Embarking on the treacherous journey through the Mountain Pass in Baldur’s Gate 3 offers players a thrilling alternative to the perilous Underdark. As adventurers navigate this rugged terrain, they will encounter formidable foes like the Death Shepherds and uncover pivotal quests that shape their path to Moonrise Towers. With dangers lurking at every turn and crucial decisions to make, this guide will illuminate the best strategies to conquer the Mountain Pass and ensure a successful transition into Act 2 of this epic RPG adventure.
Stepping into the Mountain Pass
Stepping into the Mountain Pass offers players a thrilling transition from the challenges of Act 1 to the mysteries of Act 2 in Baldur’s Gate 3. As you approach this perilous route, you’ll have to choose between two distinct paths: the treacherous Mountain Pass or the shadowy Underdark. The Mountain Pass, while shorter, presents its own set of dangers, including encounters with formidable foes and the ever-present threat of the Shadow Curse. Players should prepare adequately, ensuring they possess items like the Spider Lyre to mitigate the curse’s effects. This path not only leads to critical quests and valuable loot but also sets the stage for deeper narrative developments as you journey toward Moonrise Towers.
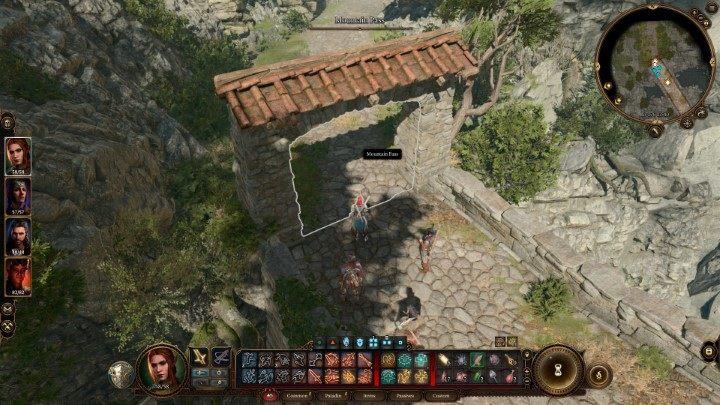
After completing most of the content in Act 1 of BG3, the journal should point you to one of two paths: The Underdark or the Mountain Pass. To take the latter path, head to the northwestern edge of the first map. You’ll come across a destroyed bridge, but turning left leads to a smaller structure that will take you directly to the pass.
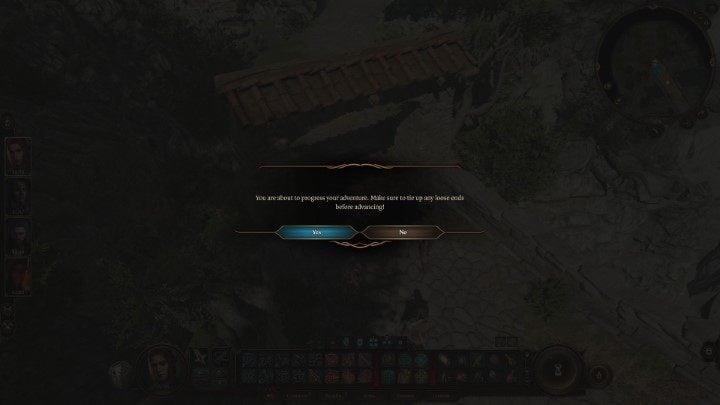
The game will warn you before you proceed further. You’ll still be able to return to the starting map after entering the pass. Make sure, however, to complete all the quests that interest you beforehand, as some of them will become unavailable.
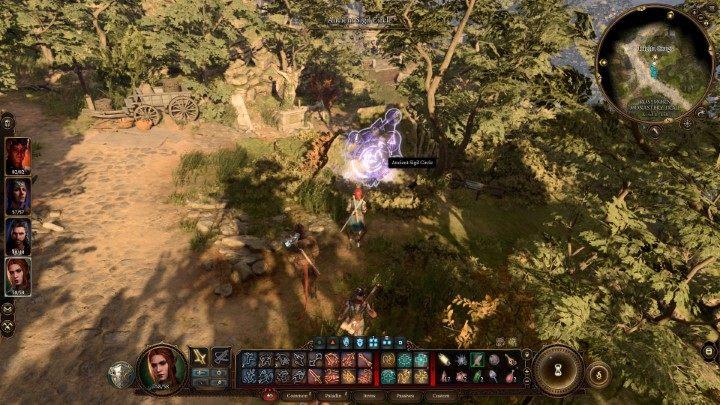
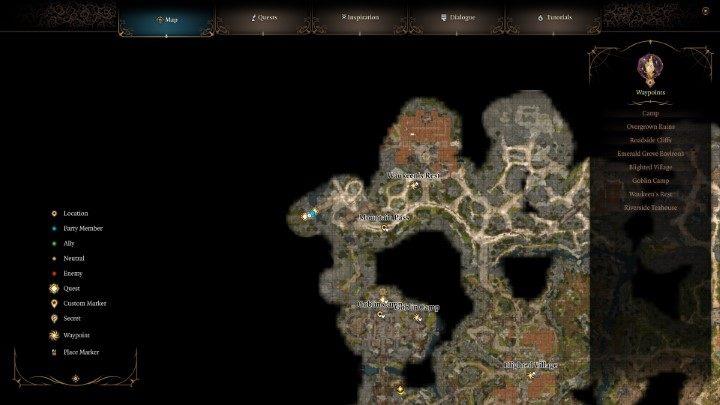
Walking down the road in the new area will lead you to a rune circle you can activate to unlock a fast travel point. The path splits in two directions right afterwards.

If you go right, you’ll meet Lady Esther. She’ll ask you to steal a Githyanki egg from the Creche further into the area. You can also trade with her. Read this page to learn more about the Creche Y’llek.
If you’re not interested in side quests and would like to rush directly to Act 2, take the left path after the rune circle. Be vigilant, as there’s an enemy encounter just a few steps ahead.
Battle against the Death Shepherds
The encounter with the Death Shepherds in Baldur’s Gate 3 presents a formidable challenge for players, requiring strategic planning and teamwork. These undead foes possess the alarming ability to resurrect their fallen allies, making them a top priority in any battle. To emerge victorious, players must first neutralize the Death Shepherds’ Necrotic Veil, which grants them significant resistances. Utilizing elemental damage and spells like Counterspell is crucial to bypass their defenses. Coordinated attacks, focusing on one Death Shepherd at a time while managing the surrounding ghouls, can turn the tide of battle. With careful execution and a bit of luck, players can conquer this daunting foe and continue their journey through the treacherous Mountain Pass.

You’ll come across a group of hostiles: two Death Shepherds and some Ghasts. These creatures are dangerous and have bothersome, obstructing abilities. There’s still some strategy to this battle, though.
The Shepherds can be a serious threat even to a newly-rested, prepared team. You should be at least Level 5 before facing them.
Before triggering the encounter, you can gain a small advantage by shooting them from hiding.

Death Shepherds can resurrect their fallen allies. Not only Ghasts – they can revive each other as well. This can heavily prolong the battle and make it much tougher. We thus recommend taking down the Shepherds first. Without them, you won’t need to worry about their resurrections.
Bring them both to low HP and finish them both off back to back. If the surviving necromancer gets a turn before you kill it, it will use it to revive the other one.
After dealing with the Shepherds, the Ghasts shouldn’t pose much trouble.
The path the battle takes place on is rather narrow. Keep a combat formation – your frontliners should be obstructing the path to the squishy backliners.
Moving on and meeting Elminster
After overcoming the challenges posed by the undead in the Mountain Pass, players will continue down the left path until they encounter a wooden bridge. Here, they will meet Elminster Aumar, a legendary figure in the Dungeons & Dragons universe, known for his wisdom and magical prowess. Clad in red robes, Elminster provides crucial exposition related to Gale, a character in your party. If Gale is present, a significant conversation unfolds between him and his old mentor, enriching the narrative. Should Gale not accompany you, Elminster will visit your camp later, allowing you to experience this pivotal interaction at your convenience. Following this encounter, adventurers should proceed towards the gate leading to Act 2, marking a significant transition in their journey.

After dealing with the undead, keep going down the left path. After a short walk, you’ll reach a wooden bridge and meet an elderly mage clad in red robes.
He’ll introduce himself as Elminster Aumar. He’ll also provide some important exposition tied to Gale. If the Wizard’s in your party, he’ll talk to his old mentor which triggers a short plot-relevant conversation. If Gale’s not with you, Aumar will head to your camp and you’ll be able to view that scene once you’re ready.

What dangers lie within the Mountain Pass
The Mountain Pass in Baldur’s Gate 3 is fraught with peril, presenting a variety of dangers that can challenge even the most seasoned adventurers. Here are the key threats players may encounter:
- Death Shepherds: As players traverse the pass, they will face aggressive encounters with Death Shepherds, formidable foes that can quickly turn the tide of battle against unprepared parties.
- Ghouls and Ghasts: The undead lurk in the shadows, with groups of Ghouls and Ghasts ready to ambush travelers. These creatures not only pose a physical threat but can also inflict debilitating status effects.
- Environmental Hazards: The Mountain Pass is not just dangerous due to its inhabitants; the terrain itself can be treacherous. Players must navigate through potentially hazardous areas, including steep cliffs and narrow paths that could lead to falls or other mishaps.
- The Shadow-Cursed Lands: As the pass leads towards the Shadow-Cursed Lands, players must contend with a pervasive curse that can drive characters mad, adding a psychological layer to the physical dangers present in the environment.
Adventurers must prepare strategically to overcome these threats and successfully navigate through this challenging region.
What are the most common hazards faced by climbers in the Mountain Pass
Climbers in the Mountain Pass face several common hazards that can significantly impact their safety and success. Here are the primary dangers:
- Extreme Weather Conditions: Climbers often encounter unpredictable weather, including blizzards, strong winds, and rapid temperature drops. These conditions can lead to frostbite, hypothermia, and impaired visibility, making navigation difficult.
- Altitude Sickness: As climbers ascend, they may suffer from altitude sickness due to reduced oxygen levels. Symptoms can range from headaches and nausea to more severe conditions like high-altitude pulmonary edema (HAPE) and high-altitude cerebral edema (HACE) if not managed properly.
- Avalanches: The risk of avalanches is a significant concern, particularly in areas with recent snowfall or unstable weather. Avalanches can occur suddenly and bury climbers under tons of snow, leading to severe injuries or fatalities.
- Rockfalls: Loose rocks and boulders are common in mountainous terrain. Rockfalls can happen without warning, posing a serious threat to climbers below. Wearing helmets and choosing routes wisely can help mitigate this risk.
- Crevasses: In glacier-covered areas, hidden crevasses can pose deadly risks. A climber may fall into these gaps if they are not visible or adequately marked, leading to serious injuries or death.
- Decision-Making Under Pressure: Climbers often face situations requiring quick decisions due to changing conditions or unexpected obstacles. Poor judgment in these moments can lead to accidents or worsen existing dangers.
Understanding these hazards is crucial for climbers to prepare adequately and enhance their safety while navigating the Mountain Pass.