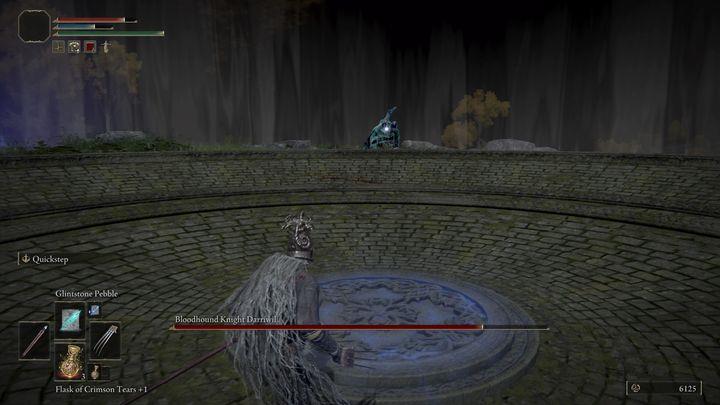
Facing the Bloodhound Knight Darriwil in Elden Ring is a daunting challenge that can leave even seasoned players trembling. Nestled within the ominous confines of the Forlorn Hound Evergaol, this optional boss wields his deadly Bloodhound Fang with terrifying speed and precision. With a combat style that combines swift, slashing attacks and the ability to teleport, Darriwil can quickly turn the tide of battle against unwary Tarnished. However, fear not—this guide will equip you with essential strategies and tips to conquer this fierce foe and claim his powerful weapon. Prepare to delve into the heart of Limgrave, where victory awaits those who are bold enough to face the Bloodhound Knight!
In addition to Bloodhound Knight Darriwil, you can also encounter a boss named Bloodhound Knight. He is fought the same way, but he is in a different location and gives different rewards. The location where you can fight him is Lakeside Crystal Cave in the Liurnia of the Lakes region. On this map, this is the Site of Grace number 49.
Location
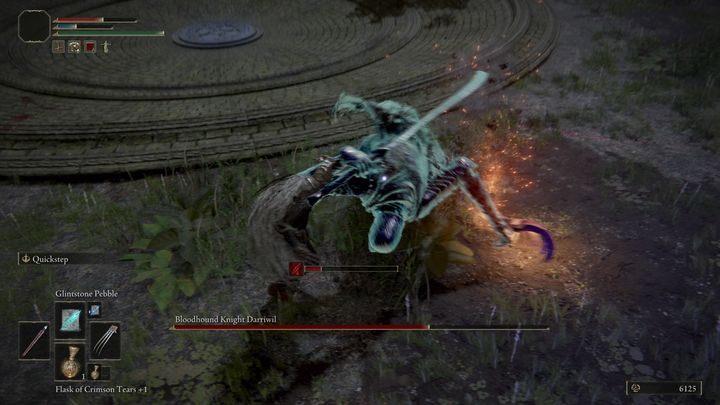
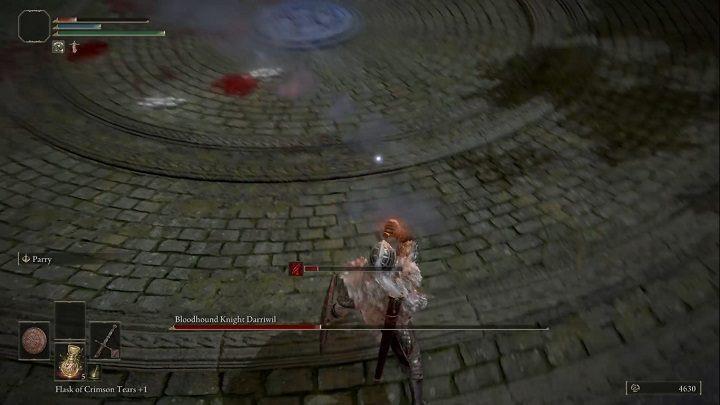
Bloodhound Knight Darriwil is located within the Forlorn Hound Evergaol, a circular arena situated in the southeastern region of Limgrave. To reach this boss, players must navigate to the area south of the Agheel Lake South Site of Grace. The Evergaol is marked by a glowing core that players can interact with to enter the boss fight. This encounter is optional, but defeating Darriwil rewards players with the coveted Bloodhound’s Fang weapon and a significant amount of runes. Notably, this battle is designed as a one-on-one fight, isolating players from other spirits or summons, although assistance can be summoned from Blaidd the Half-Wolf if players have progressed in his questline.
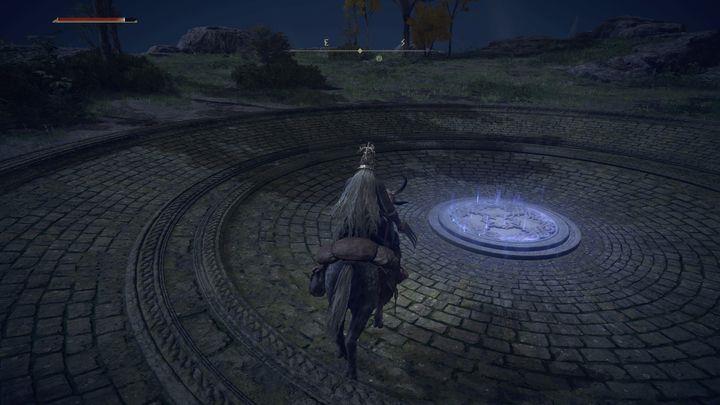
He can be found in Stormhill Evergoal. This is an optional boss that isn’t required to beat the game. The boss arena appears once you teleport there by interacting with the Evergoal. The closest Spot of Grace is Agheel Lake South. On this map, it is number 23.
Reward for defeating
Defeating Bloodhound Knight Darriwil not only tests your combat skills but also rewards you significantly. Upon his defeat, players are granted 1,900 Runes, which can be crucial for leveling up and enhancing your character’s abilities. Additionally, you will receive the coveted Bloodhound’s Fang, a powerful Curved Greatsword that scales well with Dexterity and Strength, making it an excellent choice for melee builds. This weapon not only boasts impressive damage potential but also features a unique skill that can turn the tides in future battles, enhancing your overall gameplay experience in Elden Ring.
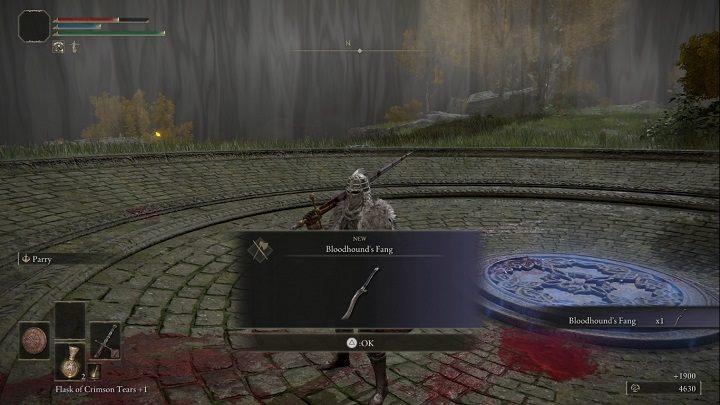
For defeating Bloodhound Knight Darriwil, you will receive Runes (1,900) and Bloodhound’s Fang.
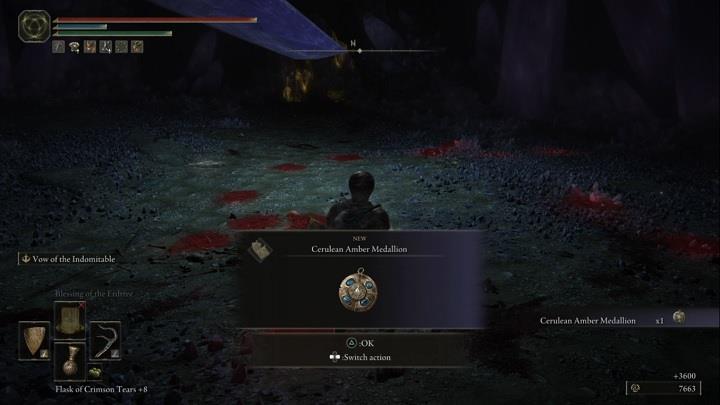
For defeating Bloodhound Knight, you will receive Runes (3,600) and a Cerulean Amber Medallion. This medallion increases the maximum number of PS.
General tips
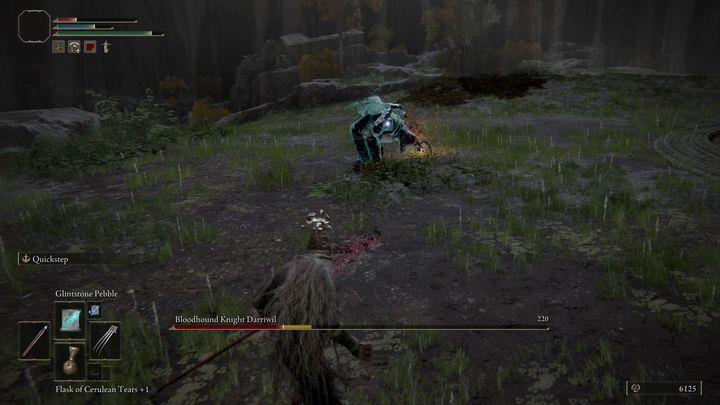
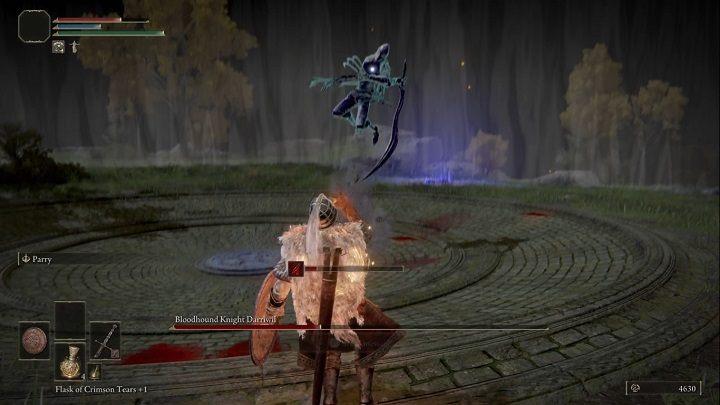
To effectively conquer Bloodhound Knight Darriwil in Elden Ring, consider these general tips to enhance your chances of success. First, summon Blaidd the Half-Wolf to assist you; his presence can significantly shift the odds in your favor, allowing you to focus on dodging and countering attacks while he distracts the boss. Second, maintain awareness of Darriwil’s attack patterns; his swift movements and teleportation can catch you off guard, so always be ready to roll or reposition. Lastly, exploit his low poise by using heavy attacks to stagger him, especially when attacking in tandem with Blaidd. With these strategies in mind, you’ll be better equipped to handle this formidable foe.
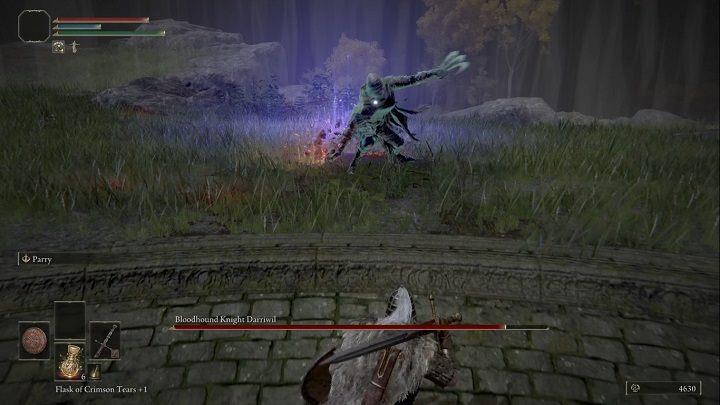
- This boss is fast and agile, and he often disappears from sight. For this reason, even when he’s not attacking your character, it’s best to have your shield equipped and drawn…
- … however, don’t go overboard with guarding, because the boss causes bleeding. If you keep guarding against his attacks for too long, the bleeding status bar will fill up quickly and you will continue to receive damage despite blocking.
- Attack once if you’re wielding a slow weapon, or twice with a fast one. If you don’t follow this strategy, you will frequently end up trading attacks and taking unnecessary damage.
- The boss is aggressive and will attack very often, so try to heal yourself or the bleeding status when you are a good distance away from him, or when he starts a chain of attacks far enough away from you.
- You can’t summon ghosts to help you fight against Darriwil! This is a significant handicap.
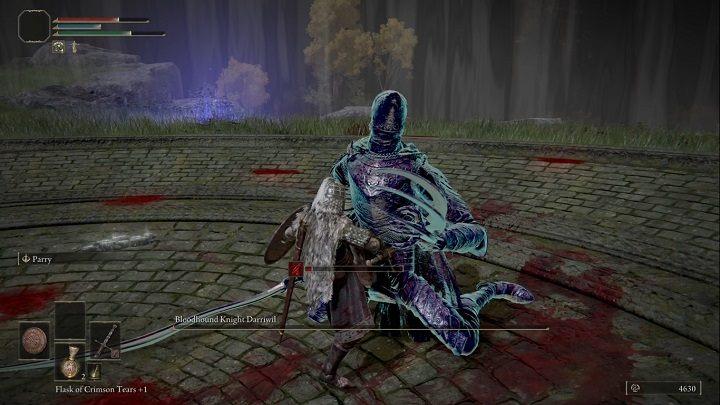
- Bloodhound Knight Darriwil is vulnerable to poison, scarlet rot, bleeding and frostbite . So capitalize on this.
Mage build – how to fight?
To effectively fight Bloodhound Knight Darriwil as a mage in Elden Ring, you’ll want to leverage your ranged capabilities while maintaining distance. Utilize spells that can deal significant damage from afar, such as Glintstone Sorceries, which allow you to attack without getting caught in Darriwil’s swift melee combos. Keep an eye on his movements; he has a tendency to teleport and close the gap quickly, so be prepared to dodge. Summoning Blaidd the Half-Wolf can also be a game-changer, as he can draw Darriwil’s attention away from you, giving you the opportunity to cast spells safely. Remember to manage your FP effectively and use items like Staunching Boluses if you risk accumulating Hemorrhage damage from his attacks. By combining strategic positioning with powerful ranged attacks, you can overcome this formidable foe.
Mages have a really tough time against Darriwil, mainly due to how agile the boss is, quickly closes the distance between you and easily dodges spells that don’t have any wind-up. Before the battle you should equip the Magic Glintblade spell. This spell first creates an aura, which then materializes a sword and sends it flying at your enemy. Darriwil will try to dodge the spell at the beginning of its wind-up, while the sword is materialising, not when it fires.
You should start off by leaving the circle you’re in without approaching the blue light. When leaving the circle Darriwil will appear by the blue light. If you leave the circle from the opposite side you’ll put a lot of distance between you and him, giving you plenty of time to launch some projectiles and making the fight much easier for yourself.
Unfortunately you never have much time to cast a spell. You should only cast once the boss is away from you or finishes a missed combo.
Never, ever heal or regenerate mana when the boss is close or at medium distance. If you do, he will immediately attack you and probably kill you.
When fighting Darriwil you must be prepared to use melee weapons often to deal damage. Playing as a mage you should take him on when on a higher level and already knowing some powerful spells.
Equipping a shield might come in handy, just as switching between it and your staff. You can use the staff when he’s far away and quickly draw your shield when he gets close. This is a good solution as the shield helps you defend yourself from the boss’ attacks, which are quick and unpredictable. What’s more, it’s worth blocking his first three attacks and then retaliating. The boss then usually stops attacking or starts preparing for the next strike, which is a slower move, giving you the opportunity to attack. However, remember to dodge after attacking if you notice that you failed to break his poise, as he will most likely perform another strike.
If you’re a magic user, your skills will come in very handy during this fight, although it’s not advisable to use sorcery or skills that have long cooldowns. The opponent’s aggressive disposition will ensure that most of these attempts will be interrupted.
It is important to be very patient in this fight, to block his attacks when your bleeding bar is slightly filled out, and to dodge or run when it’s almost full. Provoke the attacks that involve him dragging his weapon or claws against the ground, then dodge and retaliate. Very often, by blocking the initial three hits, you will take the initiative and get the opportunity to attack the boss.
Melee build – how to fight?
To effectively engage Bloodhound Knight Darriwil with a melee build in Elden Ring, players should focus on timing and positioning. Darriwil’s swift attacks and ability to close distances rapidly make it crucial to maintain a balance between aggression and defense. Players should utilize heavy attacks when Darriwil is staggered, as he has low poise, allowing for quick punishes after his combos. It’s advisable to dodge his strikes rather than block, as his attacks can inflict bleed damage, which can quickly deplete health. Summoning Blaidd the Half-Wolf can also significantly ease the fight, as he can draw Darriwil’s attention and create openings for counterattacks. Remember to heal only when it’s safe, ideally when Blaidd is engaging the boss, ensuring you maximize your offensive opportunities while minimizing risk.
Bloodhound Knight Darriwil won’t appear on the arena immediately. At the beginning of the fight, you must go to the southern edge of the evergaol where there is a breach. The opponent will appear from it. You can seize the moment and start with a strong jump attack to welcome the knight.
The opponent is very fast, agile and strong . He will stay on your toes constantly. Therefore, opportunities to attack aren’t found often. As a result, attack two times (lighter weapons) or once (when it comes to heavy weapons) at a time. If you carry a shield, keep it raised as often as possible. This will help your defense a little bit, but only the largest shield protect against his attacks.
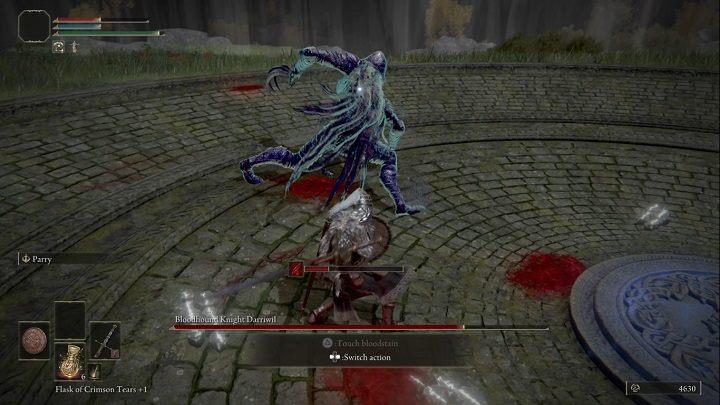
Dodging is the way to go, although you need to be acquainted with his moveset. If you want to be aggressive in return, dodge toward the opponent. The enemy often moves forward when attacking, so you will land behind his back many times. However, even if opportunity presents itself, strike for maximum of two attacks. Heavy weapons may throw the opponent off-balance, which can be followed with a critical hit.
When charging, the opponent will disappear for a moment. Fortunately, there is no problem with automatic untarget in such cases. This way you can keep an eye on him . When the enemy is close, dodge forward as fast as possible. While you are never sure what his next move will be, it increases your chances of a successful counter, and of course, avoiding losing HP.
If you manage to avoid his death from above, you can return with the same attack,. as he’ll be idle for a moment, gathering strength for the next attack. He does it after each stronger attack, which most of the time ends with a strong ground strike. Use these opportunities to deal damage of your own.
What are the best strategies to use Blaidd effectively in the fight
To effectively utilize Blaidd in the fight against Bloodhound Knight Darriwil, consider the following strategies:
Summoning Blaidd
- Timing the Summon: Summon Blaidd at the start of the fight to distract Darriwil. His presence can draw attacks away from you, allowing you to focus on dodging and countering.
Combat Strategies
- Aggressive Distraction: Blaidd’s melee attacks will keep Darriwil occupied. Use this opportunity to observe his attack patterns and find openings for your own strikes.
- Coordinate Attacks: When Blaidd engages Darriwil, look for moments when Darriwil is focused on him. This is your chance to land quick hits without drawing too much attention.
Positioning
- Stay Mobile: Keep moving to avoid Darriwil’s swift attacks. Use Blaidd’s movements as a shield to create distance when necessary.
- Utilize Terrain: Use the environment to your advantage. If there are obstacles, position yourself so that Blaidd can lure Darriwil around them, giving you time to heal or buff.
Attack Patterns
- Learn Darriwil’s Combos: Familiarize yourself with Darriwil’s attack sequences. After he finishes a combo, he often leaves himself vulnerable for a brief moment—capitalize on this by attacking after dodging.
Healing and Buffing
- Use Healing Wisely: When Blaidd is taking aggro, use this time to heal or apply buffs. Ensure you have enough distance from Darriwil before using healing items.
By leveraging Blaidd’s distraction and combining it with careful observation of Darriwil’s patterns, you can increase your chances of victory in this challenging encounter.
What are the best spells to use against Blaidd
To effectively combat Blaidd the Half-Wolf in Elden Ring, certain spells can significantly enhance your chances of victory. Here are the best spells to use against him:
Recommended Spells
1. Glintblade Phalanx
- Description: This spell creates a barrier of magical blades that will strike at Blaidd when he approaches, making it an excellent choice for maintaining distance while dealing damage.
- Strategy: Summon the blades from a safe distance, then focus on dodging his attacks as they will automatically target him when he gets close.
2. Rock Sling
- Description: A powerful spell that hurls large rocks at enemies, causing significant damage.
- Strategy: Use this spell to hit Blaidd when he is distracted or recovering from an attack. Its high damage output makes it effective, but be mindful of his fast movements.
3. Poison Mist
- Description: This incantation releases a cloud of poison that can inflict damage over time.
- Strategy: Sneak up on Blaidd and cast Poison Mist to poison him without aggroing him immediately. Continue casting it as needed to ensure he succumbs to the poison effect.
4. Giantsflame Take Thee
- Description: A long-range fire spell that can deal damage from a distance.
- Strategy: If you can find a vantage point, such as a ledge near Ranni’s Rise, cast this spell from above where Blaidd cannot reach you, allowing you to attack safely.
5. Catch Flame
- Description: A quick casting fire spell that can deal damage up close.
- Strategy: Use this when Blaidd closes the distance. It allows for quick strikes while you maintain mobility and dodge his attacks.
Additional Tips
- Armor and Resistance: Equip armor that boosts your resistance to Frostbite, as Blaidd’s attacks can inflict this status effect.
- Mobility: Stay mobile and avoid getting cornered; Blaidd’s speed can quickly overwhelm stationary targets.
By leveraging these spells and strategies, you can effectively counter Blaidd’s aggressive playstyle and increase your chances of defeating him in battle.