The in-game camera in Red Dead Redemption 2 turns every ride through the frontier into a chance for stunning photography. From adjusting focus to framing dramatic moments, mastering this tool lets players capture the wild heart of Rockstar’s open world with cinematic flair.
You can select a camera by opening the inventory and choosing Items tab. A camera is in the Kit slot which, in default, is taken by binoculars. Press any of the triggers to change the currently active item to a camera.
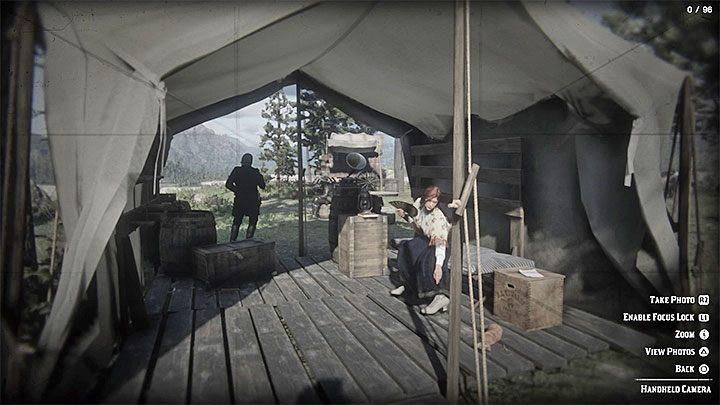
A camera has two main modes. The first allows you to take a regular pictures – press L2 or LT (default buttons). Here, you can adjust focus, zoom in or zoom out.
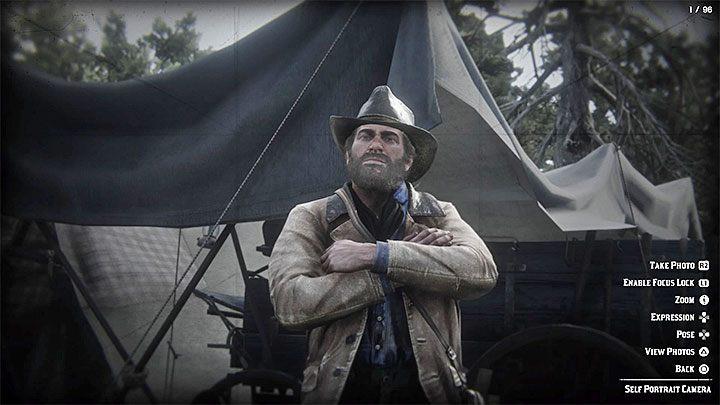
The second mode allows you to take selfies by placing the camera on the ground – do that by pressing the right analog stick (R3). Besides adjusting zoom and focus, you can also order Arthur to make different poses and expressions.

You can save every picture. Also, the game has the option to send them to Rockstar Social Club. You can store up to 96 photos.
Best camera settings for cinematic shots in RDR2
Red Dead Redemption 2 offers cinematic shots through its in-game camera, Cinematic Mode, first-person tweaks, and PC Photo Mode, with optimal settings focusing on field of view (FOV), lighting, composition, and blur for a film-like quality. Prioritize low angles, dynamic motion, and golden-hour lighting to mimic Hollywood westerns. Experiment with black bars via post-editing or mods for authenticity.
In-Game Camera Settings
Set first-person FOV to “low” in camera settings for tighter, dramatic framing that enhances immersion without distortion. Use handheld mode on uneven terrain-stand in dips for low-angle power shots or elevations for heroic high angles, adjusting focus manually for sharp subjects against blurred backgrounds. Enable no HUD, lock exposure for backlit scenes, and compose with the rule of thirds, placing horizons mid-frame.
Cinematic Mode Tips
Activate by holding the touchpad (PS4/PS5) or View button (Xbox), then right-stick click to cycle shots and nudge positioning before quick-capturing with console screenshot. Keep shots brief to beat the auto-switch timer, embracing black bars for widescreen flair-embrace subtle camera drift for motion. Best at dawn/dusk for moody shadows on landscapes or horseback rides.
PC Photo Mode (Enhanced)
Access via Esc > F6 for free-cam orbit; dial blur strength to 50-60% (lower in dark scenes), focus on key subjects, and add filters for desaturated grit. Set daytime/weather per shot if modded, smoothness to high for pans, and zoom conservatively to avoid fisheye. Combine follow/look-at/free-angle modes for orbiting hero shots.
Advanced Mod Advice
Cinematic Camera mod (Nexus) unlocks custom cams with 58-60 daytime blur, shaking for energy, and aim assist for precise tracking. Stack transitions, ped selection, and cutscene freeze for pro sequences, always moving the lens subtly. Post-edit saturation low, shadows boosted, and gamma +10 for brighter nights.
Recommended Cinematic Camera mod settings for RDR2
The Cinematic Camera mod for Red Dead Redemption 2 (version 5.3 on Nexus Mods) enhances photography with customizable cameras, transitions, and effects tailored for cinematic sequences. Recommended settings draw from the mod’s INI file options and user tutorials, emphasizing smooth motion, realistic blur, and dynamic lighting. Edit the INI file post-installation (requires Script Hook RDR2) for precise tweaks like keybinds and presets.
Core Camera Properties
Set camera modes to “Follow + Look at + Free angle around” for versatile orbiting shots around players or peds. Use zoom at 1.0-1.5x, shaking at low (0.1-0.3) for subtle handheld realism, duration 3-5 seconds per shot, and smoothness 0.8-1.0 to avoid jittery pans. Enable transitions with fade strength 0.5 for seamless switches between up to 300 saved cameras.
Blur and Focus
Apply blur strength 50-60 during daytime (lower to 30-40 at night due to lighting variance) and focus on key subjects like heads or torsos via aim assist. Cycle aim assist snap to “medium” or “hard” for precise tracking of animals/humans, highlighting body parts (e.g., head priority). Combine with photo mode filters per camera for desaturated, gritty western vibes.
Advanced Features
Configure daytime/weather per camera (e.g., dawn for golden hour), ped selection preferring alive animals, and auto-switching via dedicated key. For cutscenes, unlock manual mode and freeze action; set FirstPersonCameraSwitchingEffect to “Disabled” in INI. Test free-cam exploration with high detail, nudging positions for rule-of-thirds composition.