In Shadow of the Erdtree, Elden Ring’s sprawling DLC, the Lands Between are darker and deadlier than ever. With over 50 bosses lurking in crypts, gaols, and open fields, players will face a mix of returning legends and terrifying new adversaries. From the relentless Messmer to the enigmatic Promised Consort Radahn, every encounter demands strategy, resilience, and a touch of madness. Are you ready to uncover their secrets and claim their power?
The Land of Shadow in Shadow of the Erdtree DLC is inhabited by many minor bosses hidden in various corners of the map. This group includes enemies with a separate health bar at the bottom of the screen, who usually do not have a key role in the plot and are usually easier to defeat than the huge story bosses. On this page you will find a list of all this type of opponents along with their brief characteristics – these bosses are usually slightly stronger versions of regular opponents or fight similarly to other players.
Ancient Dragon-Man
The Ancient Dragon-Man is a formidable boss found in the Shadow of the Erdtree DLC for Elden Ring, located at the bottom of the Dragon’s Pit in Gravesite Plain. This optional encounter challenges players with its swift katana attacks, which build up Bleed damage, and its ability to summon a magical drake head for devastating fireball and lava pool attacks. While its moves are deliberate, they can be dodged with precise timing. The Ancient Dragon-Man is weak to Bleed damage, making aggressive tactics effective, especially when paired with Spirit Ashes or high Poise builds to stunlock the boss. Upon defeat, players are rewarded with 130,000 Runes and the Dragon-Hunter’s Great Katana.
- Rewards: For defeating this mini-boss, you will receive 130,000 runes and the Dragon-Hunter’s Great Katana.
The Ancient Dragon-Man lies deep in the Dragon’s Pit. This boss takes a fairly standard form of a humanoid with a melee weapon. His standard attacks are telegraphed by specific animations, so you can easily predict the upcoming attack. However, the enemy moves quite quickly, performs a lot of dodges, and additionally heals, which may prove troublesome for slower characters. The Dragon-Man often performs jumping attacks, so beware of overhead slashes and dodge as soon as the boss jumps into the air. The opponent’s special attack involves summoning a large dragon head, which will try to bite you. Its fangs reach quite far ahead, so be ready to dodge as soon as you see its reptilian head appear. The split second right after the mouth attack is a good moment to counterattack. His last move is firing a stream of magma. It leaves burning spots in the arena, but the attack itself is quite easy to avoid by moving away to a safe distance.
Jagged Peak Drake
The Jagged Peak Drake is a formidable dragon boss introduced in Elden Ring: Shadow of the Erdtree. This optional encounter occurs twice within the DLC, each fight offering unique challenges. The Drake combines devastating physical attacks with its claws, wings, and tail, alongside elemental abilities, requiring players to adapt strategies mid-battle. Found near the Dragon’s Pit Terminus Site of Grace, players can prepare by utilizing heavy weapons for stagger potential and equipping frostbite or blood loss effects to exploit its weaknesses. Staying under the Drake’s body minimizes danger from wide-area attacks, while aiming for its head maximizes damage and stagger opportunities. Summoning allies or Spirit Ashes can also provide crucial support in these intense battles.
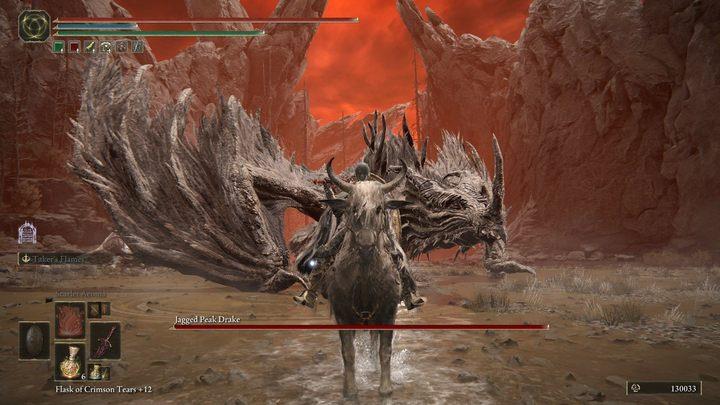
- Rewards: 90,000 or 120,000 runes (depending on which dragon you fight), Dragon Heart and Dragonscale Flesh.
In the Realm of Shadow, you’ll encounter two opponents of this type: the first one in the lake on the route to Charo’s Hidden Grave, and the second one near the Foot of the Jagged Peak area. The fight with this optional boss is not much different from fights with other dragons. We recommend you use Torrent as much as possible, which will increase your mobility and enable quick charges at the enemy. Attacks to the head, although more risky, can stagger the dragon, which will give you the opportunity to deliver a series of attacks. You can avoid fire breath by moving from side to side on your horse. Most body attacks (e.g. with tail) can be avoided by rolling at the right moment. If space allows, try to dodge towards the boss, which will reduce the distance to it and allow you to counterattack. The important thing you need to watch out for is the special lightning attack. When the Ancient Dragon-Man stands still and roars, quickly move away from him to avoid massive damage from the AOE attack.
You will encounter the dragon at the foot of Jagged Peak during a fight with another dragon (you will recognize the smaller reptile by the smaller health bar attached to the beast). Before you attack, let the dragons hurt each other, and during the fight, focus only on the “big” dragon.
Death Rite Bird
The Death Rite Bird is a challenging optional field boss in Elden Ring, known for its eerie ghostflame attacks and resistance to various damage types. These spectral avians are significantly tougher than their Deathbird counterparts, featuring a combination of Frostbite and Black Flame abilities that can quickly overwhelm unprepared players. Found in multiple locations across the Lands Between and in the Shadow of the Erdtree DLC, they are most vulnerable to Holy and Strike damage, making weapons like the Sacred Relic Sword or hammers particularly effective. Players should avoid lingering near the ghostflame trails and adopt an aggressive strategy, especially on horseback, to evade its devastating aerial and AoE attacks. Defeating a Death Rite Bird rewards valuable loot, such as Runes and unique items like Death’s Poker or Ashes of War: Ghostflame Call, depending on the location.
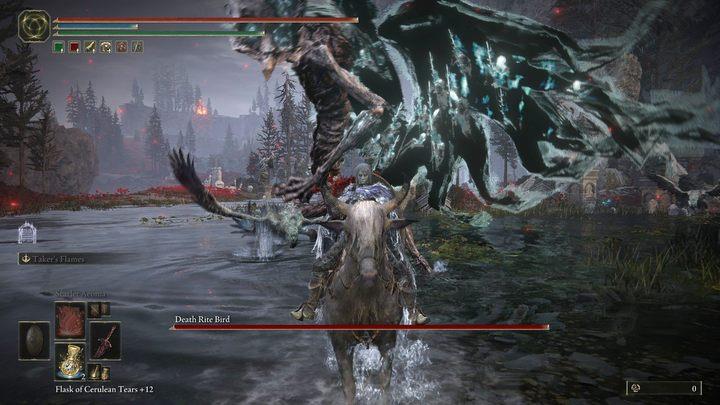
- Rewards: For defeating the bird you will receive 230,000 runes and Ashes of War: Ghostflame Call.
The Death Rite Bird in the Charo’s Hidden Grave region is a returning boss , which you can read more about on the guide page How to beat Death Bird / Death Rite Bird?.
Fallingstar Beast
The Fallingstar Beast returns as a formidable optional boss in Elden Ring’s Shadow of the Erdtree DLC, presenting an enhanced challenge compared to its base game counterpart. Located in the Finger Ruins of Dheo within the Scaduview region, this cosmic creature now boasts new gravity magic attacks and increased strength. Players can utilize elemental damage, particularly Magic, Fire, Lightning, and Holy, to exploit the beast’s vulnerabilities. The fight demands careful timing and evasion, with Torrent proving invaluable for avoiding the boss’s devastating gravity lightning strikes. Defeating this upgraded Fallingstar Beast rewards players with the powerful Gravitational Missile Sorcery and a substantial 170,000 Runes.
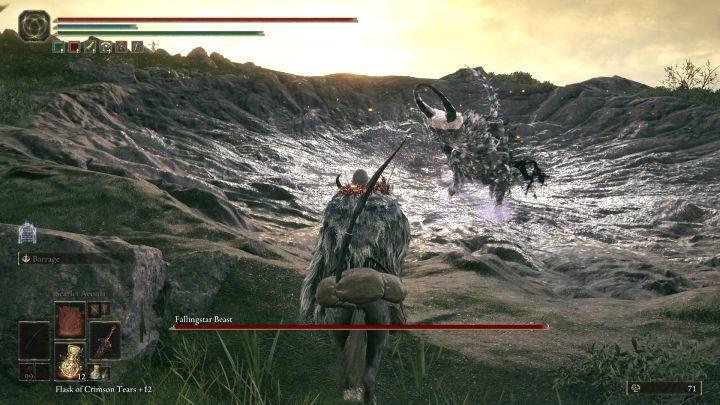
- Rewards: For defeating the beast, you will receive 170,000 runes and the Gravitational Missile spell.
The Fallingstar Beast in the Scaduview region is a well-known boss from the base game, which you can read more about on the guide page How to beat Fallingstar Beast?.
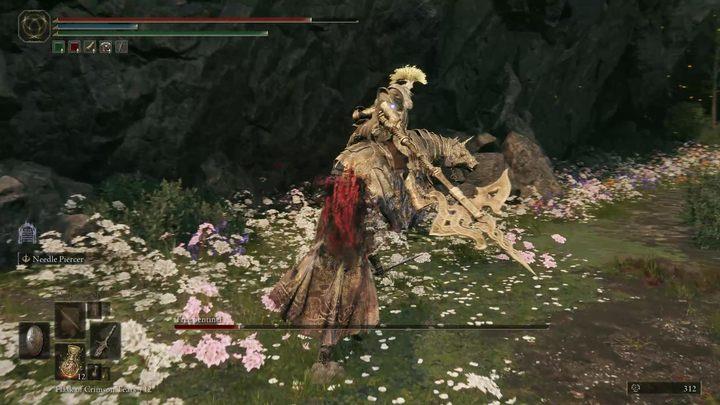
Demi-Human Queen Marigga
Demi-Human Queen Marigga is an optional field boss in Elden Ring: Shadow of the Erdtree, located on the Cerulean Coast near a shipwreck. Towering over her Demi-Human minions, Marigga wields a staff and employs both Glintstone Magic and melee attacks. Her scream can stagger players, and she may launch herself aggressively if disarmed. To succeed, players should first eliminate her surrounding minions stealthily or with Torrent’s mobility to avoid being overwhelmed. Marigga’s low health makes her vulnerable to quick, decisive strikes, but her swift attacks demand careful dodging. Defeating her rewards players with 100,000 Runes and the Star-Lined Sword.
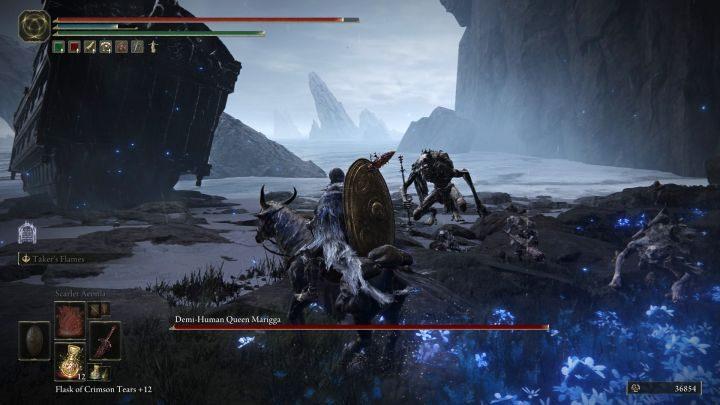
- Rewards: For defeating the Queen you will receive 100,000 runes and Star-Lined Sword.
Marigga is another named leader of the demi-humans, which you may recognize from the base game. It resides in the northwestern part of the Celurean Coast. More information about fighting this type of opponents can be found on the Demi-Human Queen – boss, how to defeat it? page.
Tree Sentinel
The Tree Sentinel is one of the first major challenges players encounter in Elden Ring. Located just south of the Church of Elleh in Limgrave, this imposing knight on horseback wields a massive halberd and shield, delivering devastating attacks. While it’s tempting to face this boss early, it’s best to level up and acquire Torrent, your spectral steed, for mounted combat. The fight requires patience and precision—treat it like a jousting duel by landing quick hits and retreating before the Sentinel counters. Watch out for its wide-reaching halberd swings and jump attacks, which can be avoided with well-timed dodges. Defeating the Tree Sentinel rewards players with the powerful Golden Halberd, making the effort worthwhile.
- Rewards: For defeating the Tree Sentinel, you will receive 120,000 runes and Blessing of Marika, a consumable item that will fully heal you.
The two Tree Sentinels you will encounter in the Scaduview region are bosses returning from the base game. You will learn more about them on a separate page of the guide, How to beat Tree Sentinel?.
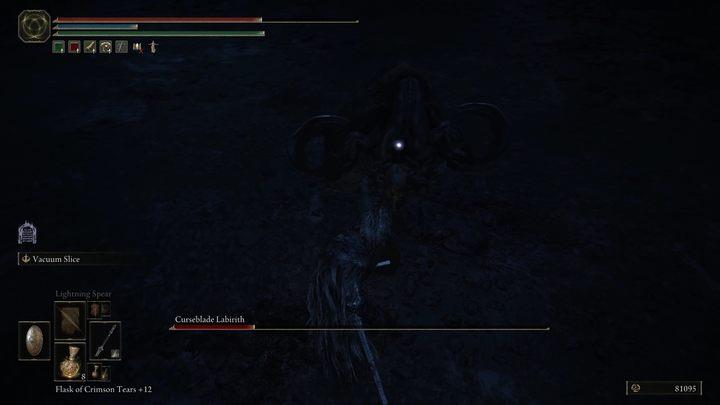
Curseblade Labirith
Curseblade Labirith is an optional boss in the Elden Ring: Shadow of the Erdtree DLC, located at the end of Bonny Gaol near Bonny Village in the Scadu Altus region. This humanoid enemy wields dual circular blades and uses a unique mechanic to obscure the battlefield with black mist, rendering itself temporarily invisible. Players can counter this by observing sparks from its weapon strikes or using durable Spirit Ashes to draw its attention while attacking strategically. The boss can also be backstabbed, offering opportunities for aggressive play. Upon defeat, it rewards 100,000 Runes and the Curseblade Meera Spirit Ash.
- Rewards: For defeating Labirith, you will receive 100,000 runes and Curseblade Meera spirit ashes.
Labirith can be found at the end of Bonny Gaol, a cave south of Bonny Village. The boss fights identically to the acrobatic opponents with chakrams, which you have probably encountered many times. The only difference is the arena – the room is dark, and the boss can use this darkness to turn into a shadow and attack by surprise. Keep your camera locked on the boss and be very careful when he disappears – he will soon reappear and attack. Beware of quick melee attacks and knive throws.
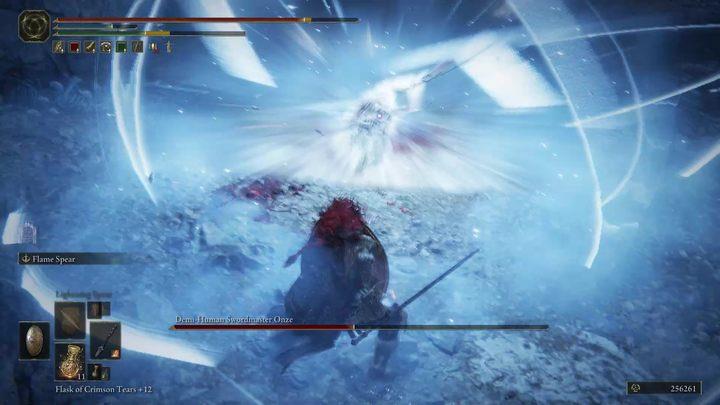
Demi-Human Swordmaster Onze
Demi-Human Swordmaster Onze is an optional boss in the Shadow of the Erdtree expansion for Elden Ring, found within Belurat Gaol in the Gravesite Plain. This diminutive yet agile adversary is known for his lightning-fast sword strikes, teleportation, and surprising attack range, making him a challenging foe. Players are advised to summon Spirit Ashes immediately upon entering the arena to divide Onze’s attention and create opportunities for counterattacks. Staying close to Onze is crucial to prevent his teleportation and larger sword swings. Despite his speed, Onze has weak defenses, allowing players to deal significant damage by maintaining offensive pressure. Defeating him rewards 80,000 runes and the Demi-Human Swordsman Yosh Spirit Ash, a valuable tool for future battles.
- Rewards: For defeating Onze, you will receive 80,000 runes and Demi-Human Swordsman Yosh spirit ashes.
The boss is located in Belurat Gaol, the entrance to which can be found at the eastern wall of the city. Onze is a small, but very agile and acrobatic opponent. He is very short, so it’s easy to stagger him with a series of attacks and interrupt his blows – but be careful when he raises his sword and takes a blocking stance, as he may then parry you. Also look out for an air attack, an area slash around him, and a grab with left hand that has a surprisingly long range – dodge to the side.
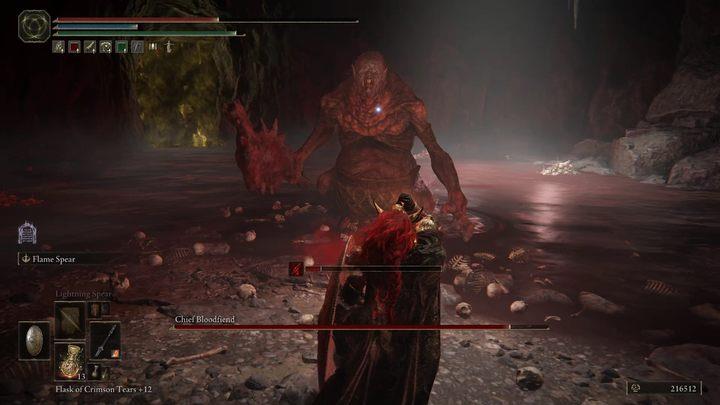
Chief Bloodfiend
Chief Bloodfiend
The Chief Bloodfiend is a formidable optional boss found in Rivermouth Cave, part of the Shadow of the Erdtree DLC in Elden Ring. This massive, troll-like enemy wields a devastating axe capable of inflicting severe blood loss, making it a significant challenge for unprepared players. The fight requires careful dodging to avoid its sweeping attacks, aerial slams, and blood-vomiting moves. Summoning Spirit Ashes can be crucial to distracting the boss and creating opportunities to strike from behind, where it is most vulnerable. Defeating the Chief Bloodfiend rewards players with 80,000 Runes and the powerful Bloodfiend Hexer’s Ashes, making it a worthwhile encounter despite being off the critical path.
- Rewards: For defeating the boss you will receive 80,000 runes and Bloodfiend Hexer’s Ashes.
The boss is located in Rivermouth Cave, the entrance to which can be found at the northern end of the Ellac River. He is a larger version of the club-wielding enemies you have encountered before. In addition to regular melee attacks, you must watch out for jumping attacks, a fiery claw, and blood spitting, which causes bleeding. Ranged attacks will be very useful during this fight – don’t attack the boss in the middle of his combo, wait until he stops attacking.
Death Knight
The Death Knight is a formidable miniboss encountered in the Fog Rift Catacombs of Elden Ring: Shadow of the Erdtree. This dual axe-wielding foe combines devastating melee combos with lightning-based attacks, making it a challenging opponent. Its arsenal includes wide-swinging strikes, spinning slashes, and ranged lightning projectiles, all of which demand precise dodging or strategic use of the environment for cover. Additionally, the Death Knight can perform a life-draining grab attack, restoring its health while inflicting significant damage. Despite its power, the boss is highly susceptible to Bleed damage and can be staggered with heavy attacks. Defeating it rewards players with the Death Knight’s Twin Axes, the Crimson Amber Medallion +3, and 110,000 Runes.
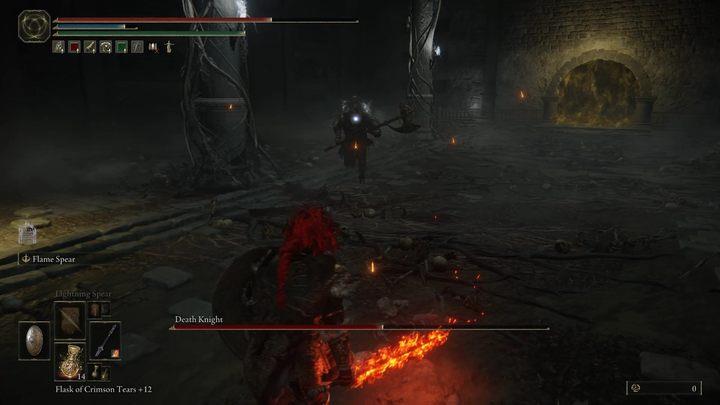
- Rewards: For defeating the knights you will receive 110,000 runes, Death Knight’s Twin Axes and a Crimson Amber Medallion 3, or 130,000 runes, a Death Knight’s Longhaft Ax and a Cerulean Amber Medallion 3.
The bosses can be found in the Fog Rift Catacombs and the Scorpion River Catacombs, both caves are located in the Ancient Ruins of Rauh. The first boss wields two axes, dealing a quick series of blows, the second one wields a halberd, dealing more powerful but slower blows. Apart from basic attacks, the bosses have identical skills: swinging an electrified ax (dodge or block), shooting lightning (hide behind one of the columns in the arena), and charging with a health-draining grab (the boss crouches, misty wings appear above him, and he throws himself in your direction – dodge to the side).
Lamenter
Lamenter is a cunning and challenging miniboss found in Lamenter’s Gaol, a haunting dungeon in Elden Ring: Shadow of the Erdtree. This small humanoid spellcaster employs deceptive tactics, such as summoning clones and vanishing in black smoke, to disorient players. Its signature moves include a devastating headbutt spell and melee attacks using a skull weapon. The key to victory lies in agility and focus—identifying the real Lamenter among its clones while avoiding their homing projectiles. Summoning Spirit Ashes can ease the battle by distracting the clones. Defeating Lamenter rewards players with 160,000 Runes and the unique Lamenter’s Mask.
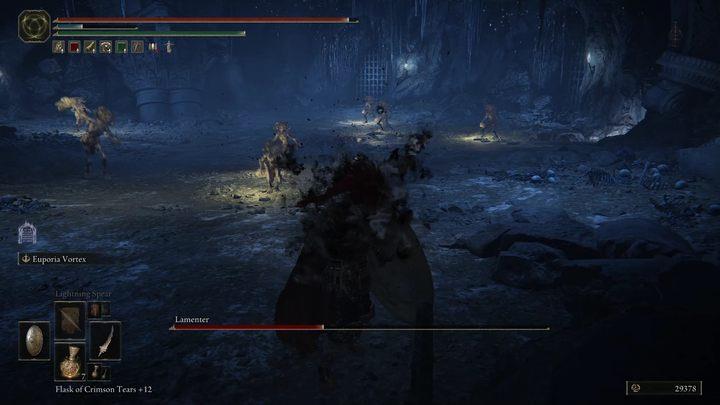
- Rewards: For defeating the Lamenter, you will receive 160,000 runes and the Lamenter’s Mask – use it without wearing any attire and you will take the form of a Lamenter.
The boss can be found in Lamenter’s Gaol, a cave in the Charo’s Hidden Grave area. The enemy has several weak attacks – punches and magic missiles. His most dangerous attack is the headbutt, so keep an eye on that. After a while, the boss will disappear and summon seven clones. The clones die after one hit – get rid of them all or make sure you find and hit the real boss at least once. Failing to strike the boss before the clones vanish will result in each remaining clone transforming into a black cloud, which will swirl around you – seven such clouds will promptly kill you. Equipping yourself with weapons or skills that have large hitboxes is worthwhile, as it allows you to hit multiple clones with a single strike, such as a halberd or a great sword.
Dancer of Ranah
The Dancer of Ranah is an optional, agile boss in the Shadow of the Erdtree DLC for Elden Ring, located in the Southern Nameless Mausoleum on an island west of the Cerulean Coast. This humanoid enemy wields dual swords and employs a unique attack style, including spinning slashes, leaping strikes, and a devastating fire spray attack. Players can exploit her humanoid nature by using parries and backstabs to gain an advantage. Upon defeating her, you’ll earn 80,000 Runes, the Dancing Blade of Ranah—a curved sword with the Unending Dance skill—and her armor set.
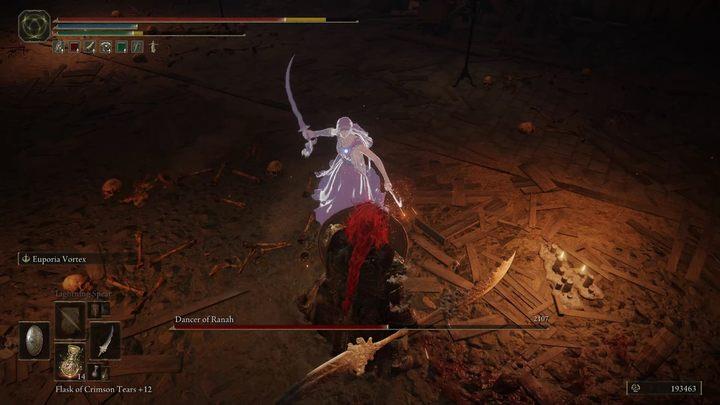
- Rewards: For defeating the Dancer, you will receive 80,000 runes, the Dancing Blade of Ranah, and the Dancer’s Outfit Set.
The boss can be found in the Southern Nameless Mausoleum, on a small island on the Cerulean Coast, which you can reach by passing through an underground cave. The boss fights with two swords, using long combinations of blows. Her stature is low, so it’s easy to stagger her and interrupt her attacks. Beware of air attacks – if you hit the Dancer while she is in the air, you can knock her to the ground before she attacks. The boss can also shoot a wave of flames at you if you move away, which you have to dodge.
Rakshasa
Rakshasa, a roaming boss in the Shadow of the Erdtree DLC for Elden Ring, is located in the Eastern Nameless Mausoleum within Scadu Altus. This humanoid enemy wields a Great Katana, performing horizontal slashes, forward thrusts, and leaping vertical slams. Despite their agility, the weight of the katana slows them down, making their attacks predictable and relatively easy to dodge or block. Players are advised to maintain distance and exploit openings to stagger Rakshasa effectively. Upon defeating this boss, players are rewarded with 90,000 Runes, Rakshasa’s Great Katana, and the Rakshasa Armor Set, which boosts damage output by up to 8% but offers slightly lower defense compared to similar armor sets3.
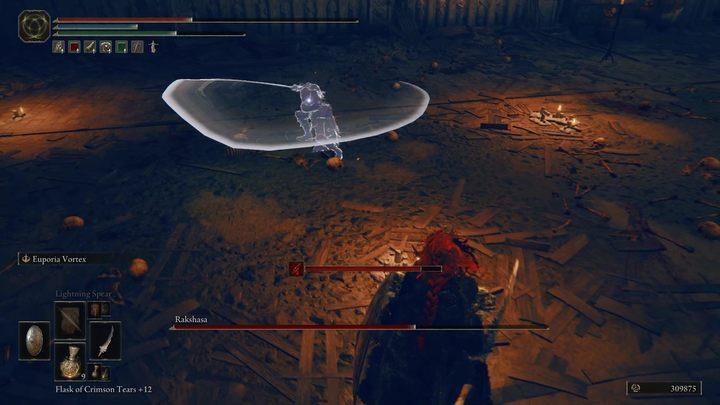
- Rewards: For defeating Rakshasa you will receive 90,000 runes, Rakshasa’s Great Katana, andRakshasa’s Armor Set.
The boss can be found in the Nameless Eastern Mausoleum, at the top of the waterfall south of the Cathedral of Manus Metyr. The boss fights with a two-handed katana and is very aggressive – he also wears heavy armor, which makes it difficult to interrupt his attacks. Attack him only after he finishes his combos, and watch out for bleeding – heal yourself before the bleeding bar fills up. The boss’s special attack is to step on his feet and swing his sword in front of him – move away from him and wait until he stops. Moving away will keep you safe as this attack inflicts significant damage but has limited range.
Red Bear
The Red Bear is a ferocious optional boss in the Shadow of the Erdtree DLC for Elden Ring, located atop a mountain near Fog Rift Fort. Known for its aggressive combat style, it employs rapid claw swipes, leaping slashes, and a powerful roar-based incantation that can deal significant area damage. To access this fight, players must use a Spirit Spring near the Temple Town Ruin site of Grace. Effective strategies include maintaining distance to avoid its combos, dodging its predictable attacks like the roar, and exploiting its vulnerability to stagger with light weapon attacks. Builds focusing on shields or long-reaching weapons with high poise damage are particularly effective against this relentless foe14.
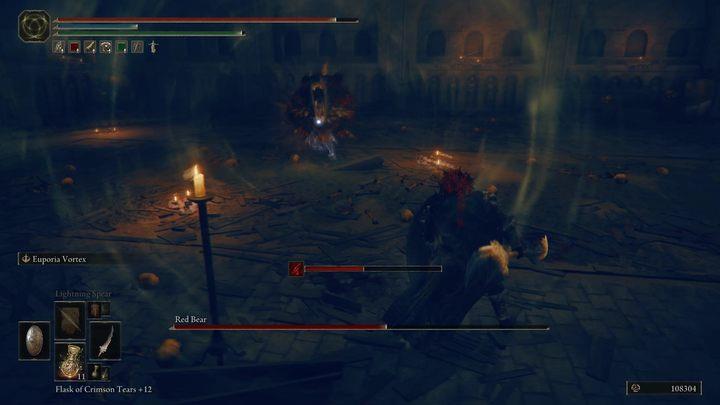
- Rewards: For defeating this boss you’ll receive 80,000 runes, a Red Bear’s Claw, and an Iron Rivet Armor Set.
The boss can be found in the Nameless Northern Mausoleum, on a hill east of the Temple Town Ruins – you can get there by jumping with the spiritspring. The boss fights with a long series of attacks with his claws – he wears light armor, which makes it easy to interrupt his attacks. His attacks have a very short range and you can avoid them by sprinting backward, then counterattack when the boss calms down. Watch out for the roar attack – you need to move away or block it with a shield.
What are the most challenging bosses in Shadow of the Erdtree
The Shadow of the Erdtree DLC for Elden Ring introduces some of the most challenging bosses in FromSoftware’s history, pushing players to their limits with brutal mechanics and relentless attacks. Here are the top contenders for the hardest bosses:
-
Promised Consort Radahn: As the final boss, Radahn combines immense speed and power with devastating gravity magic. In his second phase, Miquella joins the fight, creating an almost impossible duo that overwhelms players with divine energy and relentless attacks.
-
Messmer the Impaler: This forsaken son of Marika is a mandatory boss with extended combos, massive area-of-effect fire attacks, and a second phase featuring a giant snake transformation. His quick movements and punishing strikes leave little room for error.
-
Commander Gaius: Known for his charging attacks on an armored boar and gravity magic, Gaius forces players into a perfect balance of dodging and counterattacking. His ability to combine ranged spells with melee charges makes him a nightmare to face.
-
Divine Beast Dancing Lion: An elemental menace with lightning, wind, and ice magic, this optional boss traps players with area-of-effect attacks while healing itself when players use flasks. Its grab attack and relentless elemental damage make it uniquely difficult.
These bosses showcase Shadow of the Erdtree’s commitment to testing even veteran Tarnished with innovative mechanics and unforgiving difficulty.
What makes Promised Consort Radahn the hardest boss in Shadow of the Erdtree
Promised Consort Radahn is widely considered the hardest boss in Shadow of the Erdtree due to his relentless attack patterns, immense power, and the complexity of his two-phase battle. Here’s what makes him so challenging:
-
Phase 1: Radahn Restored
-
Radahn returns in his prime, wielding devastating physical attacks and gravity magic. His combos are fast and unpredictable, often chaining up to six strikes with minimal recovery time, leaving little room for counterattacks.
-
Signature moves like Meteor Rain and Gravity Pull force players to stay mobile while managing stamina, as dodging is critical to survival.
-
-
Phase 2: Consort of Miquella
-
At 60% health, Miquella joins the fight, infusing Radahn with holy power and granting him entirely new moves. His attacks gain massive AoE effects, ethereal projectiles, and lightning strikes that make it nearly impossible to predict or evade every blow.
-
A unique grapple move in this phase applies a debuff that causes instant death if grappled again, further raising the stakes.
-
-
Unforgiving Mechanics
-
Radahn’s relentless aggression leaves little breathing room. His ability to close gaps quickly ensures that ranged strategies are difficult to execute.
-
The fight demands precise resource management, as players must conserve stamina and healing flasks through the grueling encounter.
-
-
High Resistance and Weakness Management
-
While Radahn is vulnerable to status effects like Bleed, Frostbite, and Scarlet Rot, applying these requires risky close-range engagement.
-
This battle epitomizes FromSoftware’s design philosophy: a punishing yet rewarding challenge that demands mastery of mechanics, adaptability, and perseverance.