In the heart of the Sword Coast lies a forgotten relic of the past: the Overgrown Ruins. As adventurers embark on the quest “Explore the Ruins” in Baldur’s Gate 3, they will navigate treacherous encounters with cunning bandits and uncover ancient secrets hidden within the crypts. With multiple paths to enter this mysterious site, players must choose wisely—will they rely on stealth, persuasion, or brute force to delve into the depths and face what lurks within? Join us as we guide you through this perilous journey, revealing strategies to conquer the challenges that await.
How to prepare before entering the ruins?
Before entering the ruins in Baldur’s Gate 3, it’s crucial to prepare effectively to ensure a successful exploration. First, assemble a party of four characters; you can find potential companions like Shadowheart, Astarion, Gale, and Lae’zel near the beach. Second, aim to reach at least the second level of experience, which can be achieved by defeating enemies such as the Intellect Devourers encountered in the Nautiloid wreck. This preparation will not only bolster your party’s strength but also provide essential skills for navigating the challenges that lie ahead within the ruins.
Before entering the ruins, you should do two things: assemble a party of four and reach the second level of experience. These are not demanding tasks – four potential party members, namely Shadowheart, Astarion, Gale and Lae’zel, can be found on or near the beach. You should gain the second level of experience right after defeating the Intellect Intellect Devourers in the Nautiloid wreck or during the prologue – depending on how many enemies you have already fought.
There are several entrances to the ruins, which we have listed below. They are:
Main entrance
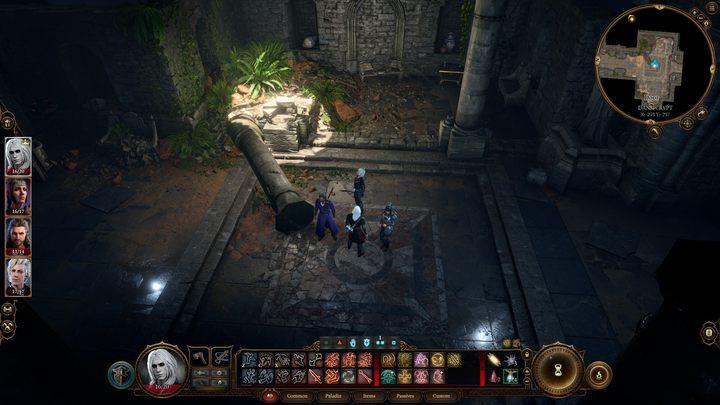
The Main Entrance of the ruins in Baldur’s Gate 3 serves as a pivotal starting point for players venturing into the depths of this ancient site. As you approach, you’ll notice the weathered stone archway, adorned with intricate carvings that hint at the history and secrets lying within. This entrance is not just a passage but a gateway to challenges and discoveries, where players must be prepared for encounters with various foes and environmental hazards. Exploring this area thoroughly can yield valuable resources and lore, setting the stage for the adventures that await in the shadowy corridors beyond.
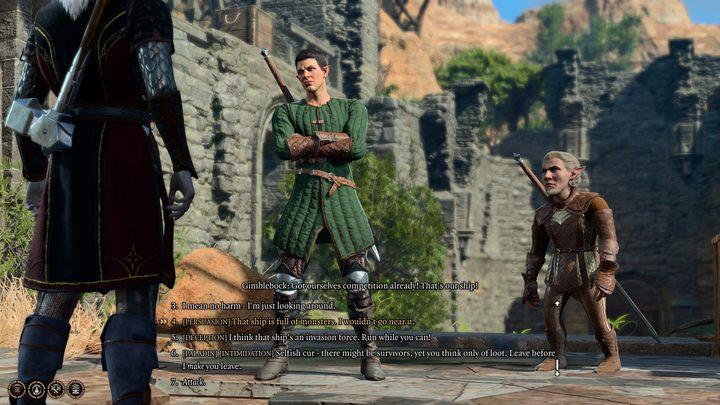
You can enter the ruins through the main entrance, which is located east of the Nautiloid wreck. Before entering the dungeon, in the ruined chapel, you will find four bandits. As soon as you approach, a conversation will begin. The bandits are aggressive and will attack unless you pass a Persuasion (DC 10), Deception (DC 12) or Intimidation (DC 10) check – in which case they will leave without a fight.

Contrary to appearances, it is better to start the fight from the front entrance than from the window to the west, which would give you an advantage in height. If you start the fight at the front entrance, two bandits will be standing directly under a large hanging stone. If any of your characters has a turn before these two, you can shoot the rope with any ranged attack. The stone will fall and immediately kill two of the bandits – you will only be left do deal with an archer to the west and a spellcaster near the stairs.
After dealing with the bandits with either violence or diplomacy, you will have to get inside the ruins – six more bandits are waiting inside. You have two main options on how to proceed:

- Through the door – approach the wooden door and talk to the bandit. You can convince him to let you in by passing either a Deception test (DC 10) or a Performance test (DC 10). If you succeed, the bandit will open the door. You’ll still have to fight the six inside, but they’ll be spread out – two of them will be separated from the rest of the group, so you can easily eliminate them before fighting the main force. If you fail to deceive the bandit or let him know of your presence, the door will remain locked – you will have to open it with a lockpick. You will find the item in the bag right next to the door. Moreover, the bandits will be ready for you and will set up a defensive formation in a narrow passage, which will make the fight much more difficult.
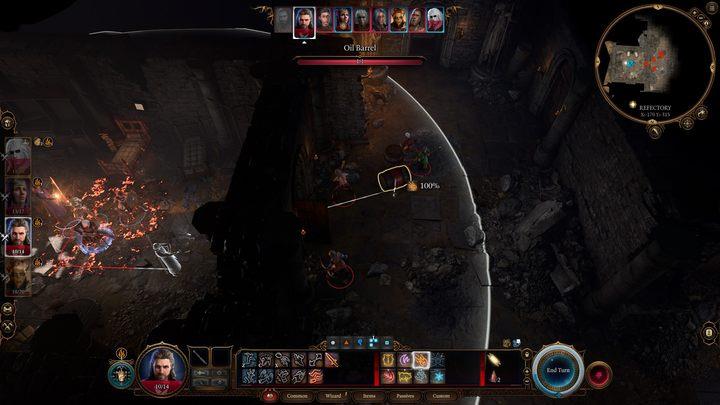
- Through a hole in the floor – the stone block mentioned above will make a hole in the floor when you let it fall, through which you can jump inside. Five bandits will gather in a group right next to you – at the same time positioning themselves right next to an oil barrel. Light it up (Shadow or Gale’s fire bolt is best here) and the barrel will explode, killing or at least seriously injuring the bandits. After the fight, you can get rid of the single bandit guarding the entrance door.
After getting rid of the enemies, explore the area – you will find a lot of food on the large table, and behind the large statue, a very simple passive Perception test (DC 1) will reveal a hidden lever. Pulling it will open a locked door nearby, which leads to the crypt.
Wooden door on the beach
A wooden door on the beach serves as a striking symbol of transition between the natural beauty of the coastline and the inviting warmth of home. Often weathered by the elements, these doors reflect the rustic charm and character of coastal living, embodying both resilience and aesthetic appeal. In Baldur’s Gate 3, exploring such ruins can evoke a sense of nostalgia and adventure, inviting players to uncover the stories hidden behind these portals. The juxtaposition of sturdy wood against the soft sands and crashing waves creates a picturesque scene, enhancing the immersive experience as players navigate through the game’s enchanting landscapes.
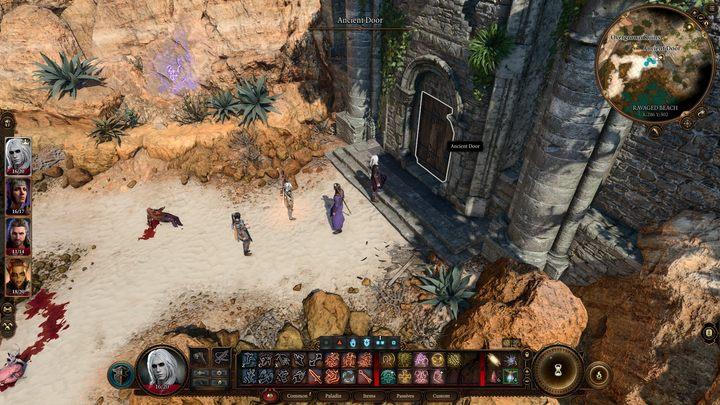
The second entrance to the ruins is a wooden door on the beach, right next to the fast travel point, near the meeting point with Shadowheart. The door is locked – to open it with a lockpick, you must pass a Sleight of Hand check (DC 20). This is a very demanding test at this point in the game – Astarion has the greatest chance of success, and he can be found not too far away. Unlike most doors in the game, these doors cannot be smashed. If you manage to open it, you will go directly to the crypt and you will be able to get the most valuable loot without tangling with the bandits.
Hidden hatch
In Baldur’s Gate 3, the Hidden Hatch serves as a crucial entry point to the Tiefling Hideout, a location filled with quests and secrets. To access this concealed hatch, players must engage with Doni, a Tiefling child, and successfully complete a series of skill checks. A DC 10 Perception check while conversing with Doni reveals the hatch’s location, followed by a DC 10 Investigation check to uncover its entrance. If players fail these checks, they can still gain access by completing the Investigate the Beach quest to obtain a password. Successfully navigating this hidden entrance allows players to reclaim stolen belongings and engage with key characters in the game, enhancing their adventure in the richly woven narrative of Baldur’s Gate 3.
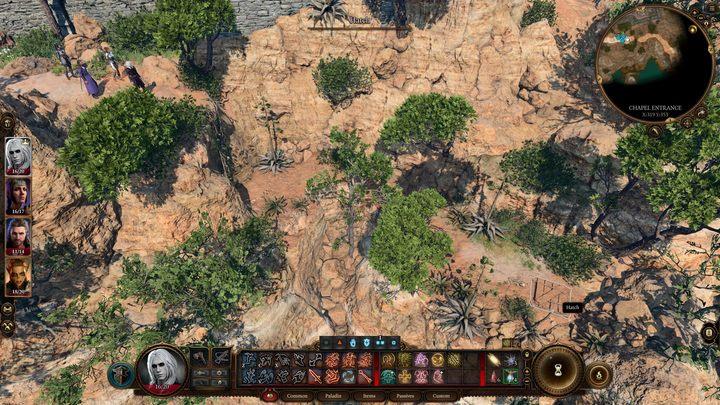
The third entrance can be found on the path just east of the ruins – it leads to a closed hatch, which also needs to be opened with a lockpick – a Sleight of Hand check (DC 20). Like the wooden door mentioned above, this hatch is best opened with Astarion’s help and it will also lead you directly to the crypt, bypassing the bandits.
Crypt
The Dank Crypt in Baldur’s Gate 3 serves as a pivotal location filled with traps, enemies, and valuable treasures. Players can access it through multiple entrances, including a hidden hatch and a chapel door, each offering different challenges and rewards. Inside, adventurers must navigate a series of traps while battling undead foes, such as the Entombed Scribes. Key items like the Amulet of Lost Voices, which allows communication with the dead, and the NPC Withers, who provides essential services like character respecs, make this crypt a crucial area for both new and seasoned players. Successfully exploring the Dank Crypt not only enhances gameplay but also deepens the player’s understanding of the mechanics at play in this rich RPG experience.
The crypt consists of a small central room (you’ll find several chests with random loot here) and a northern and southern wing. The southern wing is opened immediately, while the northern one requires opening a locked door with a lockpick (DC 10). First, go to the south wing.
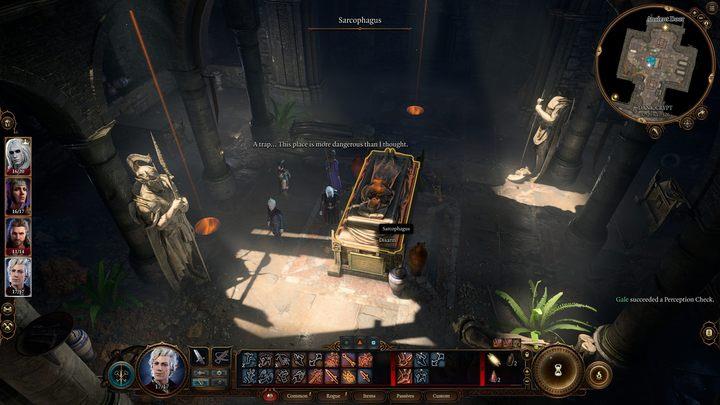
The south wing is riddled with traps. They are all connected to one source – the igniter on the sarcophagus in the middle of the room. If you don’t notice the trap (passive Perception check) and try to open the sarcophagus or fail to disarm the trap through a Dexterity test (DC 10), the room will fill with oil and the gargoyles in the walls will start shooting fire – you will most likely die, so just in case, only bring one character into the room, separated from the rest of the party. If the trap is triggered, you can save yourself by quickly pressing the button on the column next to the sarcophagus.
In the open sarcophagi by the walls, you will find some basic equipment. In the central sarcophagus you will find a universal key to the ruins and a rare spear, The Watcher’s Guide.
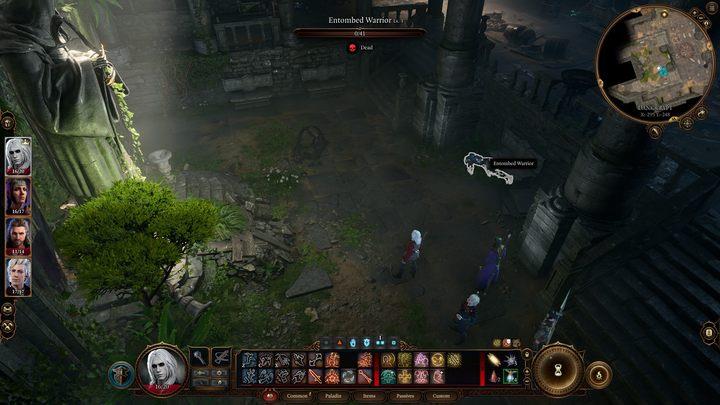
In the northern wing, you will find several chests and skeletons. Search the skeletons and take their weapons – especially the scimitar held by the skeleton in front of the large statue. This will help in the upcoming battle. Then press the button to the left of the statue – you will open the secret room, but you will also wake up the skeletons.
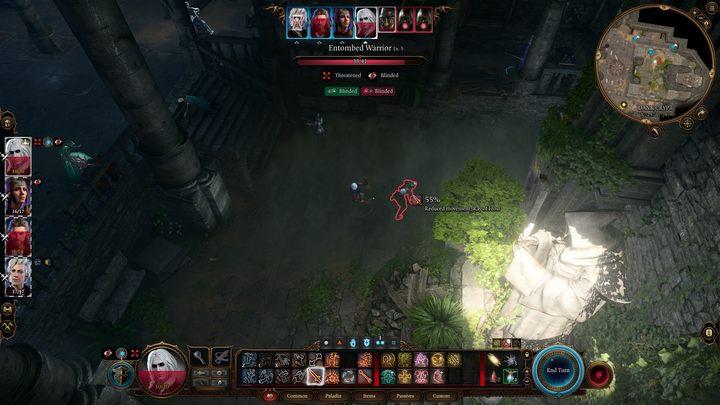
You will face four spellcasters and one warrior. Mages mainly focus on crowd control, casting area spells that blind you and prevent you from casting your own spells, occasionally attacking with a ray of frost. The warrior fights hand-to-hand and throws stones. Let your most resilient hero (e.g. Lae’zel) focus the warrior’s attention while your other heroes eliminate the casters. Mages are not very durable and their area spells require concentration, which can be interrupted by dealing damage to them. It’s worth mentioning that if both you and your opponent are in a blinding fog cloud, you will not receive a penalty to attack, as you are both fighting blindly.
Encounter with Withers
Upon entering the hidden chamber in the Dank Crypt, you’ll discover a Richly Adorned Sarcophagus containing the mysterious undead figure known as Withers. Interacting with the sarcophagus triggers a cutscene where Withers emerges and engages you in a philosophical conversation about the value of mortal life. Your responses don’t significantly impact the outcome, as Withers will ultimately bid you farewell and promise to meet again, regardless of your choices. After this encounter, Withers will appear at your camp during your next long rest, offering valuable services such as character respecs, resurrections, and the ability to hire additional companions.

After the fight, go to the hidden room. Here you will find a chest containing The Amulet of Lost Voices, thanks to which you can cast the spell of talking to the dead. There is also a sarcophagus here that you should open. You will engage in conversation with Withers, a friendly undead. It doesn’t matter how you conduct this conversation – you can even attack Withers, but he is immortal and will completely ignore the attack. After finishing the conversation, Withers will leave. This will end the quest – remember to search his sarcophagus, where you will find a lot of gold.
During your next long rest, Withers will make herself at home in your camp. He offers extremely useful services – for a small fee, he can resurrect killed party members, enable you to change your character’s class and statistics, and recruit mercenaries with whom you can fill your party if for some reason you lose your story companions. It’s worth changing Shadowheart’s stats right away – her equal Strength and Dexterity stats are not very optimal, so it’s better to allocate points to only one of these statistics.
What secrets lie within the Overgrown Ruins
The Overgrown Ruins in Baldur’s Gate 3 are shrouded in mystery and danger, offering players a wealth of secrets waiting to be uncovered. As adventurers step into this ancient site, they will encounter a variety of challenges and treasures, including:
- The Amulet of Lost Voices: This powerful artifact allows the wearer to communicate with the dead, providing invaluable insights and lore from beyond the grave.
- The Dank Crypt: A hidden dungeon beneath the ruins, accessible through multiple entrances. Inside, players will find sarcophagi containing loot and face off against undead foes, including the enigmatic Withers, who offers resurrection services and other benefits once encountered.
- Traps and Puzzles: The crypt is filled with traps that require keen perception to navigate. Players can disarm these traps or risk triggering them while searching for treasures like magic scrolls and soul coins.
- Bandit Encounters: The ruins are not devoid of life; players will confront or negotiate with bandits guarding the area. Successfully avoiding conflict can lead to a smoother exploration experience.
Exploring the Overgrown Ruins promises not only combat and strategy but also rich storytelling elements that deepen the lore of Baldur’s Gate 3.
What is the significance of the Amulet of Lost Voices
The Amulet of Lost Voices holds significant value in Baldur’s Gate 3, primarily because it grants the wearer the ability to cast the spell Speak with Dead. This rare amulet allows players to communicate with deceased characters, unlocking vital information about quests, lore, and hidden secrets throughout the game world.
Key Features:
- Spell Access: The amulet enables the wearer to cast Speak with Dead once per long rest without consuming spell slots, making it a strategic asset for gathering intelligence from fallen foes or NPCs.
- Lore Enhancement: Engaging with the dead can provide insights into the game’s backstory and help players make informed decisions during quests.
- Party Benefits: When equipped, it also inspires characters with the Acolyte background, enhancing their abilities and interactions within the game.
Location:
The amulet is located in the Dank Crypt, found near the Overgrown Ruins after defeating a group of Entombed Scribes. It is stored in a heavy chest in the same room where players encounter Withers, a pivotal NPC who offers resurrection services and other benefits later in the game.
Overall, the Amulet of Lost Voices is not just a powerful tool for communication; it enriches gameplay by deepening narrative engagement and providing strategic advantages.