Unearth the ancient whispers etched into the rock as you chase every hidden carving across the frontier.
[yt=YR@LaXugaGdya8]
The first Carving
This Carving can be found around Mount Hagen. Remember about taking some warm clothes with you on this trip!
The object is located on the very top, but it is enough to go there on horseback and write down the location of the Carving.
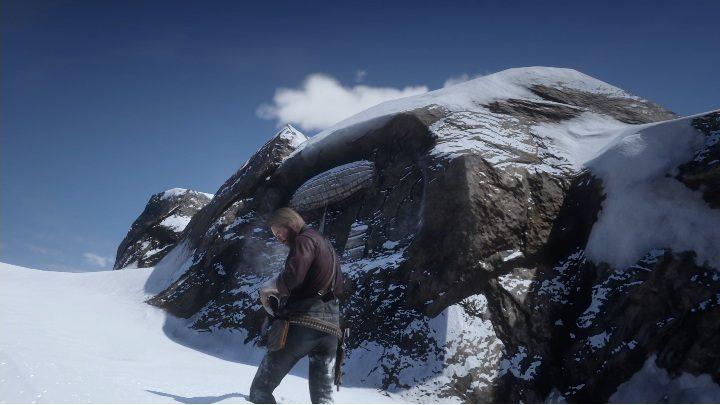
The second Carving
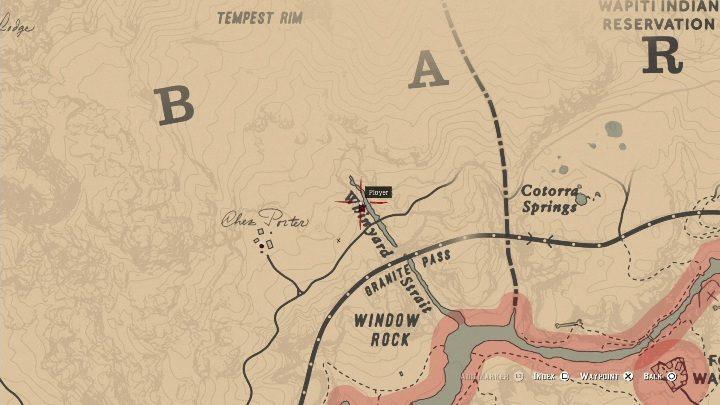
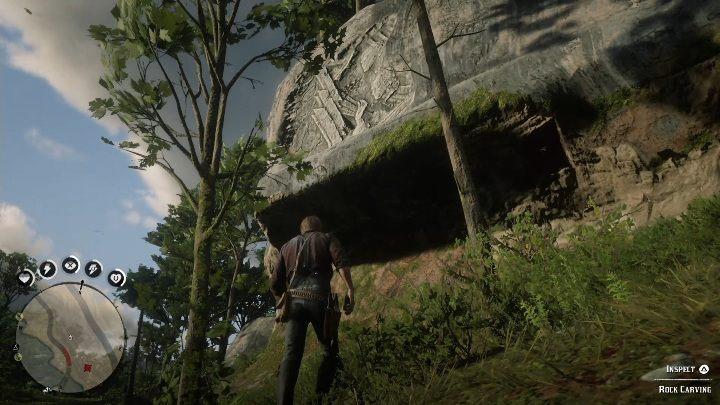
This Carving can be found around Whintard Strait.
If you drive along the river and look at the rocks, you will quickly find this Carving.
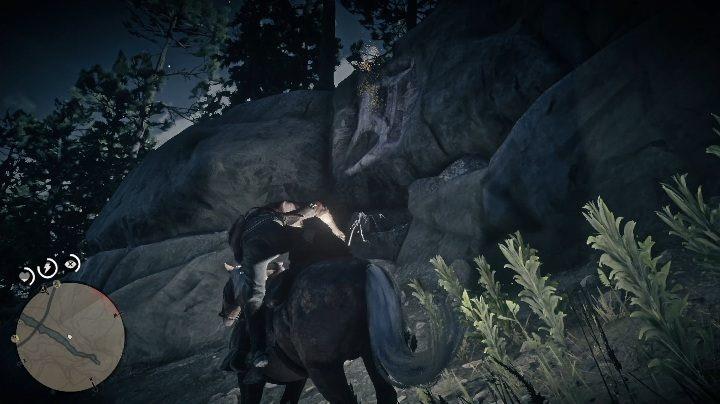
The third Carving
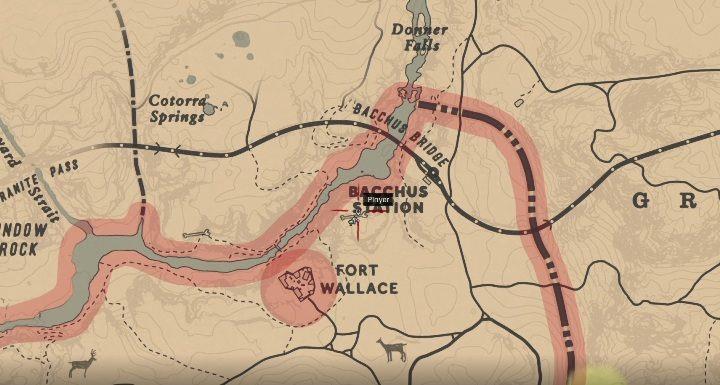
You can find this Carving near the Bacchus Station. Be careful though – watch the folks from Fort Wallace.
After climbing the mountain, you have to descend slowly and carefully on a rock ledge. The descent to it is located between two small hills.
The Carving is on the rock on the left. However, you have to be very careful, because you are in a very high place. Slipping off the rock is tantamount to death.
The fourth Carving

You can find this Carving in the northern part of CumberlandForest, near the river.
The Carving is located on a rock exactly at the pathway.
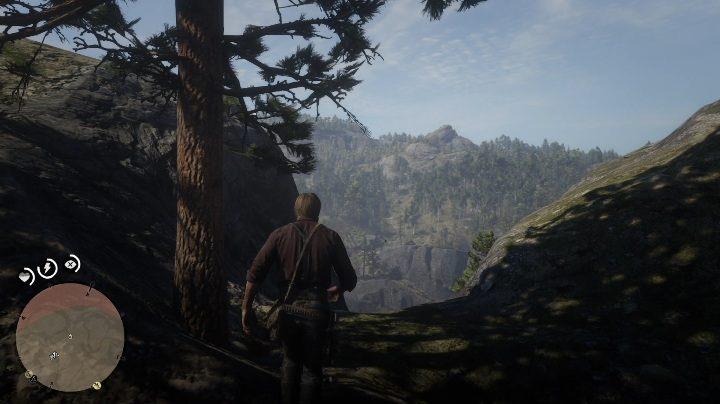
The fifth Carving
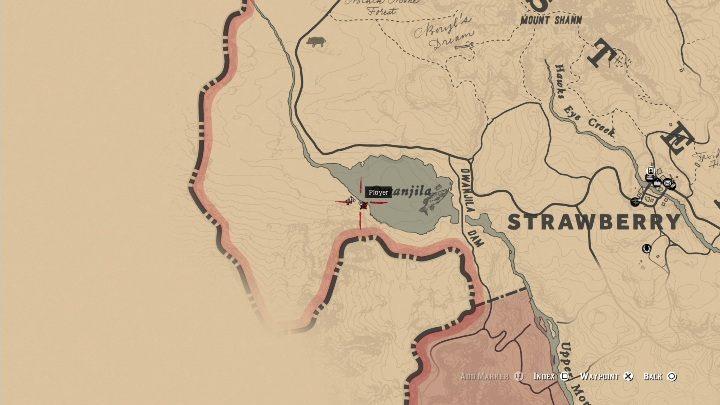
The fifth Carving you will find on the eastern part of the map, near Lake Ovanijla, near Strawberry.
The Carving is on a rock right next to the path; no need to go search the bush. Just look in the direction of the rock and you will get the option of saving information.
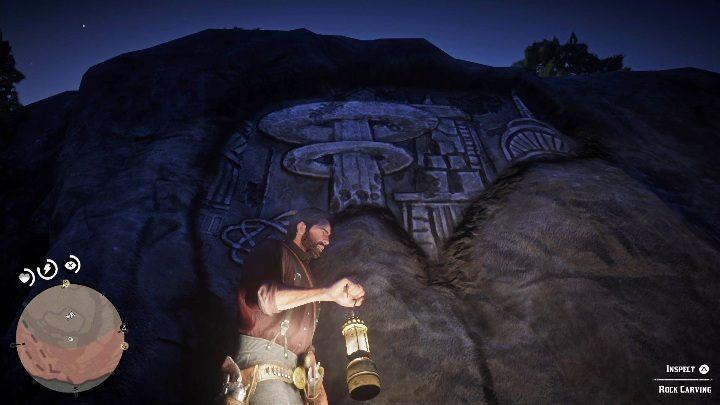
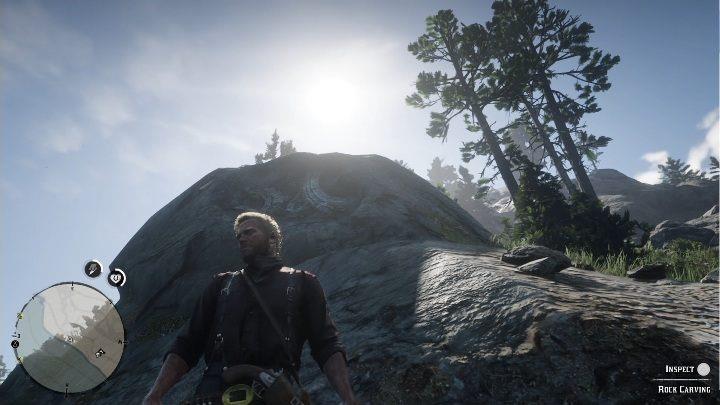
The sixth Carving
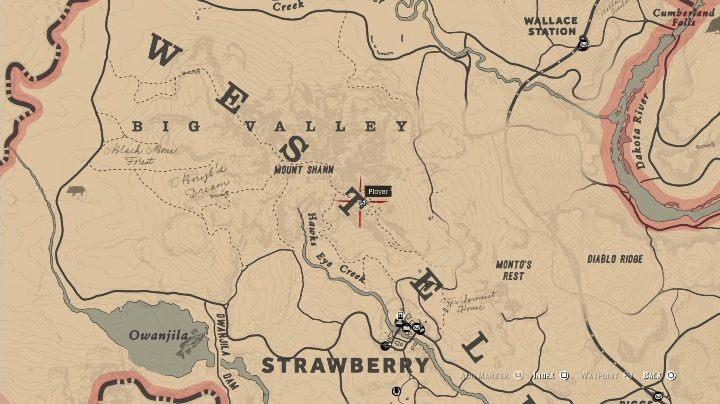
You will find the sixth Carving near the Big Valley. It is easy to find this place on the map, just by reaching the top of the letter T.
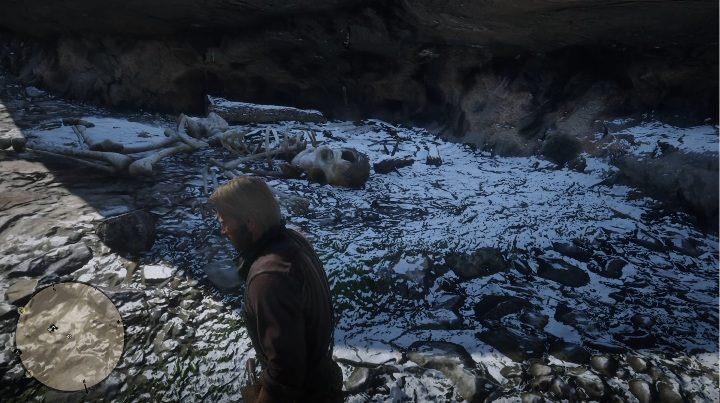
In order to reach the Carving, you must first climb up to the top, from there you will see a huge skeleton. Approach it and look around again. On the left is the path that you have to go down.
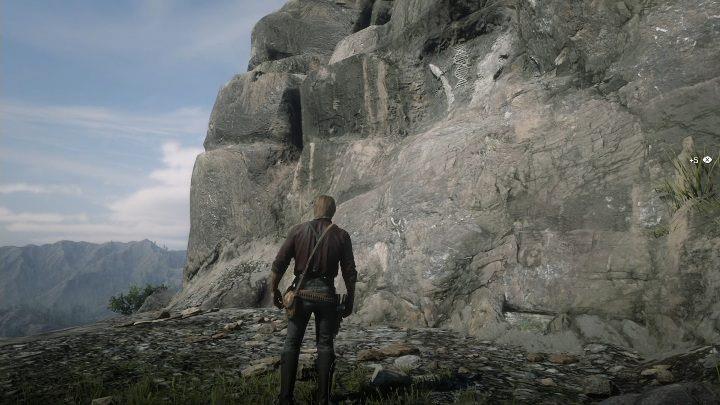
Walking along the path you will come across a Carving, it is a rock on the right side. Stand below it and click the corresponding button (triangle for PS4), and the hero will save the location of the object.
The seventh Carving
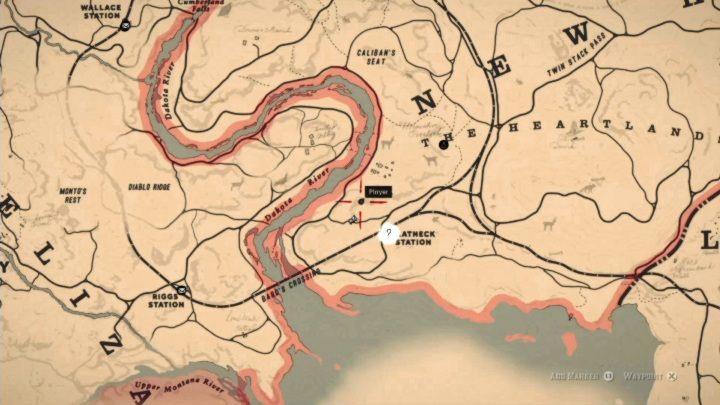
You can find the seventh Carving near the Dakota River.
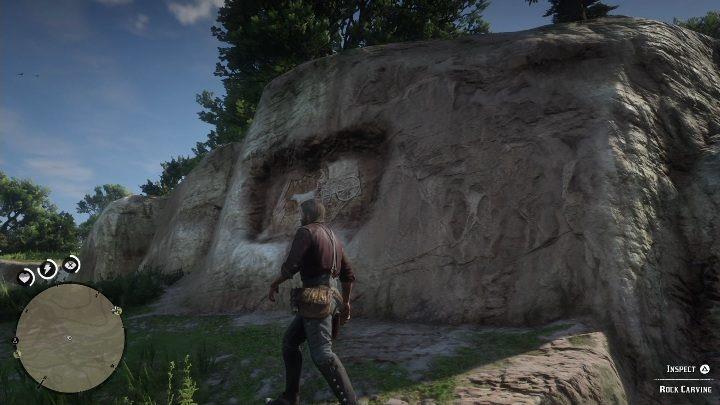
To get to an object you have to go upstairs. There, on one of the rock shelves, you will stop to save the information.
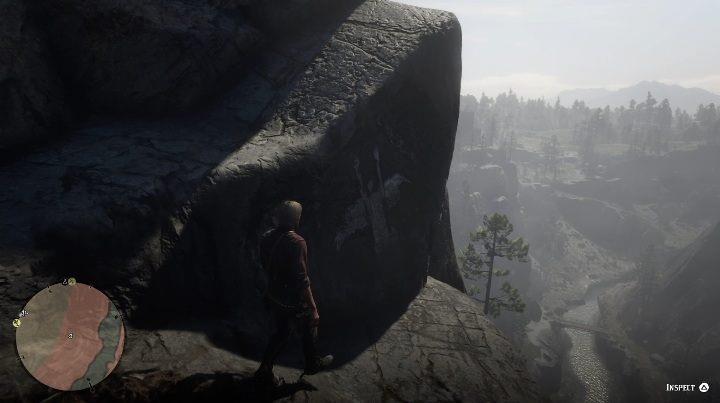
The eighth Carving
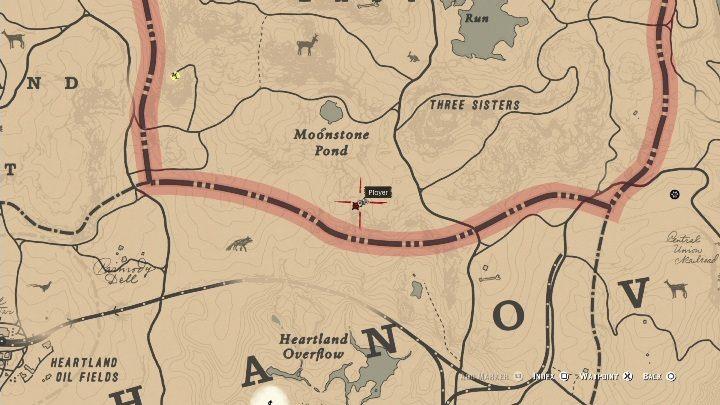
This Carving can be found to the south of Moonstone Pond. This is one of the more difficult Carvings in RDR2.
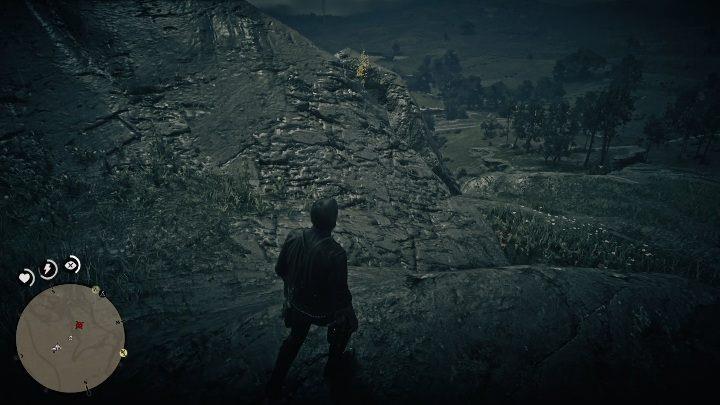
In order to get this Carving, you have to run to the rocks. However, you will have to pass between two slippery rocks. You have to be very careful that the hero doesn’t slip down. You won’t end up with the hero dying, but you’ll have to climb the mountain again.
The ninth Carving
This Carving can be found around the Roanoke Ridge. Look at the map; it’s near the letter N.
In order to get this Carving, you have to run to the rocks. It is located on the right-hand side of the mountain. In order to save it, you have to stand a piece from the rock, if you stand exactly below it, the hero will not save it.
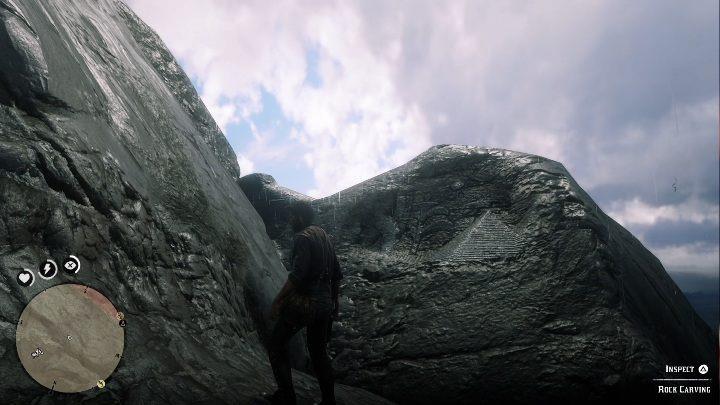
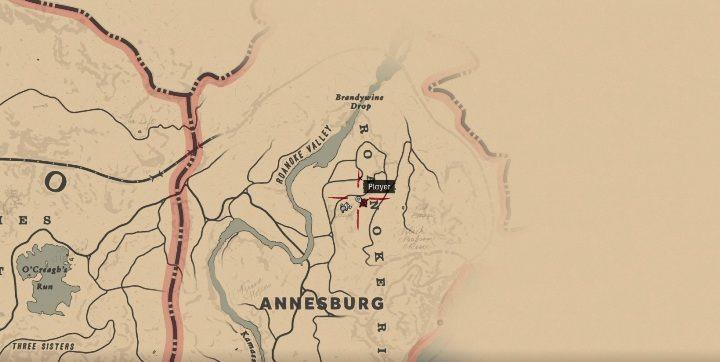
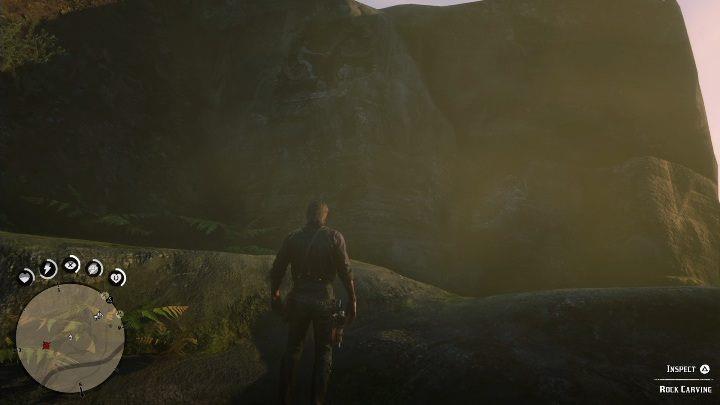
The tenth Carving
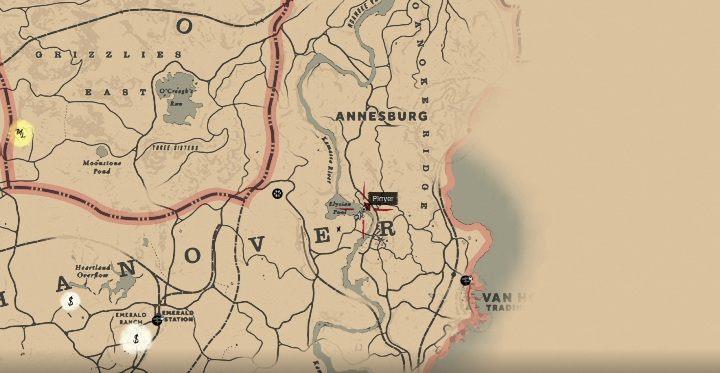
The last Carving, you will find south of Annesburg, exactly at the Elysian Pool.
Show a map with all 10 rock carving locations
Red Dead Redemption 2 includes 10 rock carvings hidden across the northern map regions, primarily for the “Geology for Beginners” mission. Interactive maps with all locations appear on sites like PowerPyx and GameRant, showing pins from west to east.
Overview Map
Guides feature a full-world map overlay with numbered markers for each carving, clustered in Ambarino (e.g., Mount Hagen, Whinyard Strait), West Elizabeth (Mount Shann, Owanjila Lake), and New Hanover (Flatneck Station, Elysian Pool). PowerPyx provides a clickable enlargable version highlighting general spots before detailed screenshots.
Regional Breakdown
-
Ambarino (3 carvings): Mount Hagen peak path, Whinyard Strait river wall, Moonstone Pond alcove-all northern peaks and shores.
-
West Elizabeth (2 carvings): Mount Shann trail near Giant skeleton, Owanjila southern shore rocks.
-
New Hanover (5 carvings): Flatneck Station cliff ledge, Bacchus Station hill path, Cumberland Forest pass, Elysian Pool road view, Deer Cottage hilltop.
Access Tips
IGN lists individual coordinate pages with zoomed map images for precision; visit powerpyx.com or gamerant.com directly for visuals, as they enlarge on click. Use Eagle Eye in-game near pins for highlighting.
Download a printable map with all 10 locations marked
No official printable map download exists directly from Rockstar Games for Red Dead Redemption 2 rock carvings. Fan guides like PowerPyx and IGN offer high-resolution interactive maps you can screenshot or print manually.
Best Download Sources
PowerPyx provides a detailed full-map image with all 10 numbered pins (Mount Hagen to Elysian Pool); right-click the enlargable map on their page and save as PNG for printing at 300 DPI. GameRant embeds a similar static map overlay in their guide-download via browser tools or screenshot for A4/letter size.
Creation Steps
Open RDR2 map in-game, enable “Show Collectibles” after starting Geology mission, zoom to northern regions, and use a screen capture tool like Snipping Tool (Windows) or Shift+Cmd+4 (Mac) for regions. Combine into one image using free editors like Paint.net, then print. Reddit shares user-made PNGs in threads like r/reddeadredemption’s simple carvings map post.
Print Tips
Scale to fit paper (e.g., 8.5×11 inches), use landscape orientation for full map view, and mark pins 1-10 matching guides: 1=Mount Hagen, 2=Whinyard Strait, 3=Moonstone Pond, 4=Mount Shann, 5=Owanjila, 6=Flatneck, 7=Bacchus, 8=Cumberland, 9=Elysian Pool, 10=Deer Cottage.