Baldur’s Gate 3 hides combat secrets that turn desperate scraps into crushing victories. Master them, and your party dominates Faerûn’s toughest foes.
Save your progress as often as possible
Save your progress frequently to avoid backtracking after a tough counter or a sudden siege, and you’ll keep your momentum even when luck isn’t on your side.
In Baldur’s Gate 3 you can save without restrictions and you should definitely use this. You can do manual, fast, and auto saves. Save the game:
- Before examining an unknown device or having a conversation with an important NPC. There is always the possibility of some important choices or unique options.
- Before attempting to pass a skill check. If the attempt fails, you won’t be able to repeat it.
- Before starting a fight. This will allow you to test different ways of preparing for a battle and to sneak up on the enemies. You can also use the saves to avoid fights.
- When you are in the middle of the fight. You can save the game in each turn and after every move. This will allow you, for example, to cancel a bad move or repeat a missed attack.
For more information on saving your progress go to Saving – when can I do that? page in the FAQ chapter.
Examine opponents by checking the cards with information about them
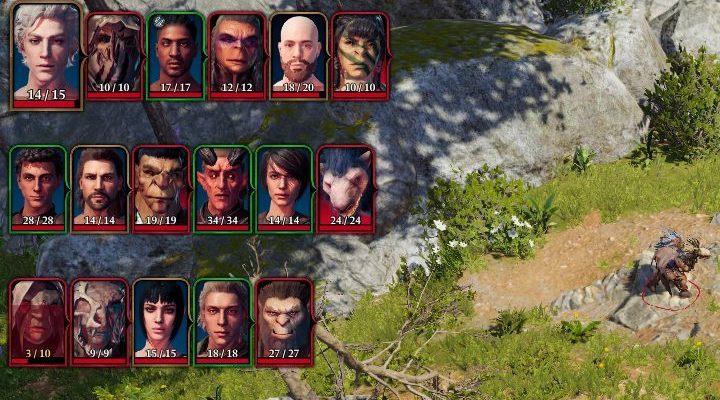
Checking the character cards of hostile NPCs before you engage can reveal their class, armor type, resistances, and unique traits, letting you tailor your tactics instead of guessing mid-fight. Use this information to focus fire on low-AC targets, disable dangerous casters, and avoid wasting spells on enemies resistant or immune to certain damage types. You can often spot synergies between opponents, such as buffers supporting melee bruisers, and plan crowd control or positioning to break their coordination before they gain momentum.
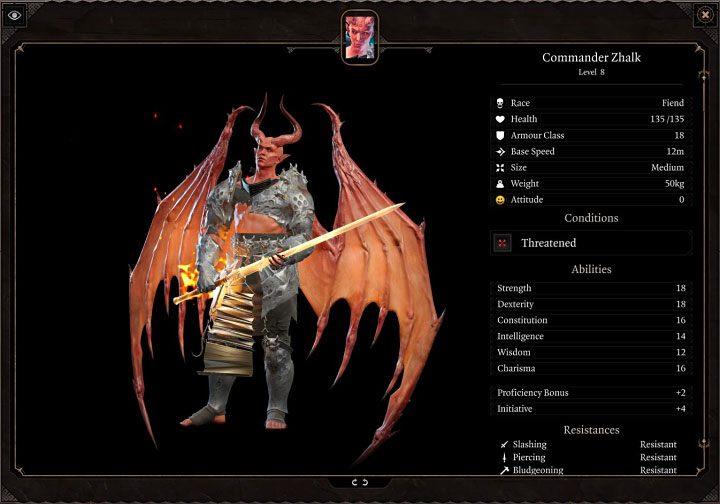
Baldur’s Gate 3 allows you to display information about your opponents and all other characters for free. To do this, you need to move the cursor over a given character, press the right mouse button, and select the option to display the character card.
You can learn, e.g. about the number of their health points, armor class, resistance to different types of attacks and spells, speed of movement, proficiency, or initiative. All this knowledge will help you determine whether you will be able to easily defeat this character, as well as better prepare to attack it (e.g. choosing attacks and spells associated with its weaknesses).
Try to place your party members in such a way that would give you an advantage over enemies
Position your party members to exploit terrain and enemy weaknesses during combat in Baldur’s Gate 3. Place ranged attackers on high ground for better range and accuracy, while melee fighters block chokepoints to limit enemy movement. Keep squishy spellcasters behind tanks who draw aggro, and use environmental hazards like fire or oil slicks to damage foes as they approach. This setup turns battles into controlled slaughters rather than chaotic brawls.
You can and should prepare for many fights by placing your characters near opponents before the fight starts. Use stealth mode to avoid being detected too soon. You can change the placement of party members when the fight begins – enemies will react to your decisions. Remember to:
- Place party members fighting at a distance (using magic or ranged weapons) on higher terrain. The idea is to give them the height advantage that increases the chances of successful attacks.
- Try to position characters fighting with light melee weapons behind opponents’ backs. Back attacks deal more damage. This is particularly important when controlling a character belonging to the Ranger class.
For more details, see the pages dedicated to combat and sneaking.
Environmental hazards can be a hindrance or advantage
Environmental hazards in Baldur’s Gate 3 shift combat dynamics, turning poison clouds into cover for stealthy approaches or fire surfaces into traps that damage foes chasing your party. Position enemies near electrified water to chain lightning damage through groups, or lure them into shadow curses that sap their health while you stay safe. Use wind gusts to push adversaries off ledges for instant kills, but watch for backlash if your own allies stumble into the hazards. Master these elements to control battles and gain the upper hand.
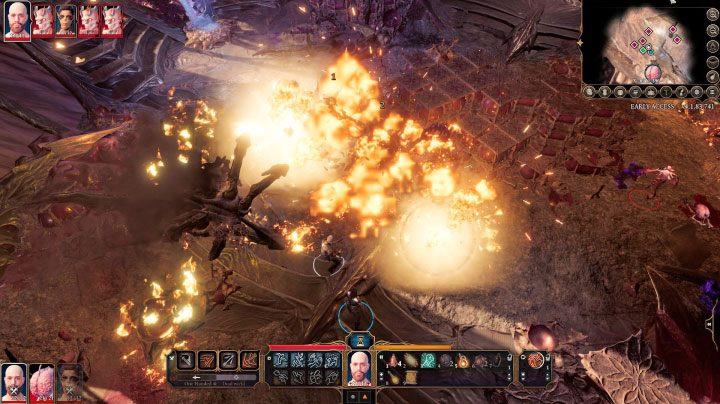
The battlefields inBaldur’s Gate 3 are interactive – you have to take this into account when planning attacks and routes for your party members. Depending on the circumstances, environmental threats may help you eliminate enemies or pose additional threats to your party. Here are some tips for them:
- Try to check the battlefield before you start a fight, or do this in the first turn. By moving the cursor over interactive objects or elements of the ground, you can see information about their characteristics.
- Look for opportunities to weaken enemies using environmental threats, e.g. by setting explosive objects on fire or detonating them, or by dropping heavy cargo on opponents.
- Avoid contact with potential hazards, such as fire or slippery surfaces that can slow or weaken your party members.
Not all fights are mandatory
Not every encounter in Baldur’s Gate 3 has to end in bloodshed. Many situations can be resolved through dialogue, clever use of skills, or environmental interaction. Sometimes avoiding combat saves resources and opens new narrative paths that would be closed by aggression. Assessing each situation before drawing your weapon can lead to better rewards, stronger alliances, and a more dynamic playthrough.
Baldur’s Gate 3 is a type of game in which multiple quests and individual confrontations can be completed in various ways. Some of them let you avoid fights. This can be particularly helpful when you can be forced to fight a strong opponent or a group. Remember the following:
- You can start a battle by making specific choices during the conversation, such as choosing a dialogue option that triggers a fight or failing a skillcheck. Remember to save the game before each encounter.
- Some fights can be avoided by not getting close to opponents visible in the distance. For example, you can try to sneak past them or look for a completely different route to your destination.
Choose those skillchecks where you have the best chance of success
Choose skill checks where your character has the highest modifier and the most relevant bonuses, then lean into those options first to maximize your odds of success.
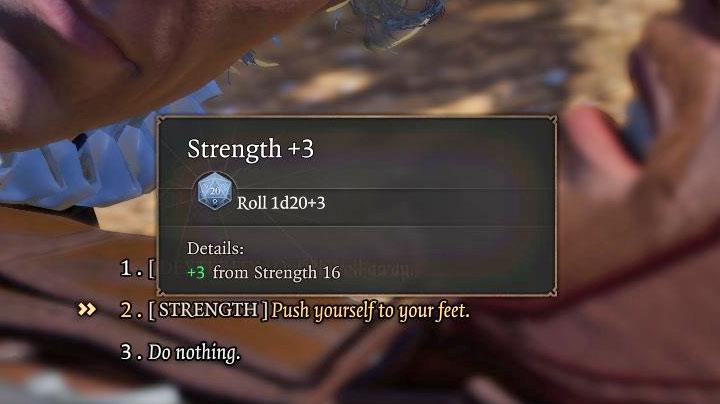
A greater chance of success in a skillcheck gives you bonus points to the value you got from a dice roll (in the example in the picture above, this bonus is 3). You can receive a bonus if the skillcheck is linked to a skill in which the character has achieved proficiency, or to a trait that he or she has developed sufficiently. Try to look for these skillchecks, especially if there are several different ones to choose from during a single scene or conversation. Two important things to remember here:
- A skillcheck is always done by the hero who initiated it. If you can choose the person to perform a given activity, choose the hero who will get the highest bonus.
- The success of the skillcheck, even with the potential bonus, depends heavily on luck. We strongly advise you to make a quick save before taking any skillcheck– a failed test cannot be repeated.
For more information on the skillchecks, see, e.g. Skillcheck – can you repeat it? page in the FAQ chapter.
Search all locations thoroughly
Search every corner carefully, as valuable loot, hidden switches, and secret passages are often tucked behind objects or inside containers that appear empty at first glance. Many areas reward persistence with rare gear, powerful scrolls, or lore items that can shape future choices. Using characters with high Perception or casting spells like Detect Magic can reveal hidden opportunities that others might miss, turning exploration into a consistent advantage throughout the campaign.
In Baldur’s Gate 3, there is plenty of loot waiting to be discovered the locations you visit. You can find it in two main ways:
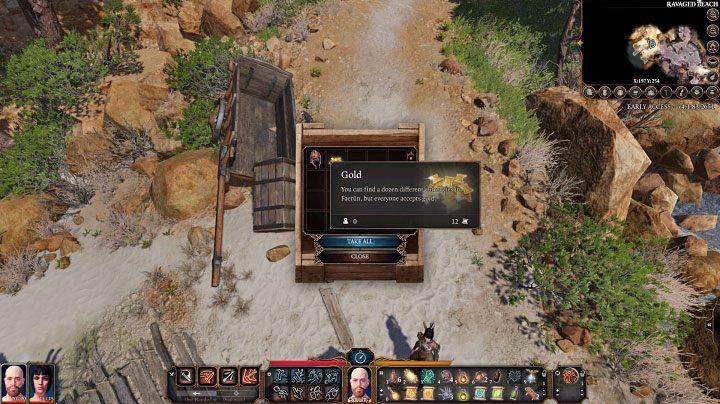
- By holding the ALT key in each new location. This will highlight some of the interactive elements in the area, such as corpses or chests. You can then examine them in search of treasure.
- By moving the cursor over all the unique elements of the environment. This will help you find those objects or chests that were not marked with the ALT key. These containers may also hide some treasures.
For more information, see How to highlight items nearby? page in the FAQ chapter.
Look for optional locations and paths
When scouting for optional locations and paths, keep an eye out for hidden alleys, rooftops, and altitude changes that can reveal alternate routes or concealed loot. Use environmental clues, like faint footprints or disturbed foliage, to trace less obvious connections, and test doors or breakable walls that might lead to rewarding side chambers.
Each major location in BG3 contains optional passages and minor locations that can hold unique treasures or alternative paths to areas associated with quests. Here are some key hints for them:
- You can jump to some places. Look for shelves and platforms that are seemingly inaccessible. You can always check if they’re within jumping range.
- You can stack items and climb them. This is another method of reaching locations that are inaccessible at first glance.
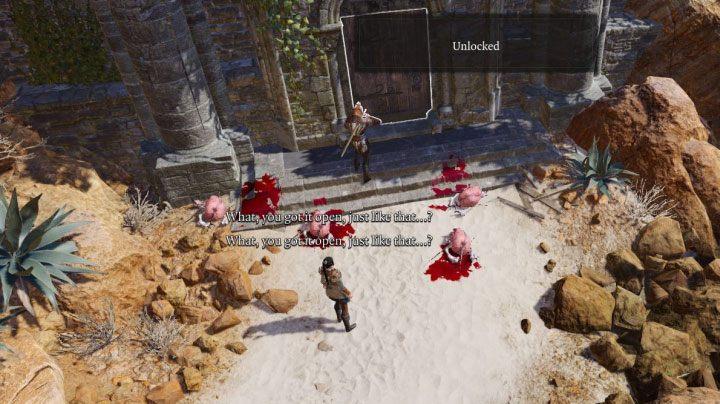
- The thief’s tools give you a chance to open a locked door. Remember to choose a hero with enough points in Sleight of Hand.
For more tips and hints, visit the Exploration section in our guide to Baldur’s Gate 3.
Recruit companions as soon as possible after completing the prologue
Recruit companions as soon as you finish the prologue to secure valuable help, diversify your party’s abilities, and gather essential quest support for the early chapters.
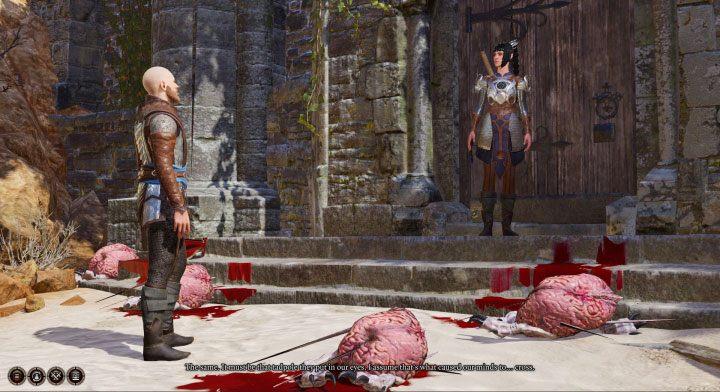
After the prologue aboard the Nautiloid, your character wakes up alone on a beach. Fortunately, you won’t be alone for too long. By exploring the area you can quickly recruit the first companions. For example, right next to the beach, you will come across a closed entrance to the ruins – a cleric named Shadowheart stands nearby. Recruiting her will give you access to many useful spells.
Having more party members will be very helpful in winning the initial battles. This also gives you greater versatility, both on the battlefield and in sequences that require, for example, using characters’ skills to increase the chance of passing skillchecks.
The list of playable characters has information on where to recruit new companions.
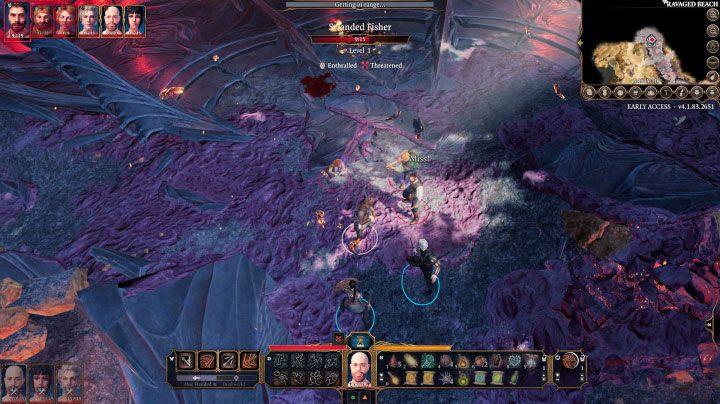
Analyze the queue of moves during fights
Analyzing the queue of moves during fights reveals how initiative, action economy, and reaction timing shape outcomes; by tracking the order and costs of actions, you can anticipate enemy responses, optimize your own sequence, and identify opportunities to interrupt or capitalize on openings.
When fighting, the queue of the moves is always displayed in the top left corner of the screen, in which team members and allies (green border) and opponents (red border) are included. You can use that knowledge and try to eliminate, weaken or paralyze stronger opponents before their turn. Similarly, you can also heal, strengthen or impose blessings on those allies who will soon make their moves.
Side note – only those team members who entered the fight are included in the queue.
Be sure to defuse the traps
Traps in Baldur’s Gate 3 can turn a smooth run into chaos, so spot them early with Perception checks from party members. Disarm using Sleight of Hand or a tool like the Thieves’ Tools, aiming for DC 10-15 rolls depending on the trap type-spike pits, poison darts, or fire runes all yield loot if handled right. Position your rogue upfront for quick defusing, and save spells like Mage Hand for safe remote triggering. Fail a check? Jump back or tank the hit with high HP characters. Practice in Act 1 ruins to master the timing before tougher spots.

Traps in Baldur’s Gate 3 can instantly kill one or even all of the team members. So it’s best to look out for them when exploring all sorts of dungeons, crypts and other locations with valuable treasures. Traps can be identified through successful perception tests.
After locating a trap, you definitely try to neutralize it by using a character with agile hands and a set to disarm the traps. Before any such action, save the game, because a failed attempt can not only lead to the loss of tools, but also to the triggering of the trap. If you’re unable to disarm the trap, it’s best to leave it for later, return with more experience.
You can learn more about traps in the section entitled – How to disarm traps? in the FAQ section of the guide.
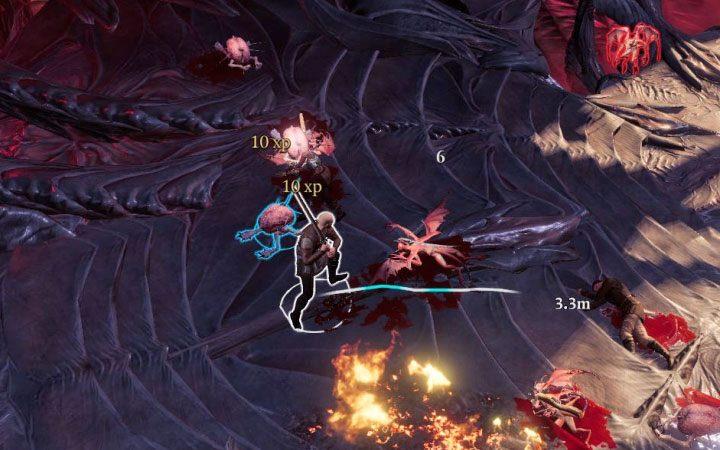
Push enemies off high ledges
Push enemies off high ledges with well-timed pushes or forced movement spells, using the battlefield’s elevation to deny them retaliation and turn the tide of combat.
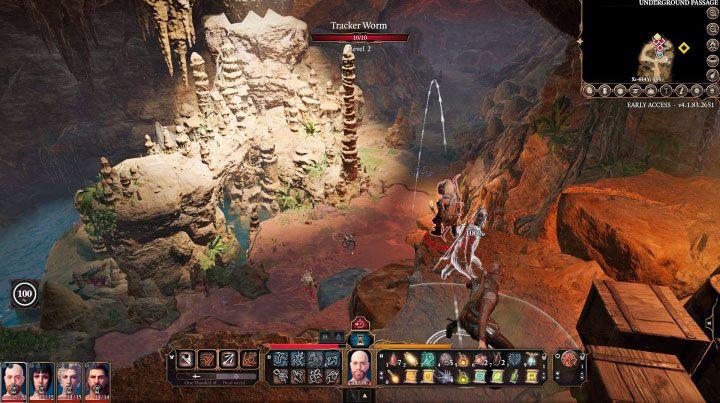
There’s a bonus action called Shove, and it’s available for all characters regardless of the represented class. You can choose this action from the blue bar to the left of the character’s thumbnail at the bottom of the screen.
With Shove, you can seriously weaken or kill opponents. Try to use this action on enemies standing on high rock shelves or near a chasm. When planning a Shove, you will see the opponent’s probable “trajectory” (example in the picture). Enemies falling from greater heights will receive more damage. In extreme cases, the shoved opponent may die.
Best class builds for early game combat effectiveness
Tavern Brawler builds and Thief Rogue excel in early game combat for their high attack output and reliability in Baldur’s Gate 3. Fighters and Monks provide straightforward melee power, while Druids offer versatile control. These leverage levels 1-4 mechanics effectively before respeccing options open up.
Tavern Brawler Monk
Open Hand subclass shines early with multiple unarmed strikes via Flurry of Blows. Prioritize Strength or Dexterity dumps, grab Tavern Brawler feat at level 4 for improvised weapon throws boosted to Strength scaling, and use Bonus Actions for extra attacks. Pair with consumables like potions from the goblin camp to fix stats, dominating Act 1 fights through sheer volume of hits.
Thief Rogue Archer
Dual hand crossbows with Sharpshooter feat at level 4 deliver 3 attacks per turn via extra Bonus Action. Focus Dexterity, hide for advantage, and off-hand attack relentlessly for 20+ damage per hit. This build carries solo through early encounters like the nautiloid and ruined village.
Berserker Thrower
Barbarian Berserker gets Frenzy for Bonus Action throws at level 3, stacking with main Action throws for dual hurling. Tavern Brawler enhances returning weapons; use javelins or scavenged items for massive early damage without spell reliance. Rage boosts survivability against Act 1 bosses.
Moon Druid
Wild Shape into spider or wolf for frontline tanking while casting Shillelagh or Spike Growth from safety. Concentration spells like Web grant party advantage, enabling Sharpshooters. Heals via Goodberry sustain the group through long dungeons.
Fighter Progression
Battle Master or Champion starts strong with sword hits and Action Surge at level 2 for burst turns. Scales into Gloom Stalker multiclass later, but pure Fighter rushes enemies effectively from level 1. Simple for beginners, pairs with any party.
Which subclasses are strongest by level 1-4
In Baldur’s Gate 3, several subclasses stand out for their exceptional power from levels 1-4, leveraging early access to key features adapted from D&D 5e rules. Circle of the Moon Druid dominates with Wild Shape forms like badger or spider for tanking and multiattacks, paired with spells like Healing Word. Tavern Brawler Monk and Open Hand Monk deliver unmatched Bonus Action attacks via Flurry of Blows.
Top Druid Subclass
Circle of the Moon unlocks at level 2, granting superior Wild Shapes with high temporary HP pools (e.g., brown bear form by level 4 proxy via scaling). This doubles effective health while casting Spike Growth for control, outpacing other Druids early. Use Goodberry for infinite healing sustain in Act 1.
Strongest Monk Options
Open Hand Monk (level 1 subclass choice) adds prone/topple effects to Flurry of Blows, knocking enemies prone for advantage. Tavern Brawler feat at level 4 turns throws into Strength-scaled nukes, enabling 4+ attacks per turn with improvised weapons. Excels in goblin camp fights.
Berserker Barbarian
Berserker (level 3) gains Frenzied Strike for extra Bonus Action attacks and Enraged Throw to prone ranged foes. Rage halves physical damage, making it the tankiest melee option through level 4. Pairs with javelins for 30+ DPR without multiclassing.
Rogue and Fighter Picks
Thief Rogue (level 3) nets two Bonus Actions for dual crossbow shots, hitting Sharpshooter breakpoints early. Gloom Stalker Ranger or Battle Master Fighter provide burst via Hunter’s Mark or maneuvers, but lag slightly behind Moon Druid’s versatility. All thrive in tight Nautiloid/underdark encounters.