Dutch van der Linde’s gang is at the heart of Red Dead Redemption 2’s gripping narrative, where every mission teeters between brilliance and chaos. From high-stakes heists to desperate escapes, Dutch’s grandiose plans often unravel into calamity, testing the loyalty and survival instincts of his outlaw family. Dive into this comprehensive walkthrough to uncover the strategies, secrets, and map locations behind the gang’s most infamous jobs—and see how ambition and betrayal shape their fateful journey.
Note – The quest markers for minor missions given to you by the members of the gang appear randomly. Check your map whenever you go back to the gang hideout. Try to take care of missions commissioned by other gang members right away. If you get promoted too quickly to the next chapters of the campaign, you may lose the chance to play them irretrievably.
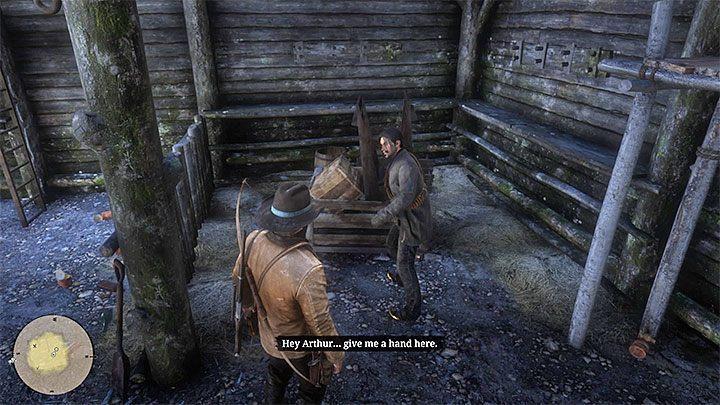
Home Robbery – Javier
Home Robbery – Javier
In Red Dead Redemption 2, the “Home Robbery” mission with Javier Escuella involves a coordinated effort to loot a wealthy residence. Javier, known for his loyalty to Dutch and his romantic demeanor, assists Arthur in scouting and infiltrating the property. Together, they search for valuables while dealing with armed guards and potential resistance inside the house. This mission highlights Javier’s resourcefulness and his commitment to the gang’s survival, showcasing his skills as both a tactician and a gunman. Players must use stealth and Dead Eye mechanics effectively to maximize their haul and avoid unnecessary conflict during this robbery.
The mission marker can appear in the gang camp in the second chapter of the game, but you can also deal with it in the third chapter. Talk to Javier at the gang headquarters.
Go with Javier to a farm located north of Valentine. After approaching your destination, take your binoculars out of your inventory to carry out a reconnaissance. Head towards the buildings and hide behind the shed to overhear the conversation. Then hide behind a large rock and wait for Javier to set fire to the shed. Attack the inhabitants of the farm with surprise and start fighting. Observe the radar indications during the battle, as it is more difficult to see the people inside the buildings.
After winning the battle, go to the barn to find a hiding place. It is hidden in the place shown in the picture and contains a lot of cash. Arthur will get enriched by 175 dollars.
Do not leave the farm right away. It is a good idea to search it thoroughly and examine the corpses of all the shot inhabitants. On the farm you can find, among other things, two collector’s cards.
Home Robbery – Sean
After completing the mission “A Short Walk in a Pretty Town,” Sean MacGuire will approach Arthur in camp to propose a home robbery. The pair will target the house of Rance Waite and his family in the northern part of Scarlett Meadows. Players should be prepared for a stealthy approach, as Sean suggests entering through the back door while the family is asleep. Once inside, Arthur and Sean must search the house for valuables, including money, jewelry, and other precious items. However, things may not go as smoothly as planned, and players should be ready for potential confrontations with the homeowners or local law enforcement.
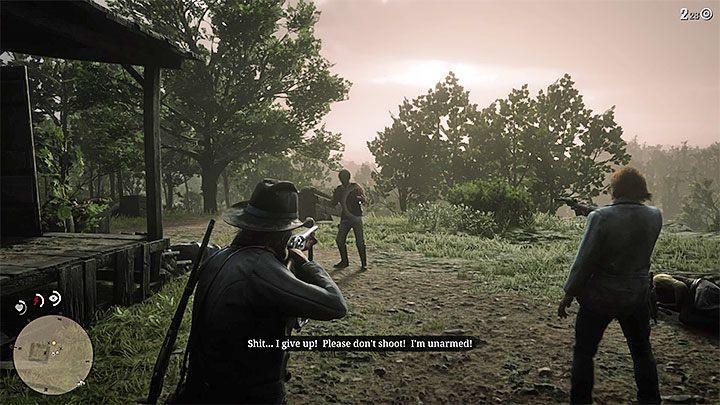
The mission marker can appear in the gang camp in the third chapter of the game. Talk to Sean. Complete this theft before you start the third chapter’s final mission. Otherwise, you won’t be able to do it.
After listening to the plan, go with Sean to a marked place – it’s a small hut west of the Bluewater Marsh. Hide away and wait until Sean kills his first opponent. Join the battle and eliminate more enemies. But don’t kill the last bandit, because you need to listen to him. You’ll find out where the cache is located.
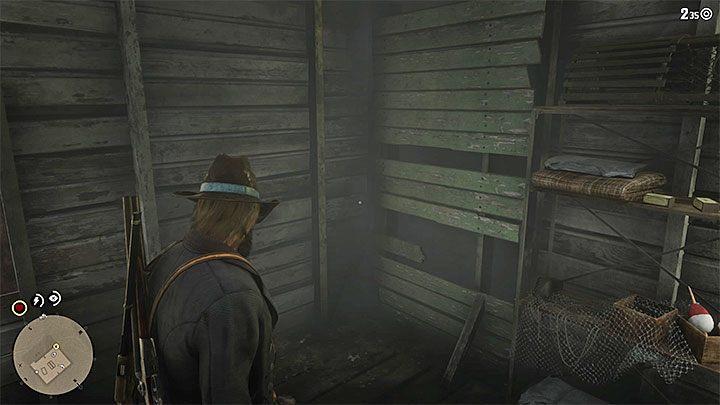
You can already enter the building. The most valuable finding is shown in the picture – the box is behind the boards. This is the corner to the left of the entrance to the building. You will find some cash. Once you’ve completed your mission, continue your search to find even more treasures (including money lying on the view, collector’s card and Double-Action Revolver in a metal chest under the bed).
Coach Robbery – Bill
The “Coach Robbery – Bill” mission in Red Dead Redemption 2 highlights Bill Williamson’s role as a loyal enforcer of Dutch’s gang. In this mission, players collaborate with Bill to rob a stagecoach, showcasing his brute strength and straightforward approach to criminal activities. To begin, players must acquire a tip from a post office clerk, marking the target’s location on the map. Once at the site, the objective is to ambush the coach, neutralize its guards, and seize control of the wagon. The stolen coach can then be sold to Seamus at Emerald Ranch for profit. Bill’s involvement emphasizes his unwavering commitment to the gang, despite his often mocked temperament and insecurities.
This quest marker can appear in the gang hideout during the third chapter. Speak with Bill. You will attack the coach in Dewberry Creek.
Reach the place marked by the game. The men start arguing. After that, you have to start chasing the coach. Use the Dead Eye to eliminate the driver and the guards. Stop the coach, wait for the dynamite to be planted, and detonate it by shooting the fuse from a safe distance. Loot the coach and then leave this place.
Coach Robbery – Sean
In the “Coach Robbery – Sean” mission in Red Dead Redemption 2, Sean MacGuire enlists Arthur Morgan’s help to rob a Boles Overland banking coach near Face Rock during Chapter 3. Sean devises a plan to distract the guards by bringing Mary-Beth along, ensuring the operation runs smoothly. This companion activity highlights Sean’s resourcefulness and mischievous nature, offering players an exciting opportunity to engage in a lucrative robbery while deepening their connection with the Van der Linde gang37.
This quest marker can appear in the gang hideout during the third chapter. Speak with Sean. Complete this theft before you start the third chapter’s final mission. Otherwise, you won’t be able to do it. The coach will appear near Valentine.
The game allows you to prepare yourself for this robbery – hide behind the fallen tree. Mary-Beth stops the coach. Use this opportunity to surprise attack the enemies. Use the Dead Eye to make sure that your shots are accurate. One of the enemies can take Mary-Beth hostage. Use the Dead Eye to save her life. Loot the coach and then leave this place.
What are the most memorable missions led by Dutch in Red Dead Redemption 2
Most Memorable Missions Led by Dutch in *Red Dead Redemption 2*
Dutch van der Linde’s leadership often drives the narrative of Red Dead Redemption 2, with his charisma and flawed ambition shaping some of the game’s most unforgettable missions. Here are the highlights:
-
Blood Feuds, Ancient and Modern (Chapter 3): This mission showcases Dutch at his most ruthless as the gang storms Braithwaite Manor to rescue Jack Marston. The cinematic gunfight, brutal interrogation, and burning of the manor reveal Dutch’s descent into moral ambiguity, leaving players questioning his methods3.
-
Country Pursuits (Chapter 4): Dutch leads Arthur into the swamps to confront Angelo Bronte. The mission is memorable for its eerie atmosphere and the terrifying encounter with a legendary bullgator, symbolizing the increasing danger surrounding Dutch’s plans.
-
The New South (Chapter 3): A rare moment of calm, this fishing trip with Dutch, Hosea, and Arthur offers heartfelt dialogue and camaraderie. It foreshadows Hosea’s tragic death and highlights Dutch’s fleeting humanity before his moral unraveling.
-
Saint Denis Bank Robbery (Chapter 4): Dutch orchestrates the gang’s most ambitious heist at Saint Denis’ largest bank. The mission ends in chaos as Pinkerton agents ambush them, leading to Hosea’s death and forcing Dutch to flee to Guarma—a pivotal moment in the gang’s downfall.
These missions encapsulate Dutch’s complex character, blending brilliance with recklessness, ultimately driving his gang toward ruin.
Which mission showcases Dutch’s most reckless decision
One of the missions that showcases Dutch’s most reckless decision in Red Dead Redemption 2 is “Blood Feuds, Ancient and Modern”. This mission highlights Dutch’s increasing instability and impulsiveness as he leads the gang into a violent confrontation between the Grays and the Braithwaites, a long-standing feud. The mission ends in chaos, with the gang facing severe repercussions from the law, which was already closing in on them. Dutch’s decision to intervene in this feud not only puts the gang at risk but also reveals his growing desperation and willingness to take dangerous risks, which becomes a recurring theme throughout the game1.
Another notable example is the Saint Denis Bank Robbery, where Dutch orchestrates a daring heist that ends in disaster. The gang is ambushed by Pinkerton agents, leading to Hosea’s death and forcing Dutch to flee to Guarma. This mission showcases Dutch’s reckless ambition and his inability to adapt to changing circumstances, leading to tragic consequences for the gang.