In the intricate world of Baldur’s Gate 3, players find themselves aboard the enigmatic Nautiloid, where they must navigate a series of mind-bending puzzles to escape. Among these challenges, the “Prisoners in Pods” puzzle stands out, requiring clever manipulation of neural connections to unlock the secrets of a captive mind. As adventurers delve deeper into this cerebral conundrum, they must connect colored nodes representing emotions, memories, and reasoning—each step bringing them closer to unraveling the dark mysteries of the Mind Flayer Colony. Will you decipher the puzzle and free the minds trapped within, or will you succumb to the chaos that lurks in the shadows?
Location of Shadowheart
Shadowheart is located aboard the Nautiloid, a Mind Flayer ship that serves as the initial setting for players in Baldur’s Gate 3. As part of the prologue, players encounter her while navigating through the ship, which is filled with various challenges and enemies. Shadowheart is found in a pod, along with other captives, and her fate becomes intertwined with the player’s journey as they attempt to escape the ship. Throughout this segment, players must solve puzzles and engage in combat, ultimately leading to significant character interactions and decisions that shape the narrative moving forward.
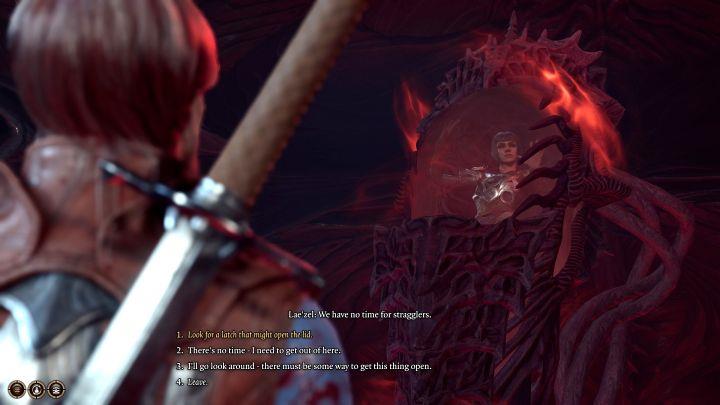
- During the Prologue you’ll have a chance of exploring the northern room. Inside the room, there are pods with people captured by Mind Flayers. In one of the pods, you can find Shadowheart, and freeing her has priority as she can join your party once released.
- After examining the pod, you can talk to the cleric, which will lead to a realization that for the purpose of opening the pod, simple interaction won’t do.
- If you’ve rolled an evil character, you can leave Shadowheart in the pod and this will not result in her death.
How to open the pod with the cleric?
To open the pod with the cleric in Baldur’s Gate 3, players need to interact with the pod located in the Nautiloid’s Restoration Chamber. Upon approaching the pod, a series of skill checks will be prompted, primarily focusing on Investigation and Medicine. Successfully completing these checks allows players to safely extract the cleric from the pod, which is crucial for progressing through the prologue. It’s important to note that failing these checks may result in damaging the cleric or failing to release them altogether. Therefore, players should prepare their characters accordingly to maximize their chances of success during this pivotal moment in the game.
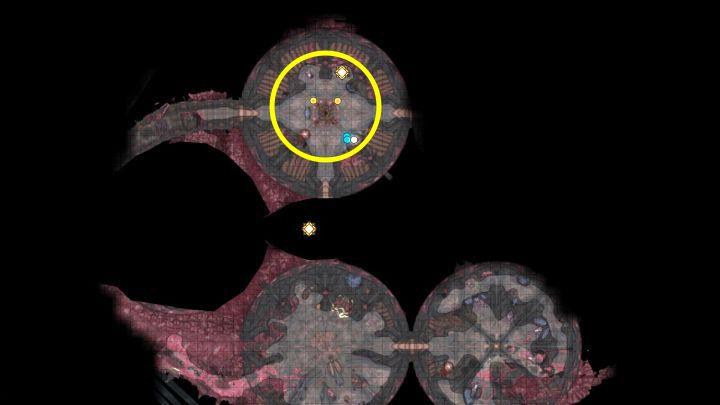
- From the room with the pods, go to the optional eastern room.
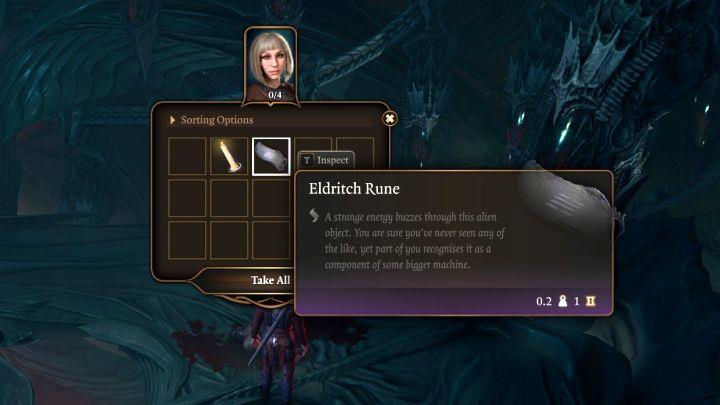
- You need to locate an item – hold ALT to highlight all interactive objects in the area. There is a corpse here that has Eldritch Rune in its inventory.
- Collect the item and return to the previous room. Next to the pod with the cleric there is a console – interact with it.
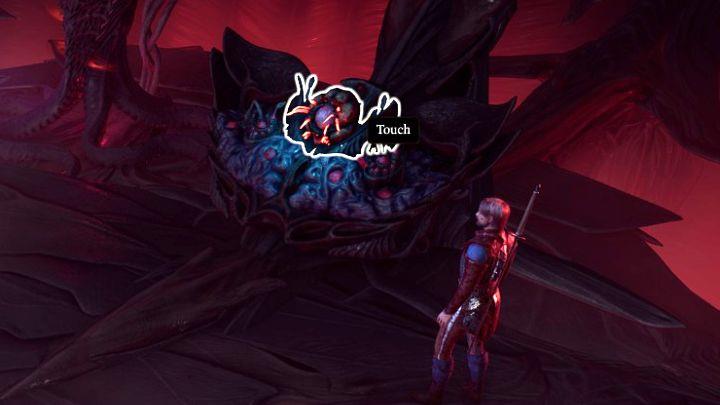
- Choose the option to place the rune in a free slot.
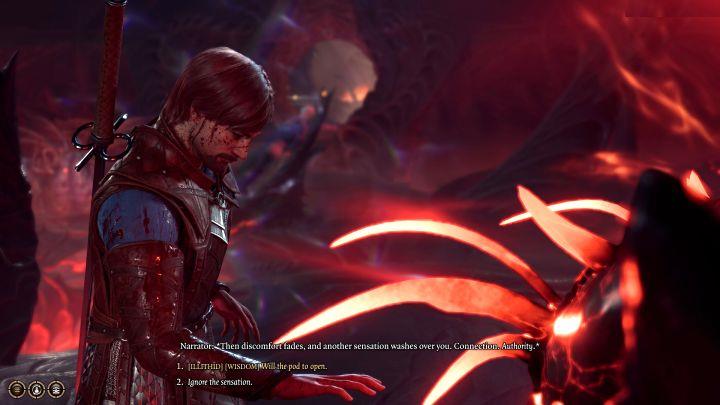
- You can immediately place your hand on the console or complete an Arcana Check to examine it closely.
- The first option involves a Wisdom and Ilithid Check. Successful completion of the checks will open the pod with Shadowheart. You can now invite the cleric to your party (or alternatively, refuse) and she will help you during the next battles of the Prologue.
If you’ve failed the Check and cannot repeat it or you don’t want to free Shadowheart now, you’ll meet her once again during Act 1 in Overgrown Ruins. The second meeting with Shadowheart is described in the page dedicated to her in Party chapter.
Prisoners from the remaining pods
In the Nautiloid puzzle of Baldur’s Gate 3, players encounter a room filled with pods containing prisoners, including the pivotal character Shadowheart. After freeing her, attention turns to the remaining pods, where players can interact with a console that controls their fate. This console features three buttons: the left button has no effect, the middle button releases some prisoners who then become hostile due to Mind Flayer control, while the right button results in their immediate death. Choosing to release these prisoners can lead to a challenging battle but also provides an opportunity for strategic gameplay and character recruitment, highlighting the moral complexities and consequences of player decisions in this richly crafted narrative.
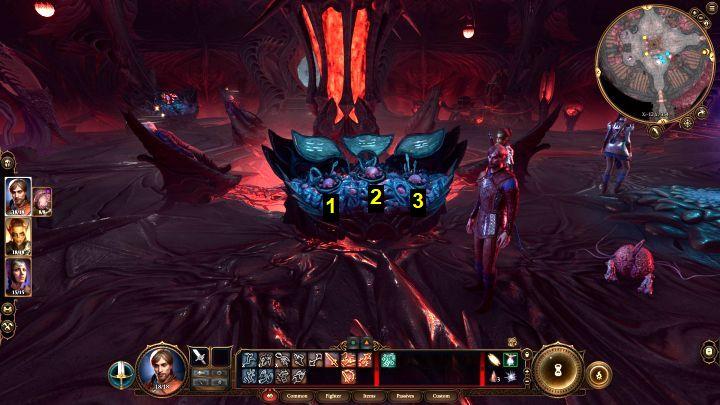
In the same room there is a second console controlling the pods with remaining prisoners. The console has 3 buttons and pressing them have different effects:
- Pressing the left button (1) has no effect.
- Pressing the middle button (2) will free some people from the pods. They will be under the control of Mind Flayers and will attack the team. The combat against these NPCs is not difficult, but there aren’t any special profits for it (you’ll receive a meagre 1 experience point).
- Pressing the right button (3) will lead to the death of those in the capsules.
How do you free the prisoners in the Nautiloid
To free the prisoners aboard the Nautiloid in Baldur’s Gate 3, players have a couple of strategic options:
-
Using the Levers in the Warden’s Office:
- Locate the Warden’s office, which is southeast of Wulbren’s cell.
- Interact with the levers corresponding to each cell to unlock them. Specifically, activate the levers for Cell Two and Cell Four to release both the deep gnomes and tieflings. This method is riskier as it may draw the attention of nearby guards, leading to a chaotic escape.
-
Breaking Through the Walls:
- Engage with the prisoners directly, which might alert guards. However, if you manage to persuade or deceive them successfully, you can provide tools (like a bludgeoning weapon) to help the gnomes break through the weak wall behind their cells.
- Once freed, ensure that guards are distracted to prevent them from attacking the escaping prisoners.
-
Stealthy Approach:
- A more stealthy method involves sneaking around and avoiding combat altogether. You can create distractions or eliminate guards quietly before facilitating the escape of the prisoners without raising an alarm.
After freeing them, guide the prisoners to a nearby pier where they can commandeer a boat for their escape back to safety at Last Light Inn.
What’s the best strategy to avoid alerting guards during the escape
To avoid alerting guards during the escape from the Nautiloid in Baldur’s Gate 3, consider the following strategies:
- Stealth Approach: Move quietly and stay out of the guards’ line of sight. Use the environment to your advantage by hiding behind objects and avoiding open areas where guards can easily spot you.
- Timing: Observe guard patrol patterns and wait for them to turn away before making your move. This will help you avoid detection when navigating through areas with multiple guards.
- Distractions: Create distractions to draw guards away from their posts. You can throw objects or use spells that create noise to divert their attention while you make your escape.
- Use of Skills: Utilize skills like Stealth or Hide to remain undetected. Characters with high Dexterity can sneak past guards more effectively.
- Eliminate Threats Quietly: If necessary, take out guards, but do so in isolated areas where other guards cannot witness the act. Use non-lethal methods or stealth attacks to minimize noise.
- Avoid Combat: If possible, bypass combat entirely by sneaking past guards rather than engaging them. This reduces the risk of alerting others and keeps the escape plan intact.
- Plan Your Exit: Identify multiple routes for escape and choose one that minimizes encounters with guards. Ensure you have a clear path back to safety once the prisoners are freed.
By following these strategies, you can successfully navigate the Nautiloid without raising alarms, ensuring a smooth escape for both yourself and the prisoners.