In the shadowy depths of the Underdark lies Grymforge, a treacherous locale teeming with dark secrets and perilous quests. As players embark on their journey through Baldur’s Gate 3, they will encounter the sinister duergars enslaving deep gnomes and a mysterious True Soul trapped within the forge’s fiery embrace. With opportunities to forge powerful weapons and armor, players must navigate a web of choices that could lead to liberation or destruction. Will you ally with the oppressed gnomes or the enigmatic Nere? Prepare for an adventure filled with danger, moral dilemmas, and the promise of legendary craftsmanship as you delve into this captivating walkthrough of Grymforge.
Grymforge
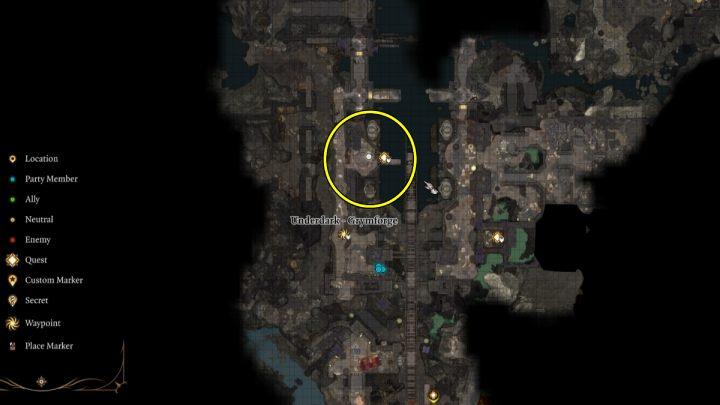
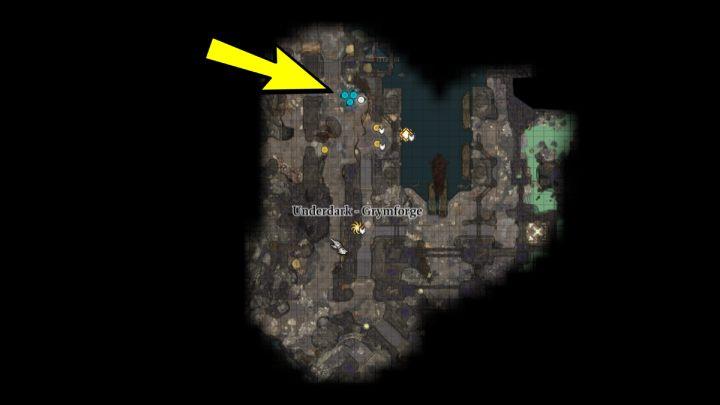
Grymforge is a pivotal location in Baldur’s Gate 3, situated within the treacherous Underdark. As players navigate this fiery and decrepit area, they encounter a host of challenges, including the oppression of deep gnomes by the duergars and the quest to rescue True Soul Nere. The environment is rich with quests and valuable items, drawing adventurers into moral dilemmas as they decide whether to aid the enslaved gnomes or align with Nere. Notably, Grymforge serves as the gateway to the legendary Adamantine Forge, where players can engage in intense battles and craft powerful equipment, making it a crucial stop in their journey through Act 1.
You will get to Grymforge using the boat moored on the beach in Underdark. If you want to use the boat, you will first have to complete Find the Missing Boots quest. Alternatively, you can fight the Duergars and take over their ship.
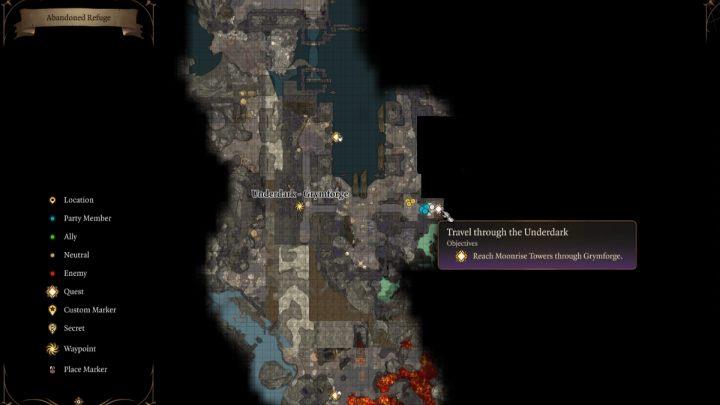
In the forge, you will find an elevator leading to the exit from the Underdark to the Shadow Cursed Lands, the location that starts act 2. If you want to quickly finish act 1, after entering the forge, head east to the elevator where a few Duergars are standing.
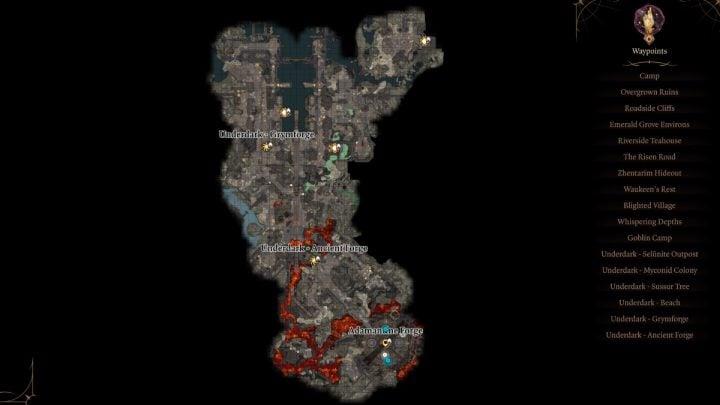
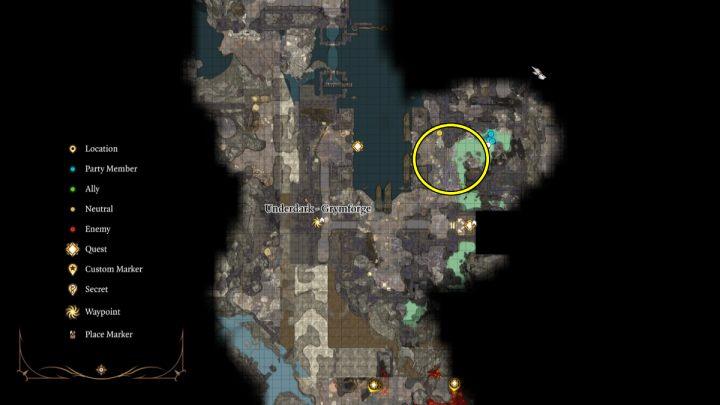
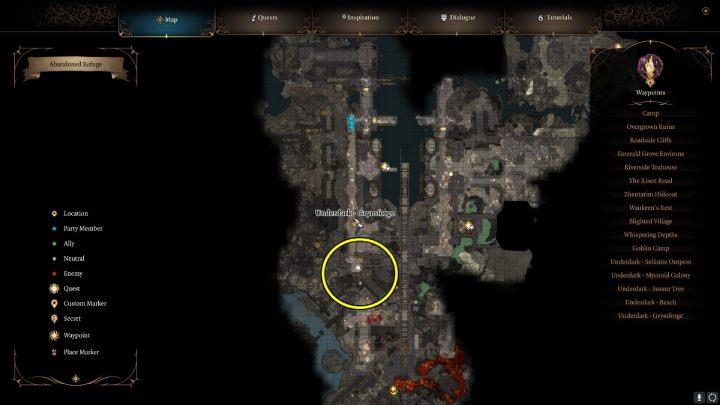
Grymforge is divided into several regions, including 2 Waypoints.
- Grymforge – this is the place where you will start exploring the forge. In this region you will unlock the quest Free True Soul Nere and complete the quest Save the Grymforge Gnomes.
- Ancient Forge – here you will find the passage to the Adamantine Forge and the items needed to forge adamantine armor and weapons.
- Adamantine Forge – here you will face a strong boss, Grym, and you will be able to forge adamantine armor and weapons. In this place, you will also find a mysterious necklace related to the quest Help the Cursed Monk.
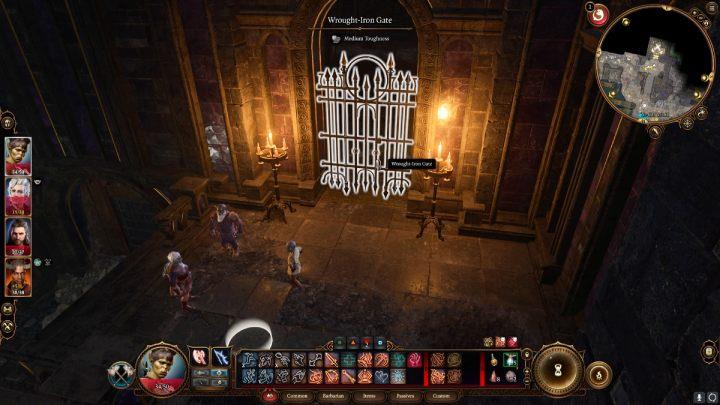
After you leave the ship, Morghal will approach you, demanding payment for passage. Choose the second dialogue option if you want to go to the forge without paying. You are now able to freely explore this area.
Free True Soul Nere
Free True Soul Nere is a pivotal side quest in Baldur’s Gate 3 that players encounter upon reaching Grymforge. This quest revolves around the urgent task of rescuing Nere, a True Soul trapped behind a cave-in alongside several gnomes, while navigating the treacherous dynamics of duergar politics. Players must gather explosives, specifically a vial of Runepowder, to clear the rubble and free Nere before he succumbs to poison gas. The quest not only tests players’ combat skills but also their moral choices, as they must decide whether to ally with Nere or the duergar, leading to significant consequences for both the story and character relationships. Successfully completing this quest can yield valuable rewards, including unique items and potential alliances that impact future gameplay.
After arriving at the forge, you will be send to Thrinn. If you have the boots that were stolen from her, you can return them now. During the conversation, you will find out that Nere was imprisoned by rubble in a poisonous room. If he is not released soon, he will die. Agree to help in removing the stones.
If you want to free Nere, you need to hurry up. Exploring the forge for too long or traveling to the camp too often will advance time significantly, and Nere will die from the poisonous gases. So you should complete this quest first and make sure you have enough health, as this quest involves an avoidable fight after removing the rubble. When the rubble is removed, you will be able to choose who to defeat – ally with Nere and defeat the rebellious dwarves or kill Nere and his brethren.
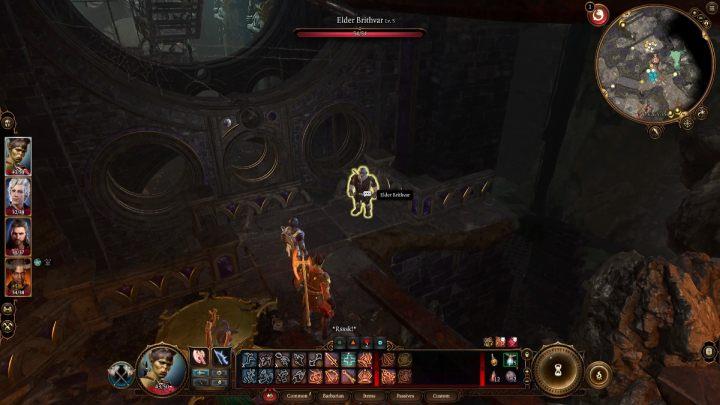
If you want to free the gnomes and choose the good side, you must kill Nere. At the stairs, you will meet Brithvar. Talk to him and tell the man that you also want to get rid of Nere. The dwarf will help you in the fight if you first eliminate the levitating sphere patrolling the area. However, you must do this quietly and without witnesses, otherwise you will be attacked or put in prison. When you get caught, you can also try to bribe the guard.
Approach the orb. Once the orb starts following you, lure it to a secluded spot and attack. One accurate shot or a strong spell should kill it instantly. Tell Brithvir that the task is complete. Now you can take care of removing the rubble.
To destroy it, you will need something stronger than regular explosives. Interact with the gnomes and pass the skill check to eavesdrop on their conversation. Tell them that Tulla sent you and offer your help. In return , you will receive the location of Philomeen’s hideout.
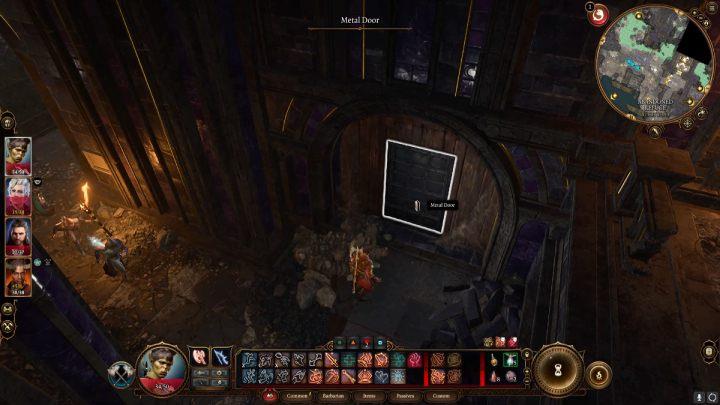
Open the small metal door in the eastern part of the forge’s lowest floor.
Go to the end of the room and press the button on the wall on the right side. In the secret chamber you will find some explosives.
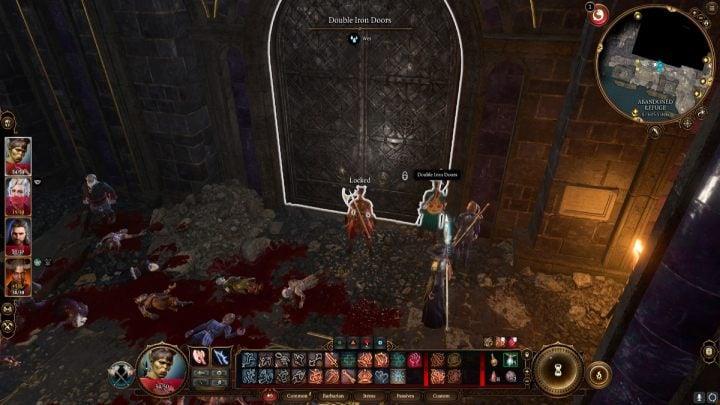
Go now to the big doors near the bodies of dead gnomes. Enter inside and take all the valuable items from the tables – you can sell the silverware at any merchant. On the left side of the chamber you will find a button that opens a secret passage. Follow the corridor until you find the large doors. Keep moving through the rubble until you reach the stairs where a group of enemies will attack you.

Go up the stairs and keep going forward. Jump over the chasm and enter the hideout through the door or go around the wall and find a hole in it.

During a conversation with the gnome, you will be able to do a skill check to persuade her to give you the Runpowder vial. You can now return to the rubble and free Nere.
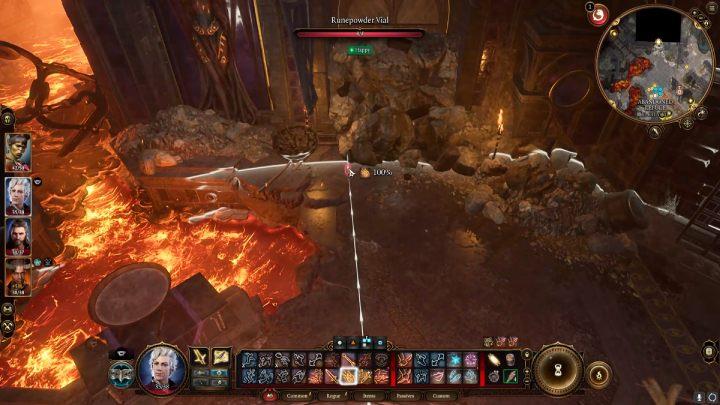
Return to the rubble and place Philomeen’s vial next to it. You can also place other explosive materials. Once you do this, the gnomes will back off to a safe distance. Do the same and hit the vial with a fireball or another fiery projectile.

Approach the explosion site and wait for the cut-scene. Choose which side to take:
- If you choose Brithvara and the gnomes, you will fight with Nere and his minions. As a reward, you will receive all of Nere’s equipment and you will be able to cut off his head to deliver it to the Mykonid colony in the Underdark.
- If you choose Nere, you will have to defeat the rebellious dwarves. And as a reward, he will give you a tadpole. This scenario will not help the gnomes.
Before you start the fight with Nere, equip one party member with the Ring of Mind-Shielding, provided you got it after completing the Help Omeluum investigate the Parasite quest in the Underdark.
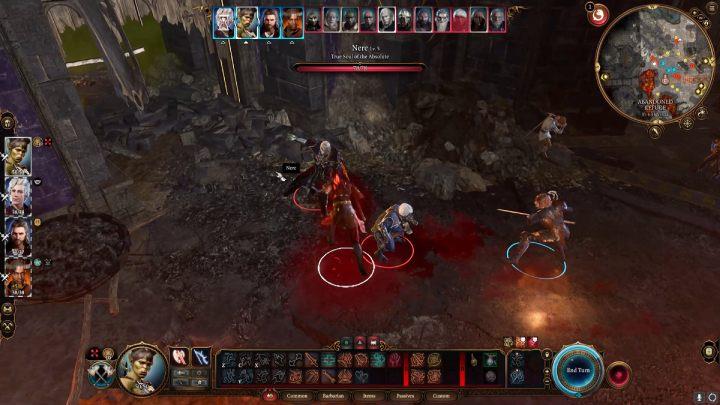
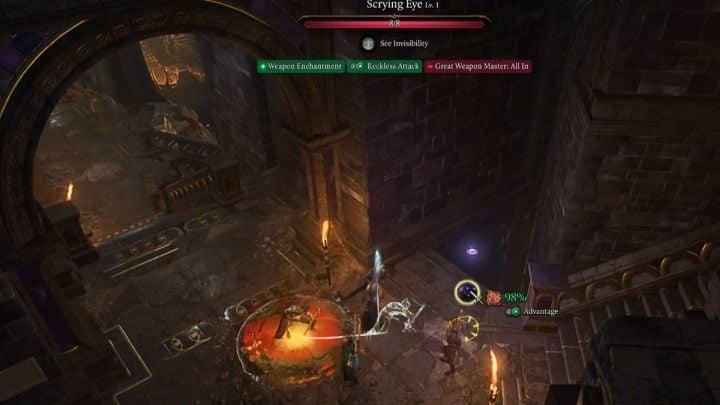
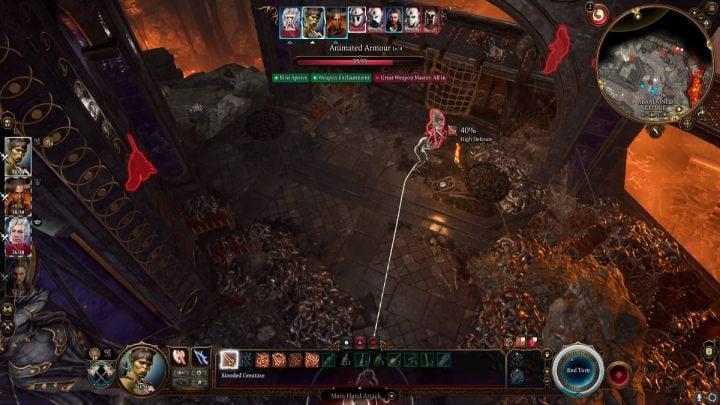
In the fight with Nere, you will have to defeat him and 6 Duergars. If you’ve previously agreed with Brithvar, you will receive 6 allies for this battle. Focus on defeating the main opponent and the mages, who will often cast mind control spells.
After winning the fight, release the gnomes during the conversation with Brithvar. On Nere’s body, you’ll find a Broken Moonlandern, a tadpole in a jar, Disintegrating Night Walkers, a dagger and a Sword of Screams that deals extra acid and psychic damage.
Save the Grymforge Gnomes
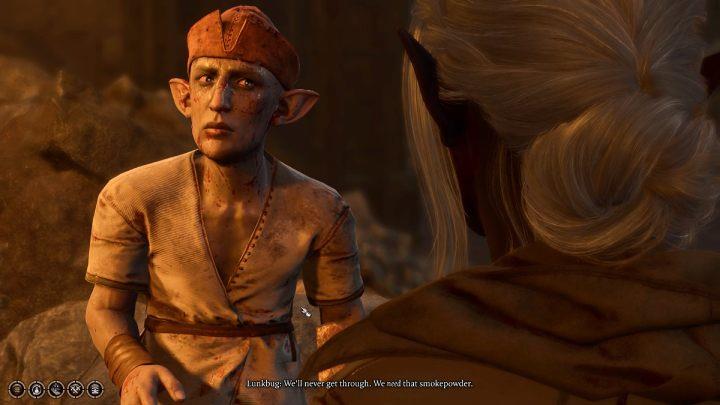
To save the Grymforge Gnomes in Baldur’s Gate 3, players must embark on a quest filled with urgency and danger. The gnomes, enslaved by the ruthless duergar, are in dire need of rescue, and time is of the essence. After initiating the quest by speaking to Lunkbug or Barcus Wroot, players must locate explosives to clear a cave-in trapping their leader, Nere. Engaging in combat with the duergar is inevitable, and strategic choices will determine the fate of the gnomes. Successfully navigating this perilous situation not only frees the gnomes but also advances the overarching narrative of the game.
If you saved Tulla, the gnome you met in the Underdark, she gave you a quest to save the gnomes in the forge.
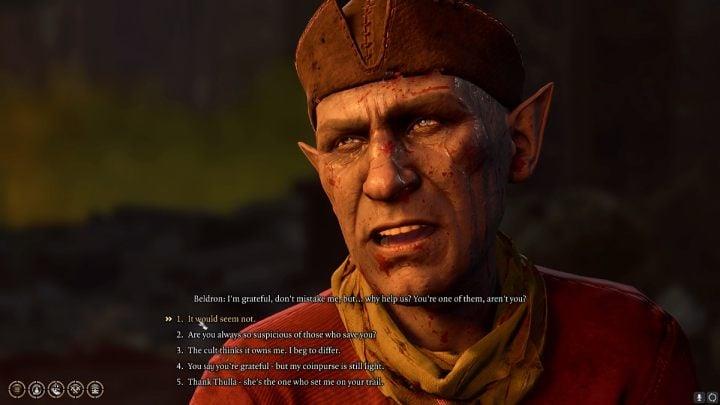
Talk to Beldron after killing Nere and defend the gnomes from Brithvar. You will receive a small payment and learn that one of the gnomes, Wulbren, has been taken to the Moonrise Towers. You can offer them help and meet them later in act 3.
Deliver Nere’s Head
Deliver Nere’s Head is a pivotal side quest in Baldur’s Gate 3 that requires players to confront and defeat True Soul Nere, a formidable foe associated with the duergar. To initiate this quest, players must first complete the “Defeat the Duergar Intruders” quest given by Sovereign Spaw. Upon acceptance, players will need to strategize their approach to Nere, ideally by turning against him during the “Free True Soul Nere” quest. After successfully defeating him, players must retrieve his head and return it to Sovereign Spaw to receive rewards, including the Envoy’s Amulet, which enhances Persuasion abilities. This quest exemplifies the game’s intricate decision-making and moral complexities, as players must choose between aiding or betraying a character they previously had the option to save.
If you completed the Defeat the Duergar Intruders quest in the Underdark, after defeating Nere, cut off his head and deliver it to the Mykonid colony. As a reward, you will receive the Envoy’s Amulet.
Get Past the Rubble
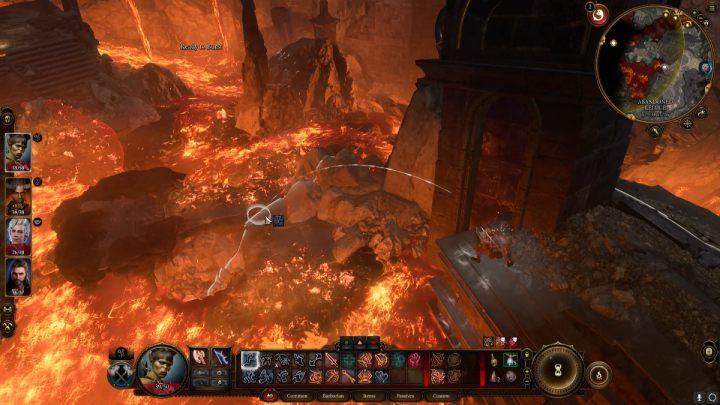
In Grymforge, players face the daunting task of navigating through rubble and uncovering secrets hidden within this perilous area of the Underdark. As you progress, you’ll encounter various challenges, including the need to assist deep gnomes trapped under debris. To get past the rubble, players can employ different strategies, such as using explosives or leveraging animal handling skills to persuade creatures to aid in clearing the path. Successfully overcoming these obstacles not only advances your quest but also reveals crucial lore and items essential for your journey, including access to the legendary Adamantine Forge.
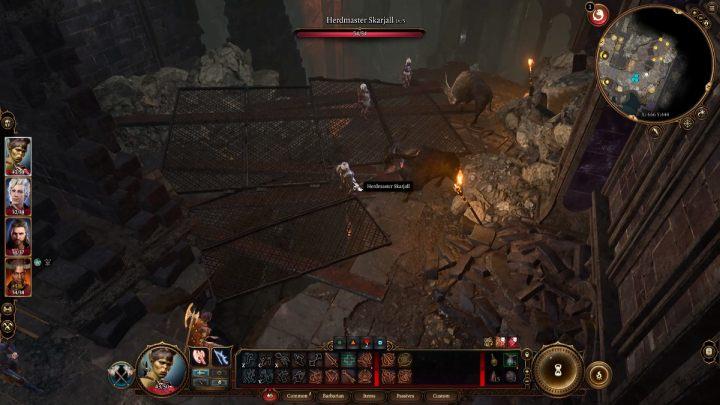
You will encounter several Duergars and oxen near the rubble. Cast a talk animal spell on yourself or drink a potion and talk to the oxen. Convince them to attack the Duergars. After the battle is won, speak again with the oxen and ask them to remove the rubble.
How to deal with a trap with a burning gargoyle?
To navigate the trap with the burning gargoyle in Grymforge, players need to employ a strategic approach. First, identify the lever mechanism that controls the metal bridge leading past the gargoyle. One character should carefully cross the bridge while others remain behind to manipulate the levers. Once across, activate the levers to reposition the bridge and allow your party members to follow safely. Timing is crucial; ensure that characters are positioned away from the gargoyle’s flames while using the levers to control their movements. This method minimizes risk and allows for a coordinated advance towards your objectives in Grymforge.
In the northern part of the forge, on its upper floor, you will find a trap with a fire-breathing gargoylestanding behind a closed grate. The best way to deal with this trap is to send a person there who possesses the Mage Hand spell.
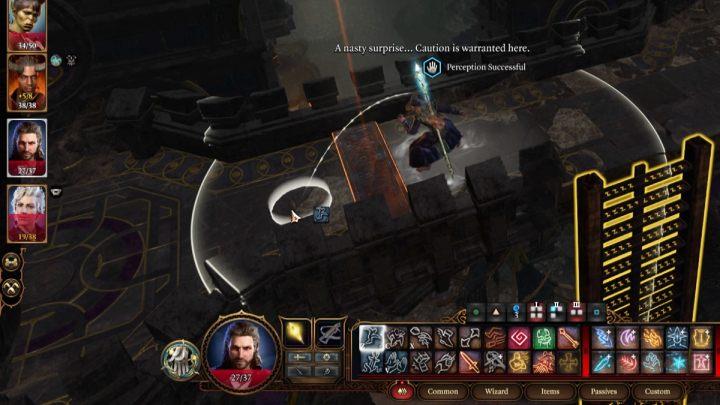
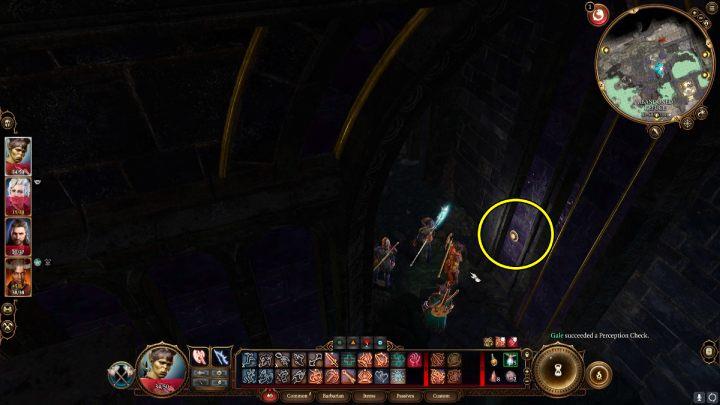
You do not have to deactivate all the traps. After passing perception check, you will discover traps and will be able to simply avoid or jump over them.
When you get to the gargoyle, conjure a hand behind the bars and use it to pull the lever. This deactivates the gargoyle and opens the gate.
By the gargoyle you will find an Idol of Shar which you can give to Shadowheart and a chest with some potions and The Protecty Sparkswall clothing.
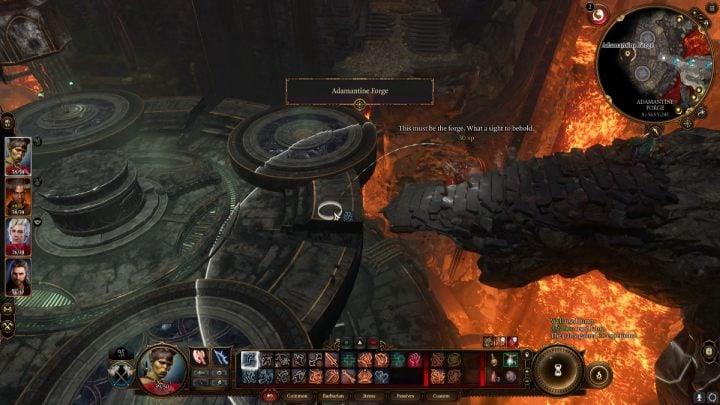
How to get to the Adamantine Forge?
To reach the Adamantine Forge in Baldur’s Gate 3, players must first navigate through Grymforge, located in the Underdark. Begin your journey by accessing Grymforge via a boat from the Decrepit Village after completing the quest to find Thrinn’s missing boots. Once you arrive, progress through the area by overcoming various obstacles and enemies. Look for a series of levers and platforms that will allow you to traverse the forge safely. Specifically, you will need to manipulate these mechanisms to navigate past traps and reach the Ancient Forge, where the Adamantine Forge is located. Be prepared for combat, as you will face Grym, the formidable guardian of this legendary crafting site.
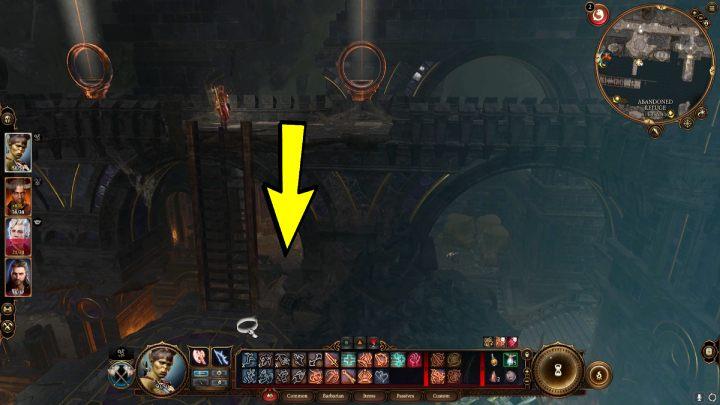
There is a ladder next to the traps and the fire-breathing gargoyle. Go down and stand by the levers.

Pull the levers and wait until a platform appears, make one person from your party jump onto it. Pull both levers again. Jump off the platform and head to the end of the corridor.
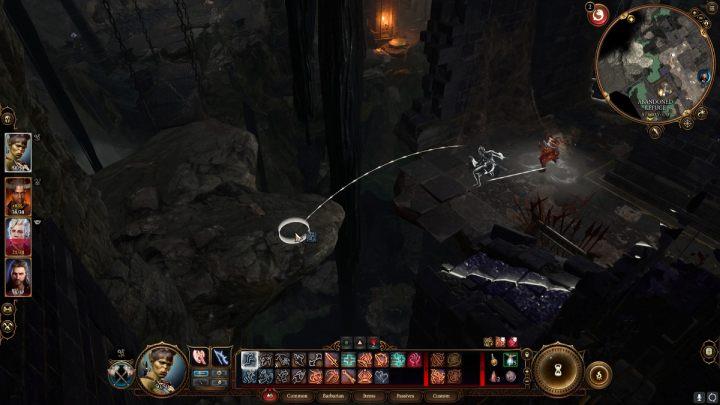
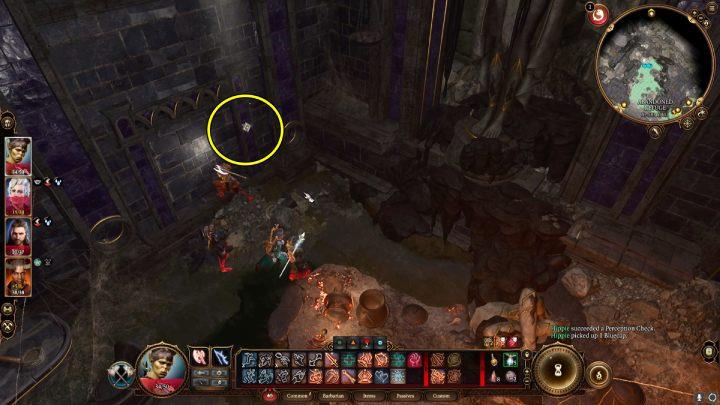
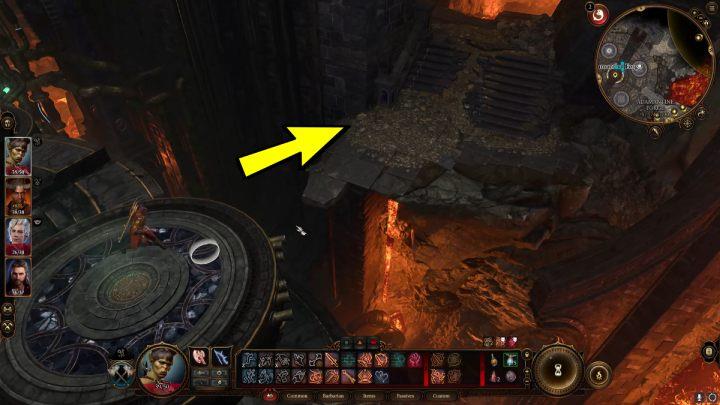
Jump over the abyss and keep going until you reach the stairs and the next levers. On the way, examine the skeletons lying on the ground and take the Steel Moulds – these items will come in handy in the Adamantine Forge.
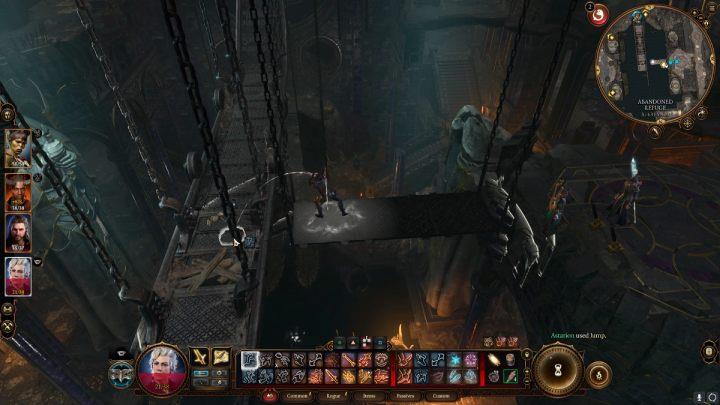
Send the next person from your party to the metal bridge. Make this person reach its end.

Return to the first party member and pull both levers. Wait until the platform reaches the second party member. Send them to the other side of the forge. You will find there another Waypoint – the Ancient Forge. You can now teleport the rest of the party there.
Going further, you will encounter 4 opponents. Defeat them and go down the stairs.
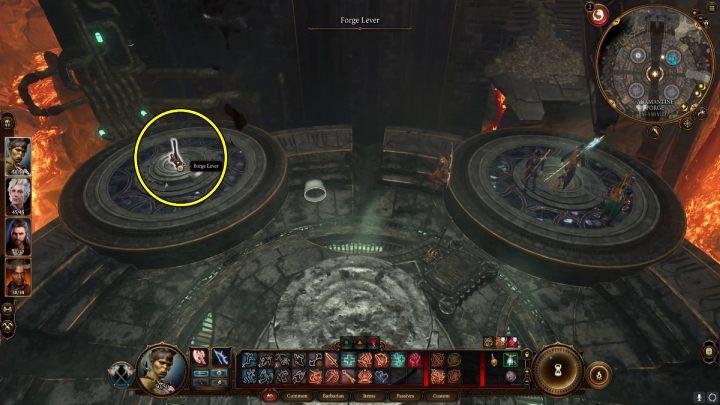
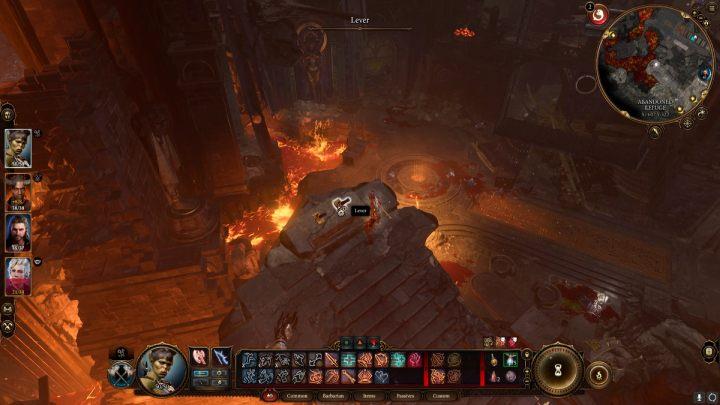
Jump down and pull the lever on one of the wheels to activate the anvil and descend.
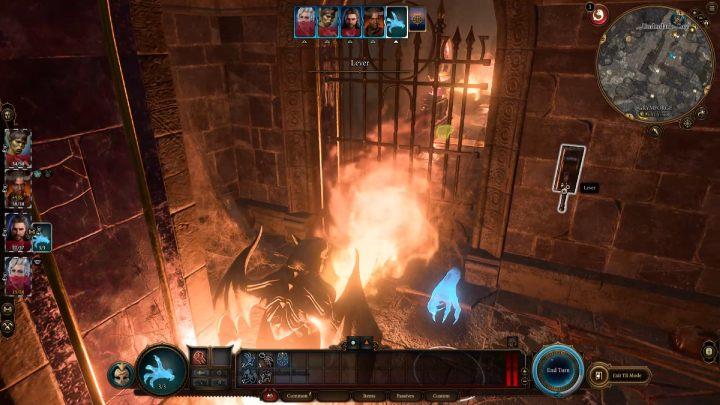
How to defeat Grym?
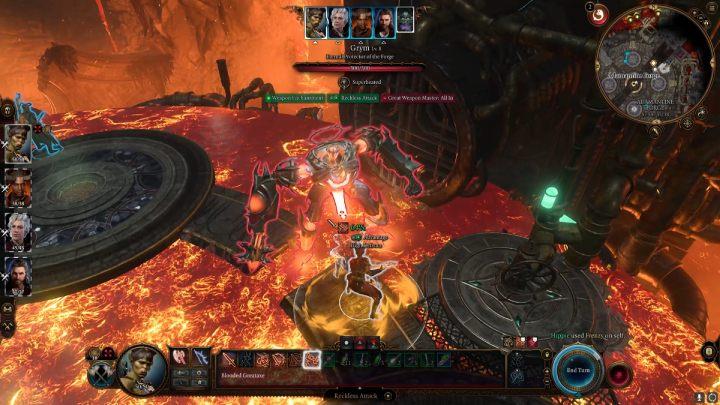
To defeat Grym in Baldur’s Gate 3, players should strategically utilize the environment of the Adamantine Forge during the boss fight. Begin by ensuring that your party is well-prepared with bludgeoning weapons, as Grym is vulnerable to this type of damage when positioned over lava. To initiate the battle, activate the lava flow using a lever, which will apply a “Superheated” debuff to Grym, causing him to take significant damage from bludgeoning attacks. Position two party members on the mold device to lure Grym into the center of the forge, while another member manages the lava valve. As Grym is weakened by the lava, use the forge lever to drop the hammer on him for additional damage. Be mindful of the Magma Mephits that appear during the fight; eliminate them quickly to maintain focus on Grym. Repeat this strategy until Grym is defeated, allowing you to craft powerful adamantine items afterward.
Grym is an optional boss from the Adamantine Forge. You will get there by going through the Underdark, heading to Grymforge.
When you go down to the Adamantine Forge, turn the Lava Valve. Grym will appear after the cut-scene.
When you open the valve, the room will flood with lava. First, set all party members on round platforms so they don’t receive fire damage.
Grym is a very strong level 8 opponent. However, there are a few ways to easily deal with him.
First, in order to damage a Grym, he must be standing in lava. Otherwise, Grym’s armor hardens, giving him protection from every attack. Have one party member always stand close to the lava valve. Every now and then the lava will cool down – you will have to turn the valve again.
Grym will not attack you for the first 2 turns. Then use your strongest attacks, while making sure that your characters don’t step into the lava.
Grym has increased resistance to almost every type of damage, his only weakness being bludgeoning.

Grym can perform several actions during his turn. However, there is a way to avoid his attacks. Every time someone hits Grym, they receive Prime Target status. You can use this to your advantage. Always attack last with the person who is furthest away from the opponent. In this way, when Grym starts his turn, he will not be able to reach that person.
Another method to quickly defeat Grym is to lure him to the center of the platform and drop a huge anvil on him.
For defeating Grym, you will receive the Grymskull Helm.
How to use the Adamantine Forge?
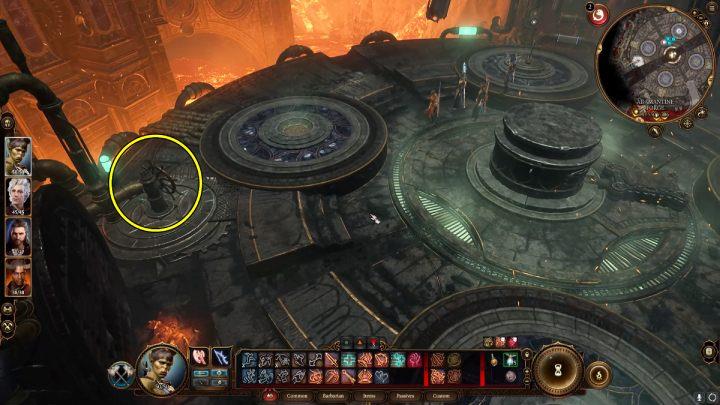
To use the Adamantine Forge in Baldur’s Gate 3, players must first gather the necessary components: a weapon or armor mold and Mithral Ore. Once at the forge, insert the chosen mold into the Mould Chamber and place Mithral Ore into the Crucible. Activating the Lava Valve will fill the platform with lava, which is essential for the forging process. After that, pull the Forge Lever to lower a giant hammer onto the Crucible, completing the crafting. However, be prepared for a battle with Grym, the guardian of the forge, who must be defeated before you can continue forging items. Once Grym is vanquished, you can repeat the process to create more powerful gear for your party.
When you get to the forge and defeat Grym, you will be able to create armor or weapons.
To forge new equipment, you will need Mithral ore and Steel Moulds. You can easily find moulds in various parts of Grymforge. There are many moulds lying near the entrance to the Adamantine Forge.
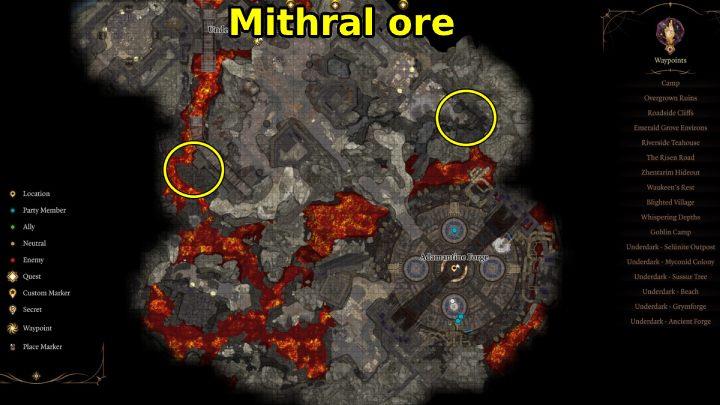
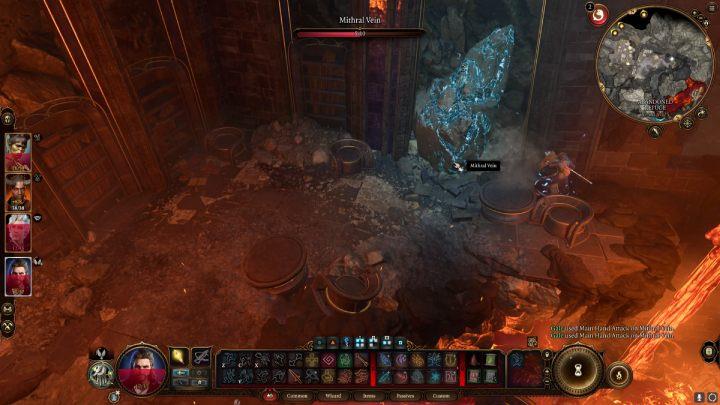
You can find Mithral ore in 2 places. One of them is south of the Ancient Forge Waypoint. Try to hit it with any weapon, or use a spell to crush the stone and pick up the ore. The second ore is north of the Adamantine Forge.
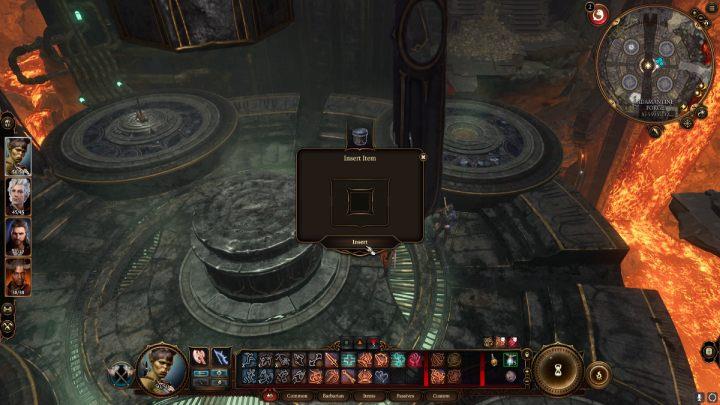
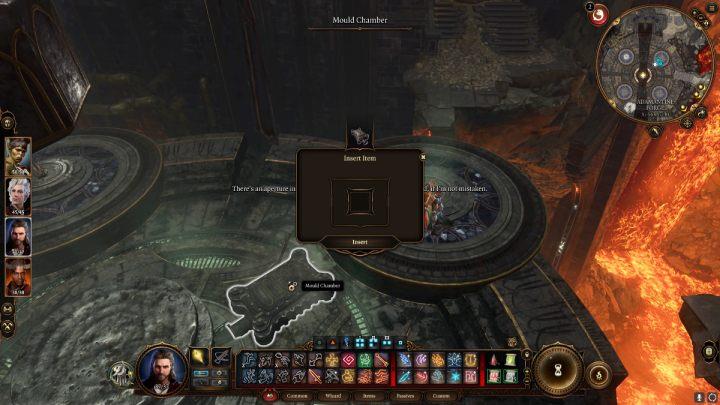
Put the Mithral ore into the anvil, and the mould into the casting. Pull the lever to lower the anvil and take the newly created piece of equipment.
Depending on the mould you used, you can make:
- Adamantine Split Armor
- Adamantine Scale Mail
- Adamantine Shield
- Adamantine Scimitar
- Adamantine Mace
- Adamantine Longsword
Think carefully about what you want to create. You will only have 2 Mithral ores at your disposal.
Help the Cursed Monk
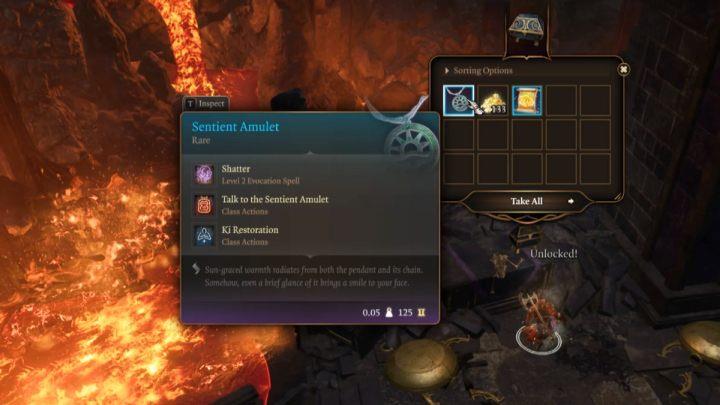
In “Baldur’s Gate 3,” the quest Help the Cursed Monk becomes available after players locate a mysterious necklace near the Adamantine Forge. This quest is intricately tied to the storyline involving True Soul Nere and the plight of the deep gnomes enslaved by duergars in Grymforge. To initiate this quest, players must first navigate through various challenges in Grymforge, including rescuing gnomes and confronting powerful foes. However, the quest itself cannot be fully explored until Act 3 when players reach Baldur’s Gate, making it a tantalizing subplot that hints at deeper narratives and character development within the game.
In Grymforge, you may come across the Dark Justiciar’s Journal. After reading it, you will unlock the Help the Cursed Monk quest.
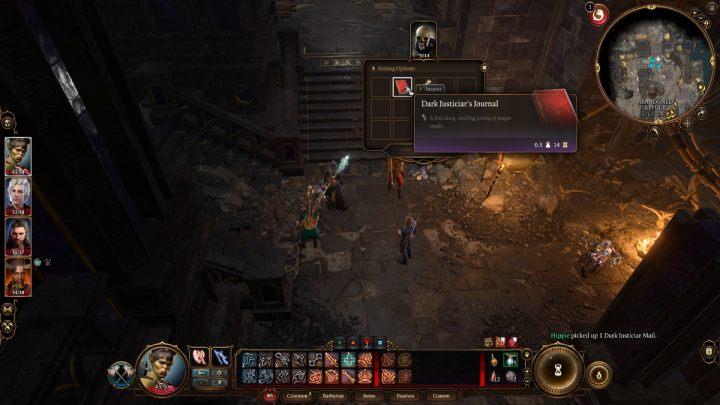
You will find the journal next to the skeleton, not far from the boat you used to get to the forge. If Shadowheart is in your party, examining the body will unlock a new dialogue with the Cleric.
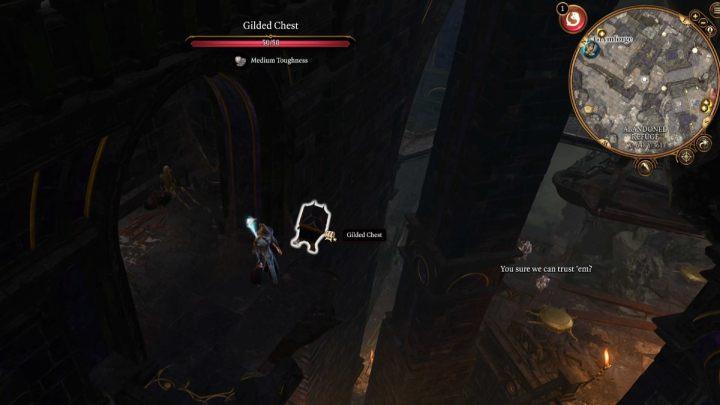
To find the Monk, you must go to the Adamantine Forge. Jump to the western part of the area and go down the rocks by the lava. Send one party member there, preferably someone with a lot of Dexterity and a bonus to Sleight of Hand.
Keep jumping over the rocks until you reach the stairs. Go up and open the chest. Watch out for burning surfaces and erupting magma.
A Lava Elemental will be patrolling the area near the chest – it should not attack you, we also do not advise getting into a fight with it. This is a very strong opponent at a much higher level than your party.
What are the key quests in Grymforge
In Grymforge, players can engage in several key quests that intertwine with the overarching narrative and character development in Baldur’s Gate 3. Here are the primary quests to focus on:
- Free True Soul Nere: This quest involves rescuing Nere, a powerful character trapped under rubble. Players must navigate through challenges and decide whether to ally with Nere or the gnomes, impacting the outcome of the story significantly.
- Save the Grymforge Gnomes: Initiated by helping Tulla in the Myconid Colony, this quest tasks players with liberating enslaved gnomes from duergar captors. The quest has a time constraint, as failing to act quickly can lead to dire consequences for the gnomes.
- Deliver Nere’s Head: After defeating Nere, players have the option to sever his head and deliver it to the Mykonid colony for rewards, adding a moral dimension to their choices.
- Help the Cursed Monk: This quest is unlocked by discovering a journal related to a cursed monk. While its resolution may not occur until later acts, it adds depth to the storyline and character interactions.
- Adamantine Forge: Players can seek out this legendary forge, which offers unique crafting opportunities and culminates in a challenging battle against Grym, a formidable boss that tests players’ combat strategies.
Each of these quests not only enhances gameplay but also enriches the narrative experience within Grymforge, making it a pivotal location in Baldur’s Gate 3.
How do you help the Cursed Monk
To help the Cursed Monk in Baldur’s Gate 3, follow these steps:
-
Start the Quest:
- Locate the Sentient Amulet in the Adamantine Forge area. You’ll find it inside an Adamantine Chest that requires a DC 25 Lockpicking (Sleight of Hand) check to open. The amulet contains the spirit of the monk, who requests your help to reunite him with his granddaughter, Shirra Clarwen, in Wyrm’s Crossing .
-
Travel to Wyrm’s Crossing:
- After acquiring the amulet, proceed to Wyrm’s Crossing, which you can access after completing Act 1 and leaving the Shadow-cursed Lands. Head to the Open Hand Temple, located north of the Circus of the Last Days .
-
Find Shirra Clarwen:
- Inside the temple, inquire about Shirra Clarwen. You will learn that she has passed away and is buried in a crypt beneath the temple. Access the crypt through a hatch located in the kitchen area .
-
Interact with Shirra’s Tomb:
- Once in the crypt, interact with Shirra’s tomb. The monk’s spirit will possess her body and offer you a choice: accept his curse or decline it .
-
Accepting or Declining the Curse:
- If you choose to accept the curse, you must make two saving throws (using Wisdom or Constitution) to avoid penalties to your Wisdom score. Success means you gain access to Tasha’s Hideous Laughter as a spell at will; failure results in a permanent reduction to your Wisdom score .
- If you decline, you will have to fight Shirra and several reanimated corpses. Defeating them ends the quest but leaves you without any rewards .
By following these steps, you can successfully navigate the quest and decide how to handle the monk’s curse while impacting your character’s abilities and story progression in Baldur’s Gate 3.