Embark on an exhilarating journey in Baldur’s Gate 3 with the quest “Free Lae’zel,” where players encounter the fierce Githyanki warrior trapped in a cage by Tiefling scouts. This side quest not only offers a chance to recruit Lae’zel, a powerful ally, but also presents players with multiple paths to navigate the tense situation. Will you choose diplomacy, deception, or combat to secure her freedom? Dive into our comprehensive walkthrough to explore every option and ensure Lae’zel joins your party, unlocking new adventures and insights into the mysterious world of the Githyanki.
Where to find Lae’zel?
To locate Lae’zel in Baldur’s Gate 3, head north from the nautiloid wreckage towards the Roadside Cliffs fast travel point. Here, you’ll find her trapped in a cage, guarded by two Tiefling scouts who consider her a threat. Approaching the scene will prompt Lae’zel to telepathically urge you to free her and assist in eliminating her captors. Successfully rescuing her not only allows you to recruit her into your party but also provides valuable information regarding a cure for the parasite affecting both of you.
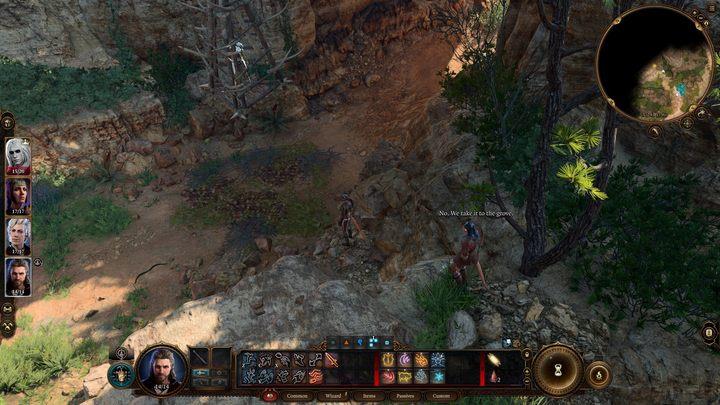
You can find Lae’zel north of the nautiloid wreck and by heading from the Roadside Cliffs fast travel point, where you found another companion, Gale. She is trapped in a cage and guarded by two scouts who consider her dangerous. As soon as you approach the group, Lae’zel will telepathically demand that you free her and help her kill the scouts – and in return, she will offer information about a cure for the parasite.
How to solve the situation?
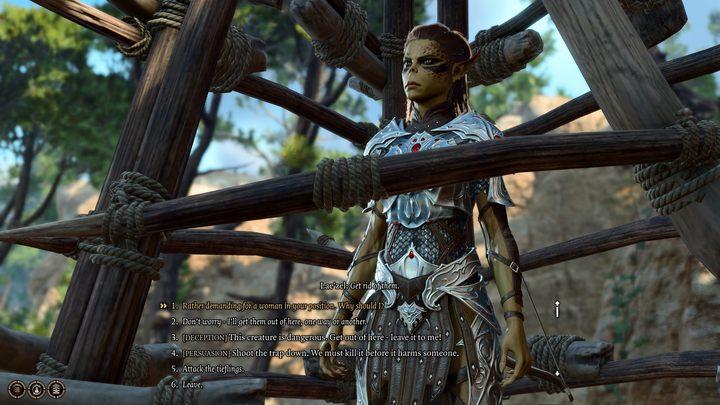
To effectively resolve the situation of freeing Lae’zel in Baldur’s Gate 3, players have several strategic options. First, you can attempt to persuade the Tiefling scouts guarding her to leave by passing a Deception check (DC 10), allowing you to approach Lae’zel without conflict. Alternatively, you can engage in combat with the scouts, either by attacking them directly or convincing them to shoot down her cage, which will lead to a fight where you can side with Lae’zel. If you choose to attack the scouts, be prepared for a battle, but this route ensures Lae’zel’s recruitment afterward. Lastly, if you prefer a non-violent approach, successfully convincing the scouts to flee will allow you to free Lae’zel with minimal confrontation, making it the most advantageous choice for gathering additional information about your quest while adding a powerful ally to your party.
You have several available options to resolve the situation. They are:
- Convince the scouts to run away and leave Lae’zel to you by making a Deception check (DC 10) – the scouts will agree and run away. Before they leave, however, you can also ask them about their grove through a Persuasion check (DC 5). If you pass this check, they will tell you about Nettie, the healer in the druid grove – this is another clue to the main quest from act one. Once they are gone, you can destroy the cage – use a ranged attack on the floor of the cage and you will free Lae’zel. You can recruit her now – she will tell you about a githyanki creche nearby, where you can also be healed. This is the best way to solve the quest because you will get two clues from it, you won’t have to fight and you will recruit Lae’zel to your party.
- Convince the scouts to leave the cage with a Persuasion check (DC 10) – the tieflings will leave the cage to take the captured Lae’zel to their camp, but Lae’zel will attack them. You will have to choose whether you will ally with the scouts or with Lae’zel and fight. If you kill Lae’zel, you won’t be able to recruit her and you’ll miss her personal quest, but you can learn about healer Nettie through a Persuasion check (DC 5). If you kill the scouts, you won’t learn about Nettie from them, but you can recruit Lae’zel and learn about the githyanki creche.
- Attack the scouts – you will have to kill the scouts in combat without Lae’zel’s help. They are not difficult opponents, especially if you have already assembled a full party. After the fight, you can free Lae’zel and add her to your party, learning about the githyanki creche.
- Leave – the scouts will leave the cage and engage in a fight with Lae’zel. If you are still standing close, you will have to choose a side – refusing to choose a side will cause the tieflings to attack you as well. If you have moved away from the cage, Lae’zel and the scouts will fight on their own – after the fight you can talk to the surviving side to recruit Lae’zel or find out about Nettie.
If you play as a drow, duergar, or githyanki, the rangers will try to attack you as soon as you approach. You will have to pass the Intimidation check (DC 5) to escape without a fight (you won’t learn about Nettie from them) or defeat them. Next, you can free Lae’zel and recruit her.
What are the best strategies to convince the scouts to flee without fighting
To convince the Tiefling scouts to flee without engaging in combat during the “Free Lae’zel” quest in Baldur’s Gate 3, players can employ several effective strategies based on character abilities and dialogue options. Here are the best approaches:
Deception Tactics
- Threatening Presence: Use a deception line such as, “This creature is dangerous. Get out of here—leave it to me!” (DC 10). This plays on the scouts’ fear of Lae’zel.
- Dramatic Warning: A Bard can employ a more theatrical approach: “Oh, gods! You’ve caught a scout; the Gith invasion force is right behind me—save yourself!” (DC 10). This creates urgency and fear, prompting them to flee.
Persuasion Options
- Appeal to Safety: Characters with persuasion skills can say, “Shoot the trap down. I’ll tear it apart before anyone else gets hurt” (DC 5). This positions the player as a protector, encouraging the scouts to leave.
- Intelligent Creature Argument: A Monk might argue, “The Githyanki’s an intelligent creature, just like you. Release her, and let us converse civilly” (DC 7). This promotes a peaceful resolution by emphasizing Lae’zel’s sentience.
Character-Specific Strategies
- Paladin Approach: A Paladin can say, “Your quarry looks dangerous, but I’ve handled worse. Leave it to me; get to safety” (DC 7). This reinforces their role as a defender while encouraging the Tieflings to trust them.
- Unique Racial Benefits: If the interacting character is a Drow or Duergar, they may need to pass a DC 5 Intimidation check first to avoid immediate hostility from the Tieflings.
By leveraging these strategies effectively, players can navigate this encounter peacefully and secure Lae’zel’s release without resorting to violence.
What are the best dialogue options to persuade the scouts to leave
To successfully persuade the Tiefling scouts to leave Lae’zel’s cage without resorting to combat in Baldur’s Gate 3, players can utilize specific dialogue options that leverage deception and persuasion. Here are the best options:
Best Dialogue Options
-
Deception (DC 10):
- “This creature is dangerous. Get out of here—leave it to me!”
- This option plays on the scouts’ fear of Lae’zel, convincing them that she poses a significant threat.
-
Paladin Deception (DC 10):
- “Your quarry looks dangerous, but I’ve handled worse. Leave it to me, get to safety.”
- This option allows a Paladin to assert their capability while encouraging the Tieflings to flee.
-
Bard Deception (DC 10):
- “Oh, gods! You’ve caught a scout; the Gith invasion force is right behind me—save yourself!”
- This dramatic warning creates urgency and fear, prompting the scouts to escape.
-
Persuasion (DC 5):
- “Shoot the trap down. I’ll tear it apart before anyone else gets hurt.”
- This option reassures the scouts that they will be safe if they act quickly.
-
Monk Persuasion (DC 7):
- “The Githyanki’s an intelligent creature, just like you. Release her, and let us converse civilly.”
- This approach appeals to their sense of reason and promotes a peaceful resolution.
-
General Persuasion (DC 7):
- “She’s an intelligent creature, not a beast to be trapped. Cut her down, and converse with her.”
- This option emphasizes Lae’zel’s sentience and encourages dialogue instead of conflict.
By selecting these dialogue options strategically, players can effectively convince the Tiefling scouts to leave Lae’zel unharmed, allowing for a peaceful resolution to this encounter.