Unlock the secrets of Minecraft’s blocky universe! From the essential dirt and stone to the dynamic liquids and vibrant plants, understanding the diverse types of blocks is key to mastering this sandbox game. Whether you’re a novice builder or a seasoned architect, our guide will equip you with tips and tricks to optimize your crafting, enhance your structures, and unleash your creativity. Dive into the basics of blocks and discover how they can transform your gameplay experience!
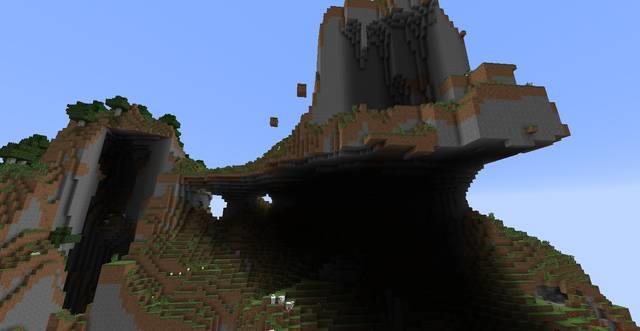
The world is made of blocks
The entire world of Minecraft is constructed of various blocks, called voxels. All of the blocks, apart from one kind, (which is Bedrock) can be destroyed with bare hands, or with tools. Some of the blocks have their own characteristic features (a block of sand falls when it is up in the air, wood burns). This is the kind of blocks that the player is interested in, as materials and resources that you can later process. Many of the basic blocks, like sandstone or some plants, do not perform any function, in the basic version of the game, other than decorative and building materials. That is why, on what you can craft from them, and how easy/difficult they are to obtain, depends their value (while bartering with NPCs and the other players in the multiplayer mode).
The location of some of the blocks also depends on the biome itself. In the winter biomes, the ground is covered with snow and, in the desert, instead of dirt, you can find sand. . Some of the blocks can only be found in the other worlds (End Stone in The End, or Quartz in the Nether). Some items that can be placed in the world, like anvil, tracks, or chest also count as blocks.
A considerable number of blocks can be added to the game with mods. Each of these blocks can obey its own rules and be independent of the game itself (e.g. a block of uranium added with mods, which serves as a power source, and can cause radiation disease if you stay near it.
What are the most creative ways to use custom blocks in Minecraft
Creative Uses for Custom Blocks in Minecraft
Custom blocks in Minecraft open up a world of possibilities for creativity and innovation. Here are some of the most imaginative ways to utilize custom blocks:
1. Unique Architectural Elements
Design intricate buildings with custom block geometries that defy the standard cube shape. Use custom textures to create features like arches, pillars, or even entire facades that add depth and character to your structures. For example, a custom block shaped like a tree trunk can enhance the realism of forest-themed builds4.
2. Interactive Game Mechanics
Incorporate custom blocks to create interactive gameplay elements. For instance, you can design a custom die block that changes appearance or behavior based on player interactions, adding a fun twist to mini-games or adventure maps. This can engage players in unique challenges or puzzles.
3. Themed Environments
Craft themed environments by using custom blocks that match specific aesthetics. For example, create a vibrant underwater scene using glowing blocks that simulate coral reefs or bioluminescent plants. This not only enhances visual appeal but also immerses players in a distinct atmosphere.
4. Dynamic Lighting Effects
Utilize blocks with custom light emission properties to create dramatic lighting effects in your builds. Custom glowing blocks can be used to simulate torches, lanterns, or even magical artifacts, allowing for atmospheric settings that change with time or player actions.
5. Artistic Installations
Transform your builds into art by using colored concrete and stained glass in combination with custom blocks. Create murals, sculptures, or even pixel art that stand out in the landscape, showcasing your artistic flair and creativity.
6. Functional Decor
Design decorative yet functional blocks that serve dual purposes. For example, a custom block that looks like a bookshelf but also functions as storage can blend aesthetics with utility, making your builds not only beautiful but also practical4.
By experimenting with these creative uses of custom blocks, players can significantly enhance their Minecraft experience, pushing the boundaries of what can be achieved within this versatile sandbox environment.
How can I create unique textures for my custom blocks
Creating unique textures for custom blocks in Minecraft involves a combination of graphic design and coding within resource packs. Here’s a step-by-step guide to help you get started:
Step 1: Prepare Your Tools
- Image Editing Software: Use software like Pixlr or GIMP to create or modify textures. Ensure your textures are typically 16×16 pixels for standard blocks.
- Text Editor: Use a text editor like Notepad++ for editing JSON files.
Step 2: Create Your Textures
- Design Your Texture: Open your image editing software and create your texture. Save it in PNG format.
- Naming Convention: Follow a clear naming convention for your textures (e.g., custom_block.png).
Step 3: Set Up Your Resource Pack
-
Create Folder Structure:
- Create a new folder for your resource pack.
- Inside, create a textures folder, then a blocks subfolder where you will place your PNG files.
- Add Texture Files: Place your custom texture files into the blocks folder.
Step 4: Define Textures in JSON Files
-
Create blocks.json:
- This file defines how your block will use the textures.
- Example structure:
json{
“format_version”: “1.21.40”,
“minecraft:block”: {
“description”: {
“identifier”: “your_namespace:custom_block”,
“is_experimental”: false
},
“components”: {
“minecraft:icon”: “textures/blocks/custom_block”
}
}
}
-
Link Textures in terrain_texture.json:
- This file should include a reference to your custom texture.
- Example entry:
json{
“texture_name”: “atlas.terrain”,
“texture_data”: {
“custom_block”: {
“textures”: “textures/blocks/custom_block”
}
}
}
Step 5: Implement Custom Block Geometry (Optional)
If you want to create more complex shapes or multiple textures per face:
- Use the geometry and material_instances components in your block’s JSON definition to specify custom shapes and different textures for each face of the block.
Step 6: Test Your Custom Block
- Load Your Resource Pack in Minecraft.
- Create a World and check if your custom block appears as expected.
By following these steps, you can create distinctive textures that enhance your Minecraft experience, allowing for greater creativity and personalization in your builds!