Starting your own Minecraft server can open up a world of possibilities, transforming your gaming experience into a vibrant community of friends and fellow crafters. Whether you’re looking to build epic structures together, embark on thrilling adventures, or simply enjoy the creative freedom of multiplayer gameplay, this guide will walk you through the essential steps to launch your server. Discover tips for setting up, managing player interactions, and ensuring a fun and engaging environment for everyone involved. Get ready to unleash your creativity and dive into the collaborative spirit of Minecraft!

The download section
From the Minecraft official website, you need to download a file that starts a server, in the .jar version, or as a binary .exe file.
Running the server with a binary file (.exe)
To run a Minecraft server using a binary file (.exe), start by downloading the server executable from the official Minecraft website. Once downloaded, create a dedicated folder on your computer to house the server files. Place the .exe file in this folder and double-click it to initiate the server setup. The first time you run the server, it will generate necessary configuration files, including an eula.txt file. Open this file and change eula=false to eula=true to accept the End User License Agreement. After saving the changes, run the .exe file again to start your server. You can connect to your server using “localhost” in Minecraft, while friends can join by entering your public IP address, assuming you have set up port forwarding correctly.
After you have downloaded the file, put it into any folder on the disk and start it.
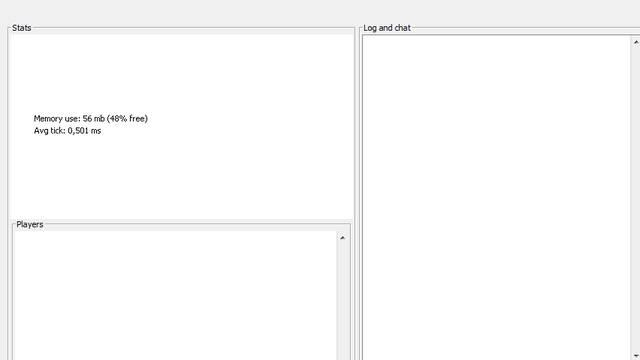
The app window
Allow the application some time, until it creates all of the files required by the server game. You will notice two new folders and five new files. Switch the server off, now, and configure its settings. After you have saved the settings, you can start the file again and join the active server.
You can also allocate more RAM memory for the server to use, which will create a .bat batch file, in the same folder as the server file:
javaw -Xms1024m -Xmx1024m -jar minecraft_server.1.7.2.exe (unless the name of the .exe file is different), and save it as your_name.bat (the file must be in the same folder as the minecraft_server.jar file!).
Running a server with a Java file (.jar)
To run a Minecraft server using a Java file (.jar), you’ll first need to ensure you have the latest version of Java installed on your system. After that, download the appropriate server .jar file from the official Minecraft website. Create a dedicated folder for your server files and place the downloaded .jar file inside it. To start the server, open a command prompt or terminal, navigate to your server folder, and execute the command java -jar server.jar –nogui. This will initiate the server without a graphical user interface, allowing for better performance. The first time you run it, you’ll need to accept the End User License Agreement (EULA) by editing the generated eula.txt file. Once that’s done, restart the server with the same command to get it up and running, enabling you and your friends to connect using your local IP address or public IP after configuring port forwarding.
Starting a server with a .jar file is the same as starting it with the .exe file. If you are experiencing problems with starting the .jar file, you can create a .bat batch file, by writing in the Notepad:
java -Xms512M -Xmx1G -jar minecraft_server.1.7.2.jar (unless the name of the .jar file is different) (and “-d64” if you are starting it under a 64-bit operating system) and saving as your_name.bat (the file must be in the same folder as the minecraft_server.jar file!).
This way, you can also allocate more RAM memory for the server, which will influence the fluency of gameplay, with complex worlds and big number of players.
What are the first steps to setting up a Minecraft server
To set up a Minecraft server, follow these essential steps to get started:
- Install Java: Ensure you have the latest version of Java installed on your computer, as Minecraft runs on this platform. You can check your current version by running java -version in your command prompt or terminal. If it’s not installed, download it from the official Java website.
- Download the Minecraft Server Software: Visit the official Minecraft website and download the server .jar file for the version you want to play. Create a dedicated folder for your server files and place the downloaded .jar file there.
- Accept the EULA: Run the server .jar file by double-clicking it. This will generate several files, including an eula.txt file. Open this file and change eula=false to eula=true to accept the End User License Agreement, then save and close the file.
- Configure Server Properties: Open the server.properties file generated in your server folder to customize settings like game mode, difficulty, and server port (default is 25565). Adjust these settings according to your preferences.
- Start Your Server: Run the server again by double-clicking the .jar file. This will start your Minecraft server, allowing you to join using localhost in the game under Multiplayer mode.
- Port Forwarding (Optional): If you want friends outside your local network to join, you’ll need to set up port forwarding on your router for port 25565. Instructions vary by router model, so refer to your router’s manual for specifics5.
- Invite Friends: Share your public IP address with friends so they can connect to your server from their Minecraft clients using the Multiplayer option and entering your IP address5.
By following these steps, you’ll have a fully operational Minecraft server ready for you and your friends to explore and build together!
What are the best practices for securing a Minecraft server
Securing a Minecraft server is crucial to protect both the server and its players from various threats, including hackers, bots, and DDoS attacks. Here are some best practices to enhance your server’s security:
Best Practices for Securing a Minecraft Server
- Use a Firewall: Implement a firewall to block unwanted traffic. Configure it to allow only necessary ports (like 25565 for Minecraft) and restrict access to trusted IP addresses.
- Set Up a Proxy: Utilize a proxy service to hide your server’s real IP address and filter out malicious traffic. Services like TCPShield can provide additional DDoS protection.
- Implement a Whitelist: Enable a whitelist to control who can join your server. This feature allows only approved players to access the server, preventing unwanted guests from causing disruptions.
-
Install Security Plugins: Use plugins that enhance security, such as:
- NoCheatPlus: Prevents cheating and exploits.
- CoreProtect: Logs player actions for recovery after griefing.
- GriefPrevention: Protects player builds from unauthorized modifications.
- Regularly Update Software: Keep your Minecraft server, plugins, and any associated software updated to patch vulnerabilities and enhance security features.
- Secure Administrator Accounts: Use strong, unique passwords for admin accounts and enable two-factor authentication if available. Limit access to sensitive files and server controls.
- Backup Regularly: Schedule regular backups of your server data to recover quickly in case of an attack or data loss.
- Monitor Server Activity: Use tools like fail2ban to monitor logs for suspicious activity and automatically ban IPs that exhibit malicious behavior.
- Restrict Console Access: Limit console access to trusted staff members only, reducing the risk of unauthorized changes or commands being executed on the server.
- Educate Your Community: Inform players about security best practices, such as not sharing personal information and recognizing phishing attempts.
By implementing these measures, you can significantly enhance the security of your Minecraft server, creating a safer environment for all players involved.