Discover the fascinating world of Minecraft’s Redstone circuits as we delve into the innovative use of rails to create complex automated systems. This guide will unravel the intricacies of powered, detector, and activator rails, empowering players to design everything from efficient transportation networks to intricate machinery. Whether you’re a seasoned engineer or a curious newcomer, learn how to harness the power of redstone to elevate your gameplay and transform your Minecraft experience into a realm of limitless creativity.
Rails
In Minecraft, rails are essential components for creating efficient transportation systems using minecarts. They come in several types, including standard rails, powered rails, detector rails, and activator rails. Powered rails are crucial for boosting minecart speed and must be powered by redstone to function effectively, especially on slopes. Detector rails act like pressure plates, triggering redstone signals when a minecart passes over them, allowing for automated functions like track switching. Lastly, activator rails are primarily used to trigger specific actions, such as arming TNT minecarts. By combining these various rail types with redstone circuits, players can create intricate and functional railway systems that enhance gameplay and exploration.
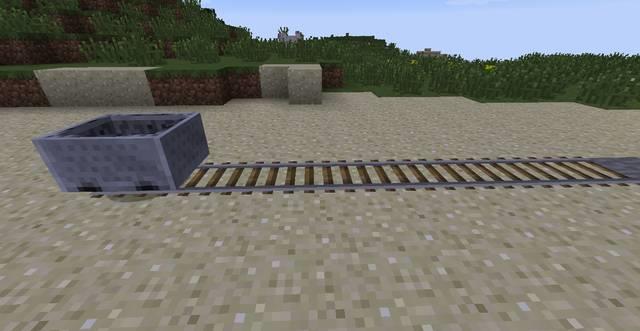
Railways are not too complicated structures. For a standard one, it is enough that you lay down rails and put a minecart on them. However, you can considerably expand the railway’s usability by implementing a few special objects…
Powered Rail
Powered rails are an essential component in Minecraft’s redstone circuit system, providing a means to propel minecarts along tracks. When powered by redstone energy, these rails increase the speed of minecarts, allowing for efficient transportation across vast distances. Players can activate powered rails using various redstone mechanisms, such as levers, buttons, or redstone torches. Strategically placing powered rails at intervals along your rail system can help maintain momentum and ensure smooth travel, making them a vital tool for any aspiring engineer in the game.
Powered rails – after the minecart passes over them, it builds up speed – this is an important element of each construction (requires redstone powering. Without being powered, these function like the regular rails. Remember to place them especially ahead of steep slopes.
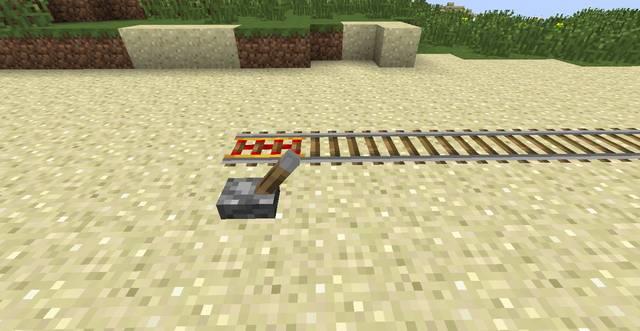
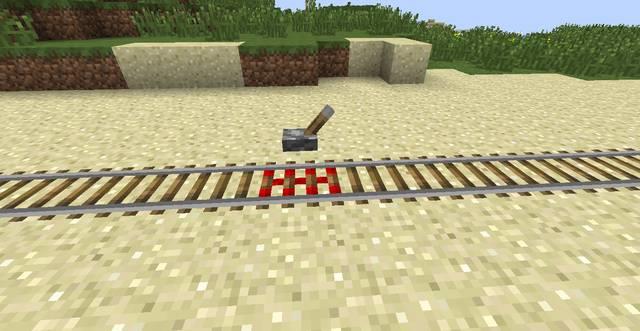
Detector Rail
The Detector Rail is a specialized type of rail in Minecraft that plays a crucial role in redstone circuitry. When a minecart passes over it, the Detector Rail emits a redstone signal, allowing players to create complex automated systems. This functionality makes it an essential component for various contraptions, such as automatic doors, traps, or even signaling systems for minecart transport. By integrating Detector Rails into your designs, you can enhance the interactivity and efficiency of your redstone creations, making gameplay more dynamic and engaging.
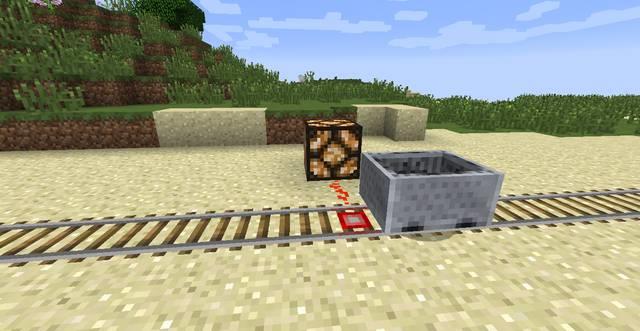
Detector rail – once a minecart rolls over, these behave just like the pressure plates. After being connected to redstone, they can perform predefined functions.
Activator Rail
The Activator Rail is a unique component in Minecraft’s redstone circuitry that plays a crucial role in controlling minecart behavior. When powered by redstone, it can activate and deactivate minecarts that pass over it, triggering actions such as launching or stopping them. This makes it an essential tool for creating automated transportation systems or intricate redstone contraptions. By strategically placing Activator Rails, players can enhance their rail networks, allowing for seamless transitions between different tracks and ensuring efficient movement throughout their builds.
How can I create a complex redstone circuit using rails
Creating a complex redstone circuit using rails in Minecraft involves integrating various rail types and redstone components to achieve automation and functionality. Here’s a step-by-step guide to help you build an intricate system:
Materials Needed
- Rails: Regular rails, powered rails, detector rails, activator rails
- Redstone Components: Redstone dust, levers, redstone torches, pistons
- Minecarts: Standard minecarts or specialized ones (e.g., with chests or TNT)
Steps to Create a Redstone Circuit with Rails
1. Laying the Track
- Start by laying down your regular rails to form the basic layout of your railway. You can create straight lines or curves as needed.
- Use powered rails at strategic points to ensure minecarts maintain speed, especially on slopes or long stretches. Place powered rails every 38 blocks for passenger carts and every 8 blocks for cargo carts.
2. Incorporating Detector Rails
- Place detector rails at key junctions where you want to trigger redstone signals when a minecart passes over them. These can activate various mechanisms like doors or pistons.
3. Using Activator Rails
- If you plan to use TNT minecarts or other special functions, integrate activator rails into your circuit. These will activate when a minecart rolls over them, allowing for unique interactions like detonating TNT.
4. Building Switches and Junctions
- Create junctions using powered rails that can change direction based on redstone signals. For example, you can set up levers connected to redstone dust that power specific rails to redirect carts at T-intersections.
- Ensure that the powered rail at the junction is connected to a redstone signal source (like a lever or torch) so it can switch directions as needed.
5. Adding Redstone Mechanisms
- Integrate redstone components such as pistons to push blocks into the path of unwanted minecarts. This can create one-way systems where carts are directed only in specific ways1.
- Use redstone dust to connect various components and ensure that signals are transmitted effectively throughout your circuit.
6. Testing Your Circuit
- Once everything is set up, test your circuit by placing a minecart on the track. Observe how it interacts with powered and detector rails.
- Make adjustments as necessary to improve efficiency or functionality.
Example Circuit Design
- One-Way Rail System: Create a simple one-way rail using a combination of powered and detector rails along with pistons that block carts coming from the wrong direction when activated1.
- Dynamic Switching System: Build a more complex system where levers control the direction of carts at junctions, allowing for multiple routes depending on player input5.
By combining these elements, you can create intricate and functional redstone circuits that enhance your Minecraft gameplay experience, allowing for automated transport systems and more!
What are the most common challenges when building complex redstone circuits with rails
Building complex redstone circuits with rails in Minecraft can present several challenges. Here are some of the most common issues players encounter:
1. Powering Rails Effectively
- Signal Duration: Many players find that buttons and levers provide only short pulses, which may not be sufficient to power rails for the time needed for minecarts to pass over them. This can lead to carts stopping unexpectedly.
- Activation Depth: Redstone dust does not activate powered rails that are one block below it, complicating underground designs. Players often need to use redstone torches or other mechanisms to ensure powered rails are activated correctly from below.
2. Complexity of Logic Gates
- Implementing logic gates for directional switches can be daunting for beginners. Understanding how to create circuits that can switch between multiple routes without visible redstone components requires a solid grasp of redstone mechanics and may involve using pulse extenders.
3. Space and Layout Constraints
- Designing circuits that fit within a limited space while maintaining functionality is challenging. Players often struggle to hide redstone components underground or within a compact area without compromising the circuit’s effectiveness.
4. Maintaining Momentum
- Minecarts can lose momentum quickly, especially on inclines or when they encounter unpowered rails. Ensuring there are enough powered rails placed strategically is crucial, but this can become resource-intensive, particularly in terms of gold needed for powered rails5.
5. Interference Between Components
- Interactions between different types of rails (powered, detector, activator) can lead to unexpected behavior if not configured correctly. For example, detector rails may trigger mechanisms unintentionally if not properly isolated from other redstone signals.
By understanding these challenges and planning accordingly, players can create more efficient and effective redstone circuits using rails in Minecraft.