The more player spends 4-6 attempts defeating the Legion due to ignoring the Insanity mechanic. This guide fills all the gaps: precise attack timing, target prioritization, and a preparation checklist will reduce your attempts to 2-3 . Spoiler: one of the checklist items works even with minimum gear.
What you need to know before fighting the Legion (preparation checklist)
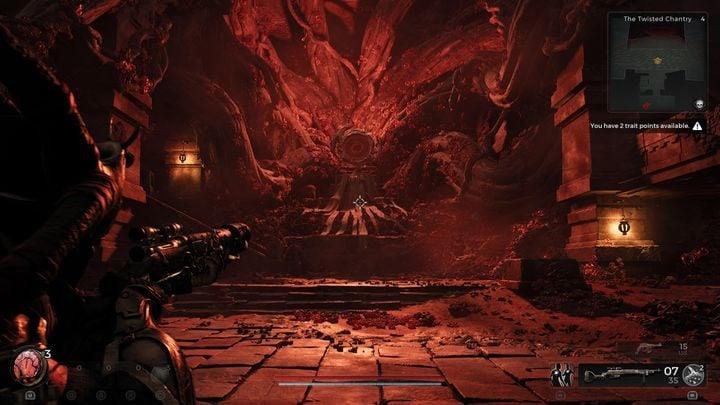
On average, 7 out of 10 players lose a character within the first 15 seconds of a fight due to ignoring the Madness mechanic. To find the Legion boss in Remnant 2, head to the Twisted Church on Yaesha and activate the crystal portal in the far corner of the area. Without proper gear, shield and body damage will be zero.
* Check your status resistance: have at least 30% mental damage resistance, otherwise the bar will fill in 2-3 visual encounters. Use stability amulets and gloves with partial immunity to debuffs.
* Choose long-range gear: the question of which weapon is best against the Legion is simple – automatic rifles and assault rifles with armor-piercing weapon mods deliver consistent damage to vulnerable areas. Close combat is unworkable due to the constant knockback.
* Stock up on consumables: take 4-5 speed syringes and healing crystals. Survival depends on constant movement, strafing, and distance control, not on a solid defense.
* Adjust your build to the phase: remove heavy armor and melee mods. Preparing for the fight requires a clear focus on arena control and reaction speed.
* Enable co-op or adjust the difficulty: If you’re playing with a partner, divide the roles. One draws aggro and controls adds, while the other deals damage to the eyes when they’re vulnerable.
Check every point before entering-this will reduce the number of attempts to 3-5 per session. How to defeat Legion without unnecessary deaths? Follow the checklist strictly, point by point.
Combat Mechanics: How Madness and Vulnerability Work
Initial attempts often result in death because players fail to recognize when the Insanity meter reaches a critical value-followed by instant blindness and damage over time. Understanding the mechanics of the Insanity status in Remnant 2 is key to surviving the Legion fight.
Insanity Scale
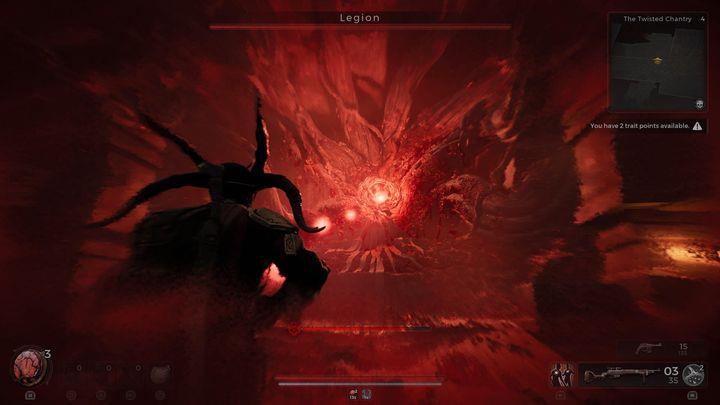
The boss’s red eye begins to glow briefly before the attack that fills the gauge. Direct line of sight to the glow accelerates the debuff buildup. Why can’t you look at Legion? Visual contact quickly fills the gauge, and when it’s full, the character is blinded and takes a periodic damage tick. How can you remove the frenzy effect? Simply turn the camera away and break line of sight-the gauge begins to drain. Avoid looking directly at the red eye for more than 1-2 seconds .
Vulnerability window
Legion’s vulnerability only appears after the attack animation ends, when the red eye fades. This is the only time when dealing damage is effective: body damage increases, and the shield is temporarily disabled. Watch for the visual cue-as soon as the glow fades, focus your fire on the boss’s central mass. Missing the window means a long wait for the next opportunity. Attack only during the vulnerability phase , otherwise damage will be minimal.
Position in battle
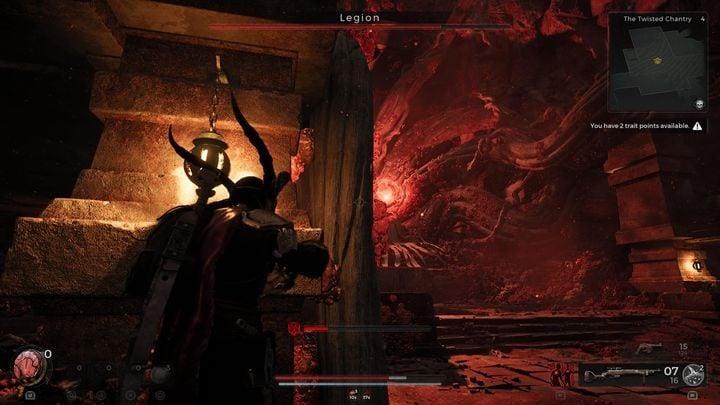
Maintain a medium distance from the boss: this gives you time to react when the cast begins and reduces the chance of being hit by the shockwave. Move around the perimeter of the arena, avoiding the Legion’s back-adds spawn there, distracting him and dealing an additional tick of damage. Positional control reduces the number of debuffs received and allows you to more reliably exploit the vulnerability window. Maintain mobility ; standing still ensures the Insanity meter fills quickly.
Legion Attacks and Precise Countermeasures (Table)
Legion’s attacks require precise reactions: every mechanic has a window for dodging or rolling. How do you dodge Legion’s shockwave? Roll at the moment of impact or retreat beforehand. What to do with exploding enemies? Prioritize eliminating them before they get close.
| Attack | Mechanics and damage | Countermeasure | Timing/Distance |
|---|---|---|---|
| Shock wave | A red ring pulse emanates from the center of the arena, dealing moderate damage to everyone within the radius, throwing the character back 3-4 meters, and interrupting the player’s current attack. | Roll when the wave hits to gain temporary immunity to knockback or move away to a safe distance from the center in advance | The casting animation takes 1.5 seconds – start moving at the first visual signal of the glow, do not wait for the wave to fully unfold |
| Homing projectiles | Red orbs are released in volleys of 3-5 pieces, follow the player for 2-3 seconds, explode on contact and cause area damage with a slowing effect | A sharp change in the trajectory of movement in a zigzag + the use of cover (columns, arena walls) to block the trajectory of projectiles | Projectiles lose their targeting after 2-3 seconds of firing, allowing you to wait it out in cover without wasting resources on dodging. |
| Calling for reinforcements | The boss resurrects enemies around the arena’s perimeter: regular adds with low health and explosive adds that detonate when they approach the player. | Prioritize targets: explosive adds first (high damage), then normal adds (distraction), and then focus on the boss in the vulnerability phase. | Destroy exploding adds within 5-7 seconds of their appearance, otherwise they will come within detonation range and deal critical damage. |
| Blinding beam | Direct visual contact with the boss’s red eye quickly fills the insanity meter, which, when full, causes the interface to become blinded and a periodic damage tick. | Immediately breaking the line of sight: moving the camera to the side or behind the character, using peripheral vision to check position | The madness meter increases in 1-2 seconds of direct gaze – do not look at the eye longer than this time, even for aiming |
Remember the critical timings: missing one countermeasure leads to a rapid filling of the insanity meter and a potential team wipe in co-op.
Tactics by phase: from the start to 75% and the final
- Phase One: Stationary Boss – Legion stands still, attacking with shockwaves and summoning adds. Maintain a medium distance of 8-12 meters to ensure you can roll before the shockwave hits. Prioritize the exploding adds first, then focus on the boss during a vulnerable window. Rotating clockwise around the arena makes it easier to maintain positional control and reduces the chance of being caught in crossfire. The first phase gives you time to practice your attack timing without pressure from the mobile boss.
- Phase 2 (75% health): Mobile Legion – The boss begins moving around the arena, which changes Remnant 2 tactics. What changes in the second phase of the fight with the Legion? A dash with area-of-effect damage is added, and reinforcements are summoned more frequently every 10-12 seconds . Controlling adds becomes critical: don’t let them surround you, otherwise, your roll won’t save you from combo damage. The boss’s movement requires constant repositioning – monitor its trajectory and position yourself early for a favorable position near the edge of the arena.
- Final Surge (25% health): The Legion phases of the fight enter an aggressive mode. The boss combos attacks without pause, and the Insanity meter grows twice as fast. Focusing on the boss during a vulnerable moment is the only way to quickly end the fight. Use all remaining consumables, don’t skimp. Attack timing is reduced to 0.5-1 second between casts-reactions must be instantaneous. Misplaced positioning at this stage almost certainly results in a wipe.

In co-op, divide roles: one player draws aggro and controls adds, while the other deals damage. In solo mode, prioritize survival: it’s better to miss a window of vulnerability than to take critical damage from adds. Remember: the boss’s movement in the second phase is not random, but follows a fixed path; study it during the first 20-30 seconds of the phase to predict its position.
Checklist: Weapons, Mutators, and Consumables
* Long-range automatic weapons: The best weapons against Legion are assault rifles with a high rate of fire and weapon mods that enhance penetration. Close combat is ineffective due to constant knockback and short engagement distances. Focus on consistent damage to vulnerable areas rather than a single critical strike.
* Area-of-effect mutators: Choose mods that deal area-of-effect damage to control adds. Fire damage and lightning status effects speed up wave clearing. What mutators should I take on Legion? Prioritize mods that slow, shield break, and multi-target damage. Avoid mods with long cooldowns.
* Survival Consumables: Bring 4-5 Speed Syringes for quick repositioning and 3-4 Healing Crystals. Speed Syringes are critical for dodging shockwaves and controlling distance. Don’t skimp on consumables in the final phase-it’s better to use everything and win than to save and lose.
* Armor with a balance of defense and mobility: heavy armor reduces damage but slows rolls. Ideally, medium armor with 25-30% frenzy resistance will slow the debuff gauge from filling. Full light armor is not recommended: one precise hit from an add will remove half your health.
* Remnant 2 build for the vulnerability phase: prioritize stamina and critical damage. Should you use melee? No-range and mobility are more important than melee damage. Focus on stats that speed up stamina recovery for frequent dodges.
* Co-op synergy: Divide roles within the team-one player controls the adds (area damage), the other focuses on the boss during the vulnerability window. Synchronizing attacks increases effectiveness by 1.5-2x compared to random focus.
Check each point before entering the arena – proper preparation reduces the number of attempts to 3-5 per session.
Rewards for victory and what to do with the drops
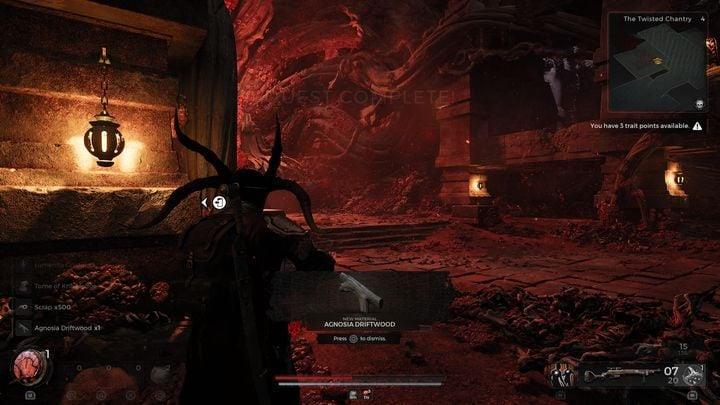
After defeating the Legion, you receive Agnosia Driftwood-a key resource for crafting unique weapons and modifications. What should you spend Agnosia Driftwood on? Priority: crafting long-range mods with shield penetration or upgrading your existing arsenal for the final locations of Yaesh. The Tome of Knowledge grants 1 stat point-invest it in stamina or critical damage to speed up subsequent boss fights.
Additional loot includes Lumenite ( 15-25 units) for upgrading rings and amulets, as well as Scrap ( 200-350 ) for basic weapon upgrades. Upgrading weapons with these resources increases damage by 10-15% per level, which is critical for endgame content. Is Legion worth farming? Yes, if you lack resources to craft a build for the final zones-repeat runs provide consistent drops without randomization on the loot table.
Distribute Legion rewards immediately after the battle: don’t delay crafting and upgrading to avoid losing effectiveness in subsequent locations. Priority: weapon mods > armor upgrades > consumables. This order maximizes the return on each resource.
Restrictions and recommendations for players
Remnant 2 is rated 12+ (PEGI/ESRB)-the game contains scenes of violence and mystical elements not recommended for younger audiences. Individuals with epilepsy or a history of addictive behavior should limit game sessions to 30-45 minutes , with mandatory breaks. Co-op mode requires a stable internet connection: if the connection is lost, boss fight progress is not saved. Before playing for extended periods, create a backup save in a separate slot to protect against losing progress during technical glitches.
What to do if the tactic doesn’t work the first time
If you can’t beat Legion after 3-4 tries, stop and analyze your mistakes: most often, the cause is ignoring the Insanity meter or incorrectly prioritizing targets. The community’s advice for Remnant 2 boils down to one thing: change your approach, don’t just repeat the same actions. Try switching your build-switch to a long-range weapon with crowd control mods if adds are constantly distracting you. Why is Legion so difficult? The boss combines mechanics that require simultaneous positional control, timing, and resource management. How can you simplify the fight in co-op? Divide roles: one player focuses on the boss, the other clears the adds-this reduces the load on reactions and increases the team’s survivability. Check the latest patches: balance changes can strengthen or weaken certain tactics. If you’re stuck, reach out to the community-guides and videos analyzing mechanics often contain nuances that are easy to miss on your own. A second attempt with a thorough analysis of your mistakes increases your chances of winning by 2-3 times